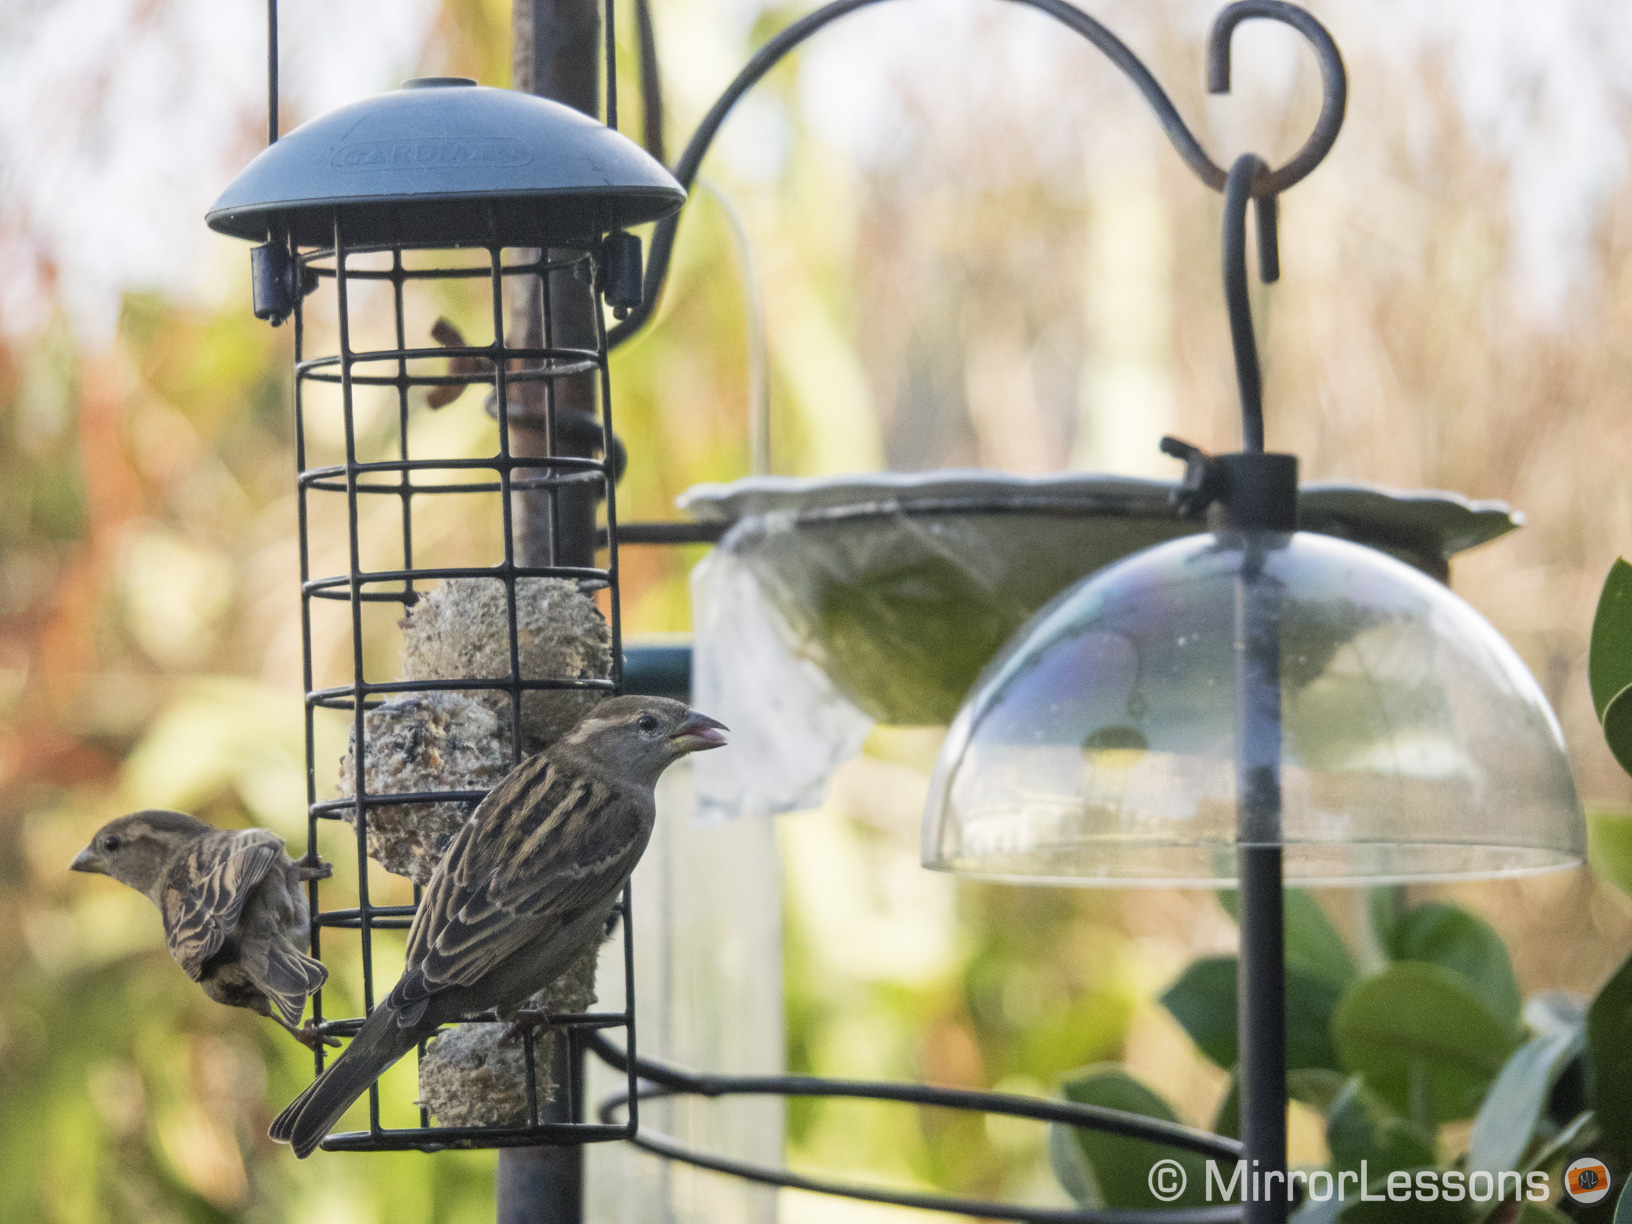
My parents have a beautiful back garden in Wales which is lovingly nurtured by my “green thumb” mum. The centrepiece is a three-pronged feeder, where dozens of species of birds including robins, sparrows, blue tits, goldfinches, wrens and siskins gather for their daily feast of seeds and balls of fat. It is nothing short of a small paradise when the sun is out and the temperature is right.
I’d always just had a passing interest in our winged visitors until we received the M.Zuiko 14-150mm f/4-5.6 Mark II to test on our OM-D E-M1. Once I’d mounted camera onto our Giottos Vitruvian Tripod, I placed the combo on the porch at a great enough distance that the birds wouldn’t feel threatened by the camera (or mistake it for a perch!) but close enough to capture our feathered friends up-close.

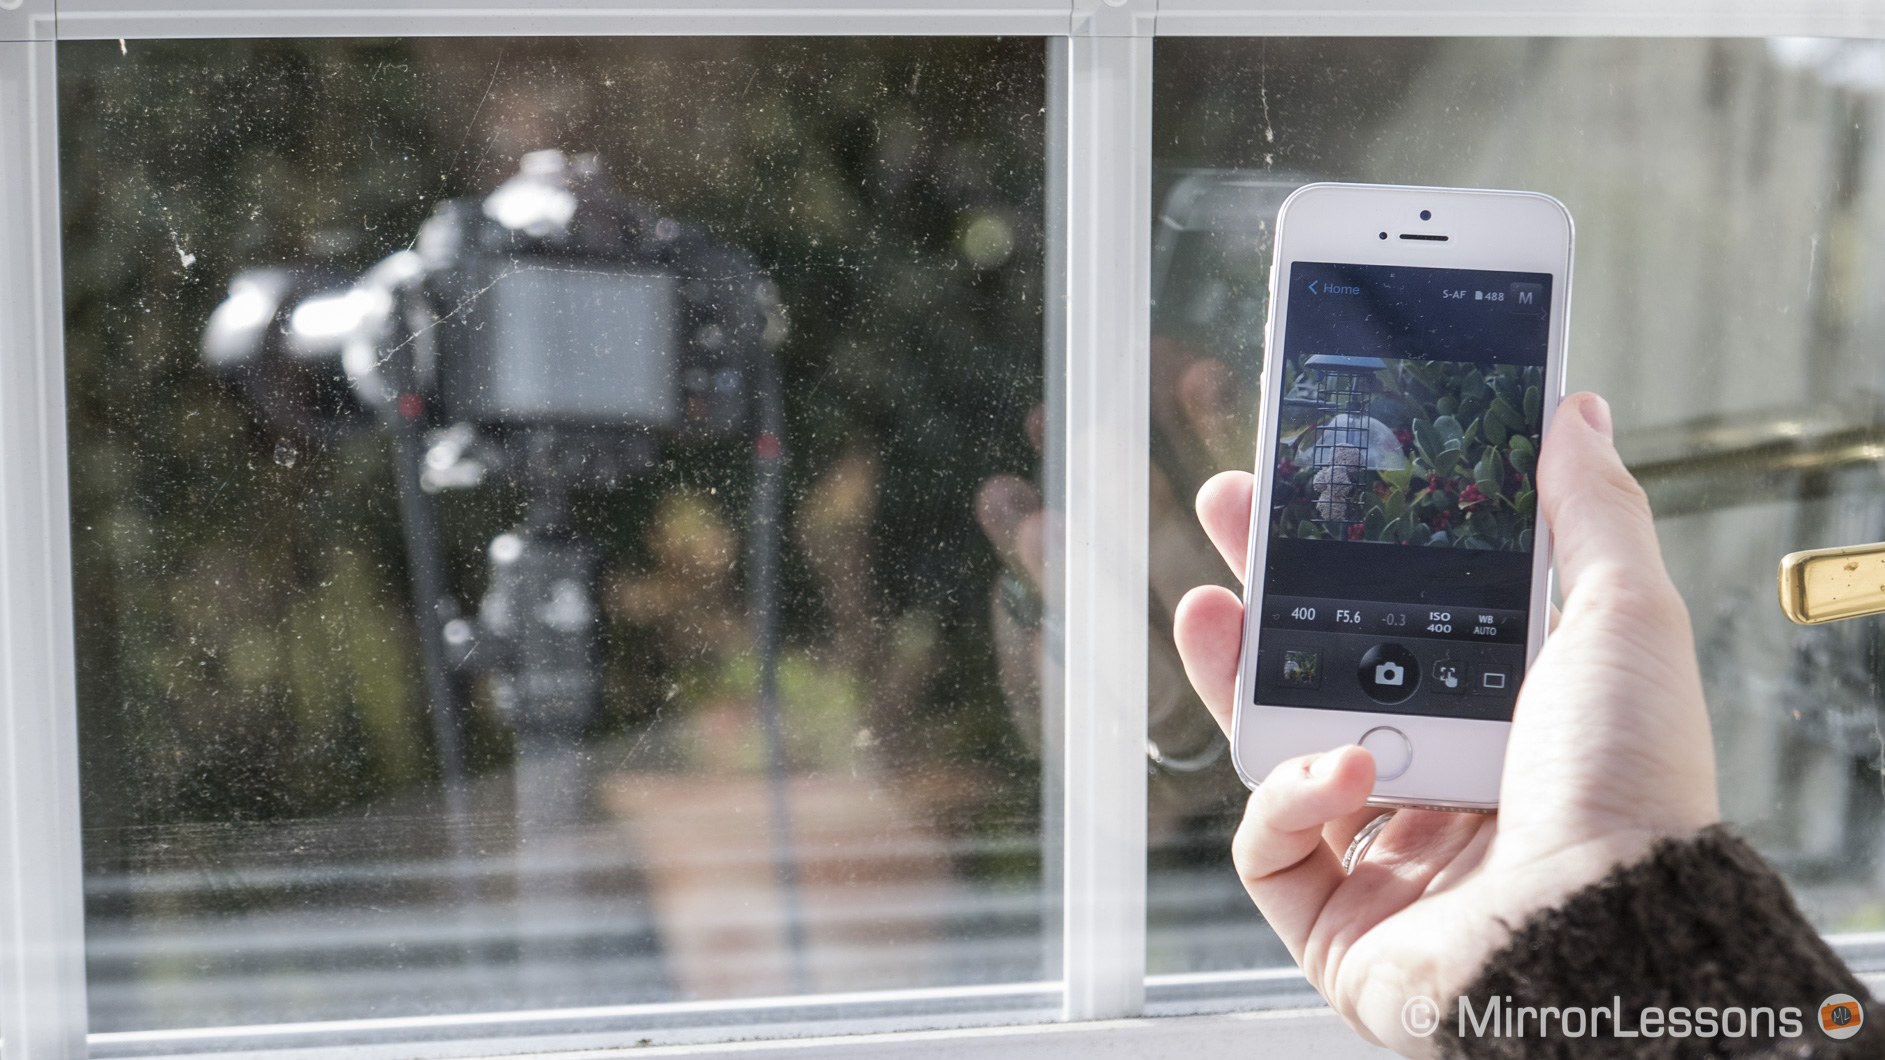
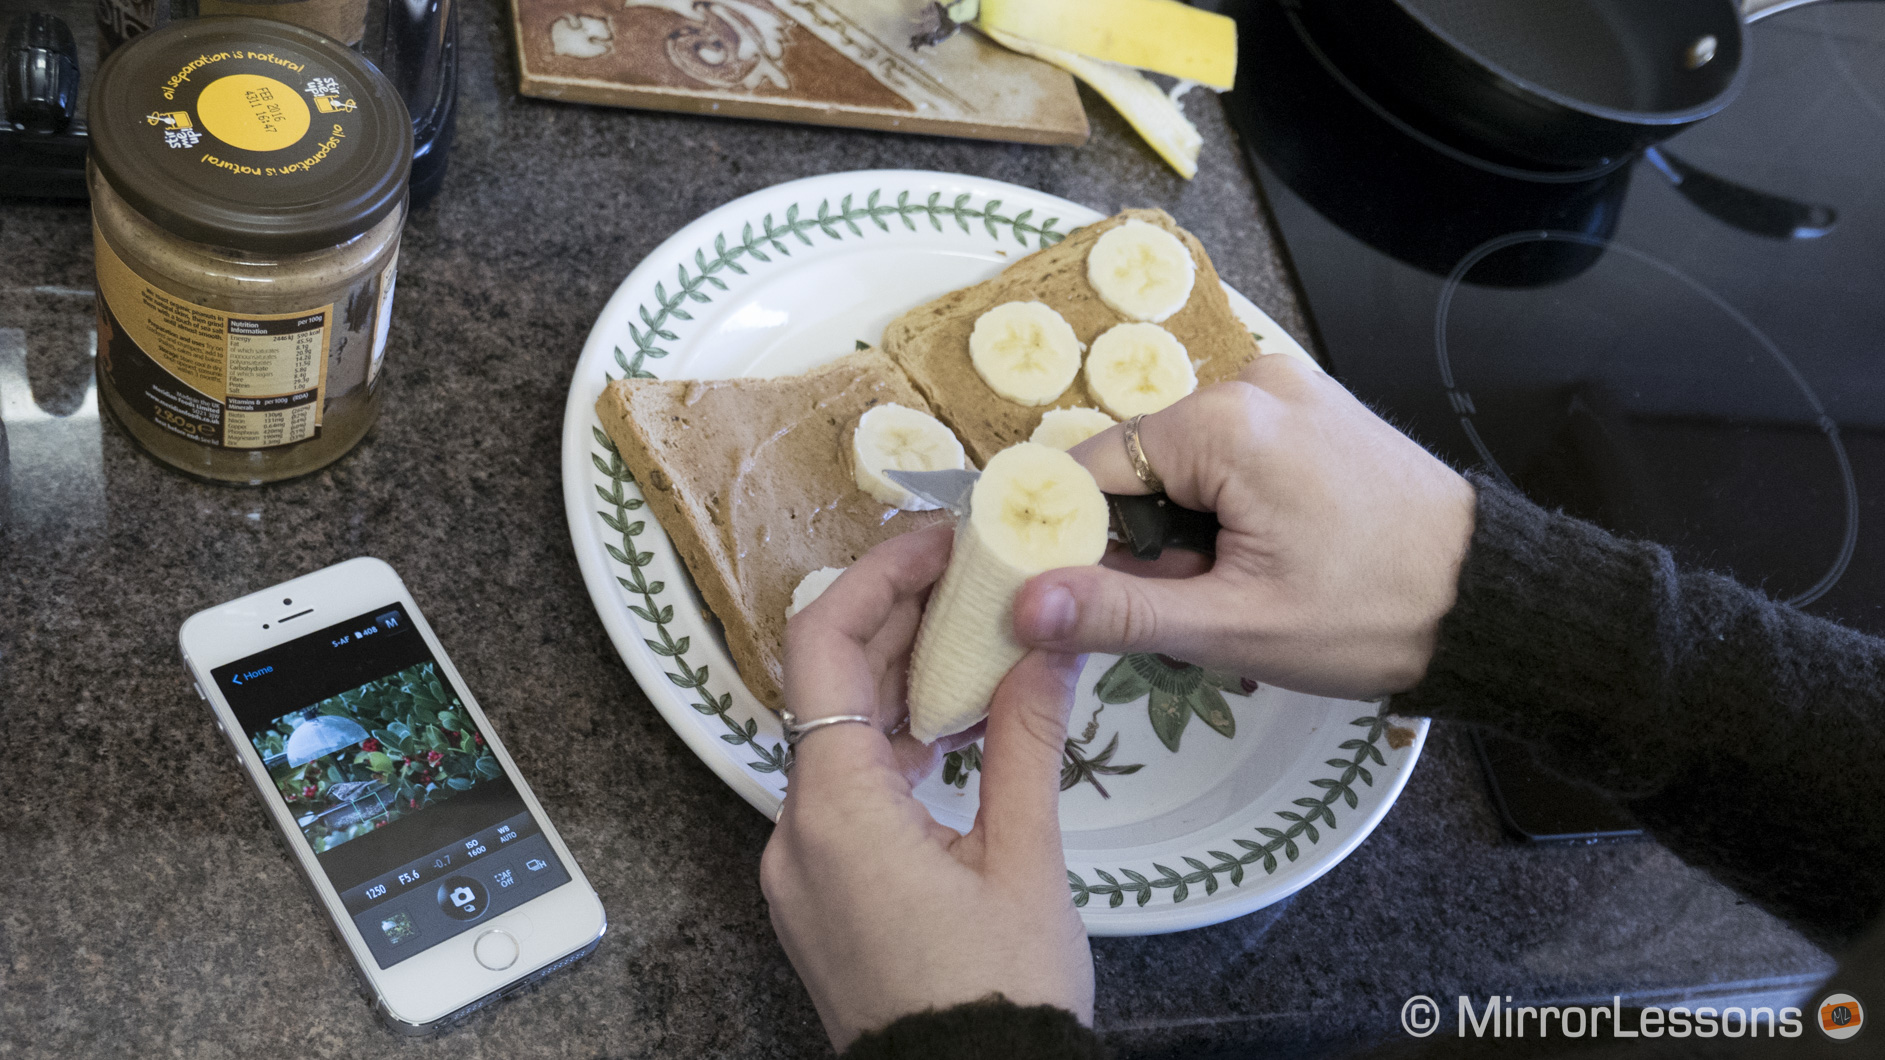
Then came the step of connecting the camera to our iPhone 5 via WiFi. First, I activated the E-M1’s WiFi function by pressing the on-screen button. I then went into my phone’s connectivity settings and selected the E-M1’s WiFi signal. Finally, I went into the Olympus Share app and selected Remote Control. Almost immediately, I was presented with a screen where I could not only see what the camera was seeing, but also access a series of basic controls including ISO, shutter speed, aperture, burst mode, AF point and more.

At first, I wasn’t sure just how much distance I could put between myself and the camera, and still maintain the WiFi connection. It turns out you can stand about 10 metres away before the connection starts to fail, so I was easily able to make lunch, brew up some tea and answer the doorbell as I kept a watchful eye on the phone.
I did notice that the connection would occasionally sever for no apparent reason. Sometimes it would reconnect after a few seconds whereas other times I had to go out into the garden and reactivate the camera’s WiFi. It would happen more frequently on rainy and windy days.

Having access to the basic controls was also a blessing. Since the light constantly changes in Wales, I often had to adjust the shutter speed and ISO to keep the exposure constant, and it was very easy to do from our smartphone.
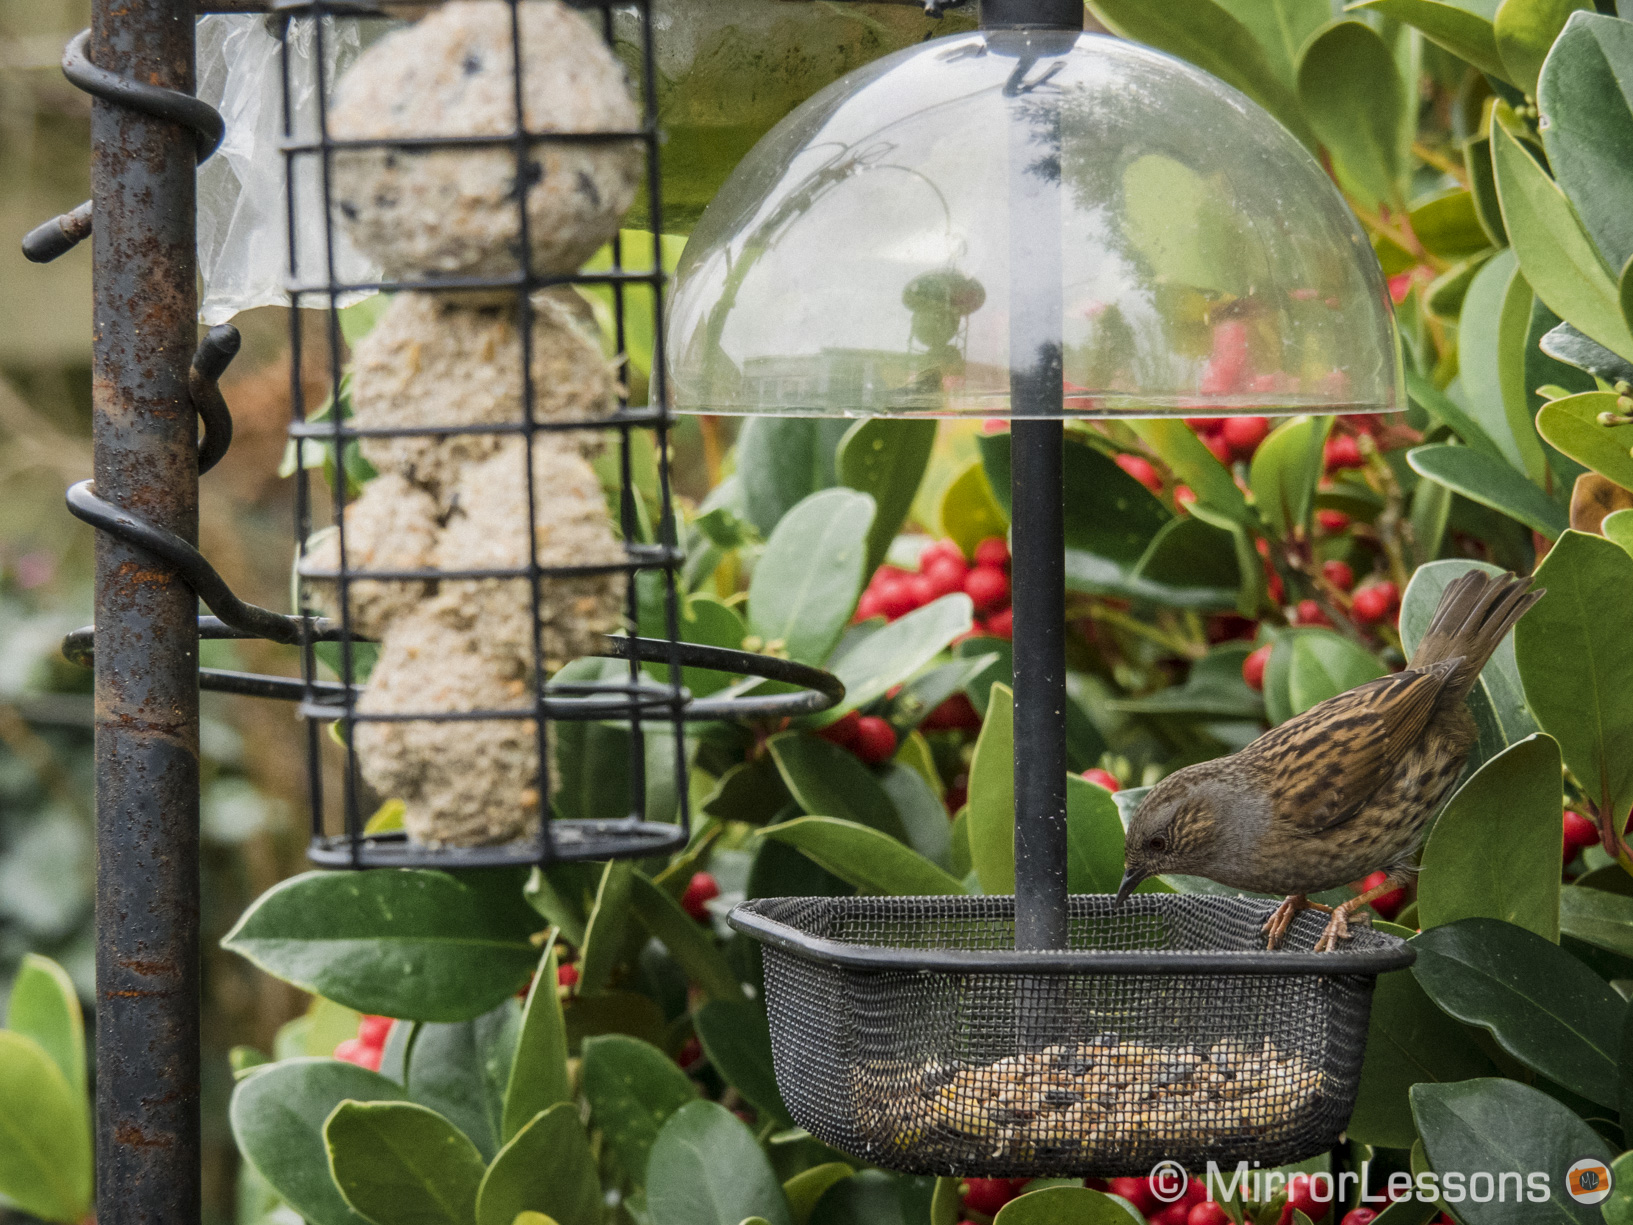

As for the aperture, I always kept it to the fastest aperture possible, which was usually f/5.6 with the focal length I was using. In a way, a faster aperture would have helped as I could have raised the shutter speed to freeze the motion of the birds, and lowered the ISO by a stop to decrease noise. However a faster aperture would have also decreased the depth of field, making it harder to capture an in-focus bird unless it were on the same focus plane as the feeder upon which I had placed the AF point. Of course it is always better to work on sunny rather than cloudy days, as you’ll be able to keep your ISO lower and your shutter speed higher.

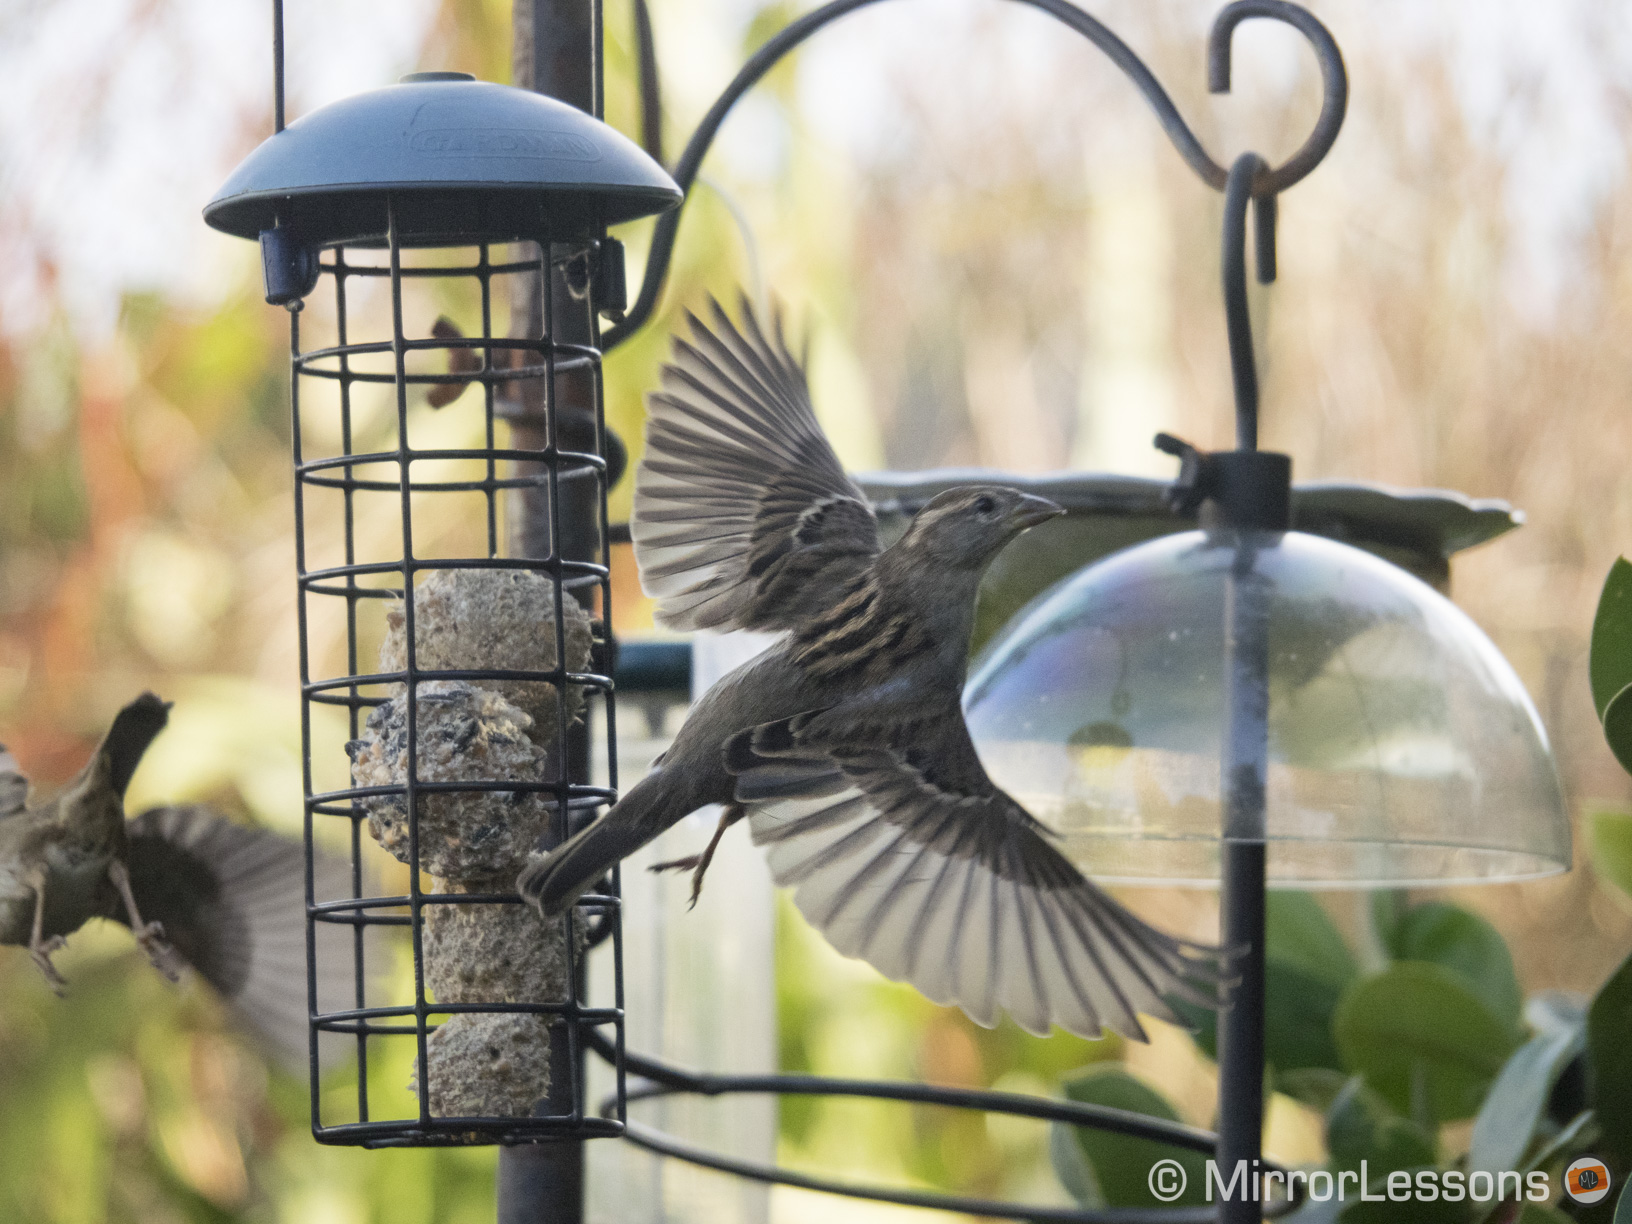
When it comes to bird photography, the burst modes on the E-M1 (or any camera) are your best friend. Birds move so quickly that it is almost inevitable that you’ll miss the decisive moment should you rely on your reflexes alone. I generally tend to stick with High burst, though Low can work for birds that are engrossed in the feeder. The E-M1 shoots at 10fps, so there is a good chance that you’ll be able to capture split-second moments like a bird taking off or landing.
Since you’ll accumulate dozens of images, I suggest that you tweak your camera’s settings to perfection and turn off Raw. Not only will the camera be more reactive but you’ll have fewer heavy files to deal with later on.


Another small suggestion is to somehow disguise or hide your camera. Birds aren’t stupid – they’re acutely aware of any changes in their environment, especially if that change is the addition of a large, black, ominous-looking machine that makes a sound every time they go near the feeder. The first day I went out, I remember placing the camera out in the open and waiting for two hours, hoping that the birds would pay the feeder a visit. Having given up hope by lunchtime, I brought the camera inside to change the battery. No sooner had I brought it in did the birds encircle the feeder in the dozens. From then on, I made a point to place the camera in the shadows or behind bushes as far away from the feeder as the zoom would allow.

Finally, a word about battery life on both the E-M1 and the iPhone 5. I found that in both cases, the WiFi connection consumed very little battery life. Even after an 45 minutes of connectivity, the iPhone was still 75% charged (down from 100%) and the camera’s battery icon was still displaying three lines. It takes about two and half hours of constant connectivity for the E-M1’s battery to run out completely.
Do you have any bird photography tips and techniques to share? If so, leave a comment below!