The LEE Filters Seven5 Starter Kit arrived on our doorstep for testing well over a month ago, but between a mix of predictably miserable February weather and the onslaught of recent releases and announcements, I only just got around to testing it this past week.
Let me begin by saying that my experience with filters is extremely limited, as most of my personal photography bounces back and forth between macro and street. I do enjoy landscapes, however, so testing the Seven5 Starter Kit has proven a nice way of branching out into this genre of photography as well.

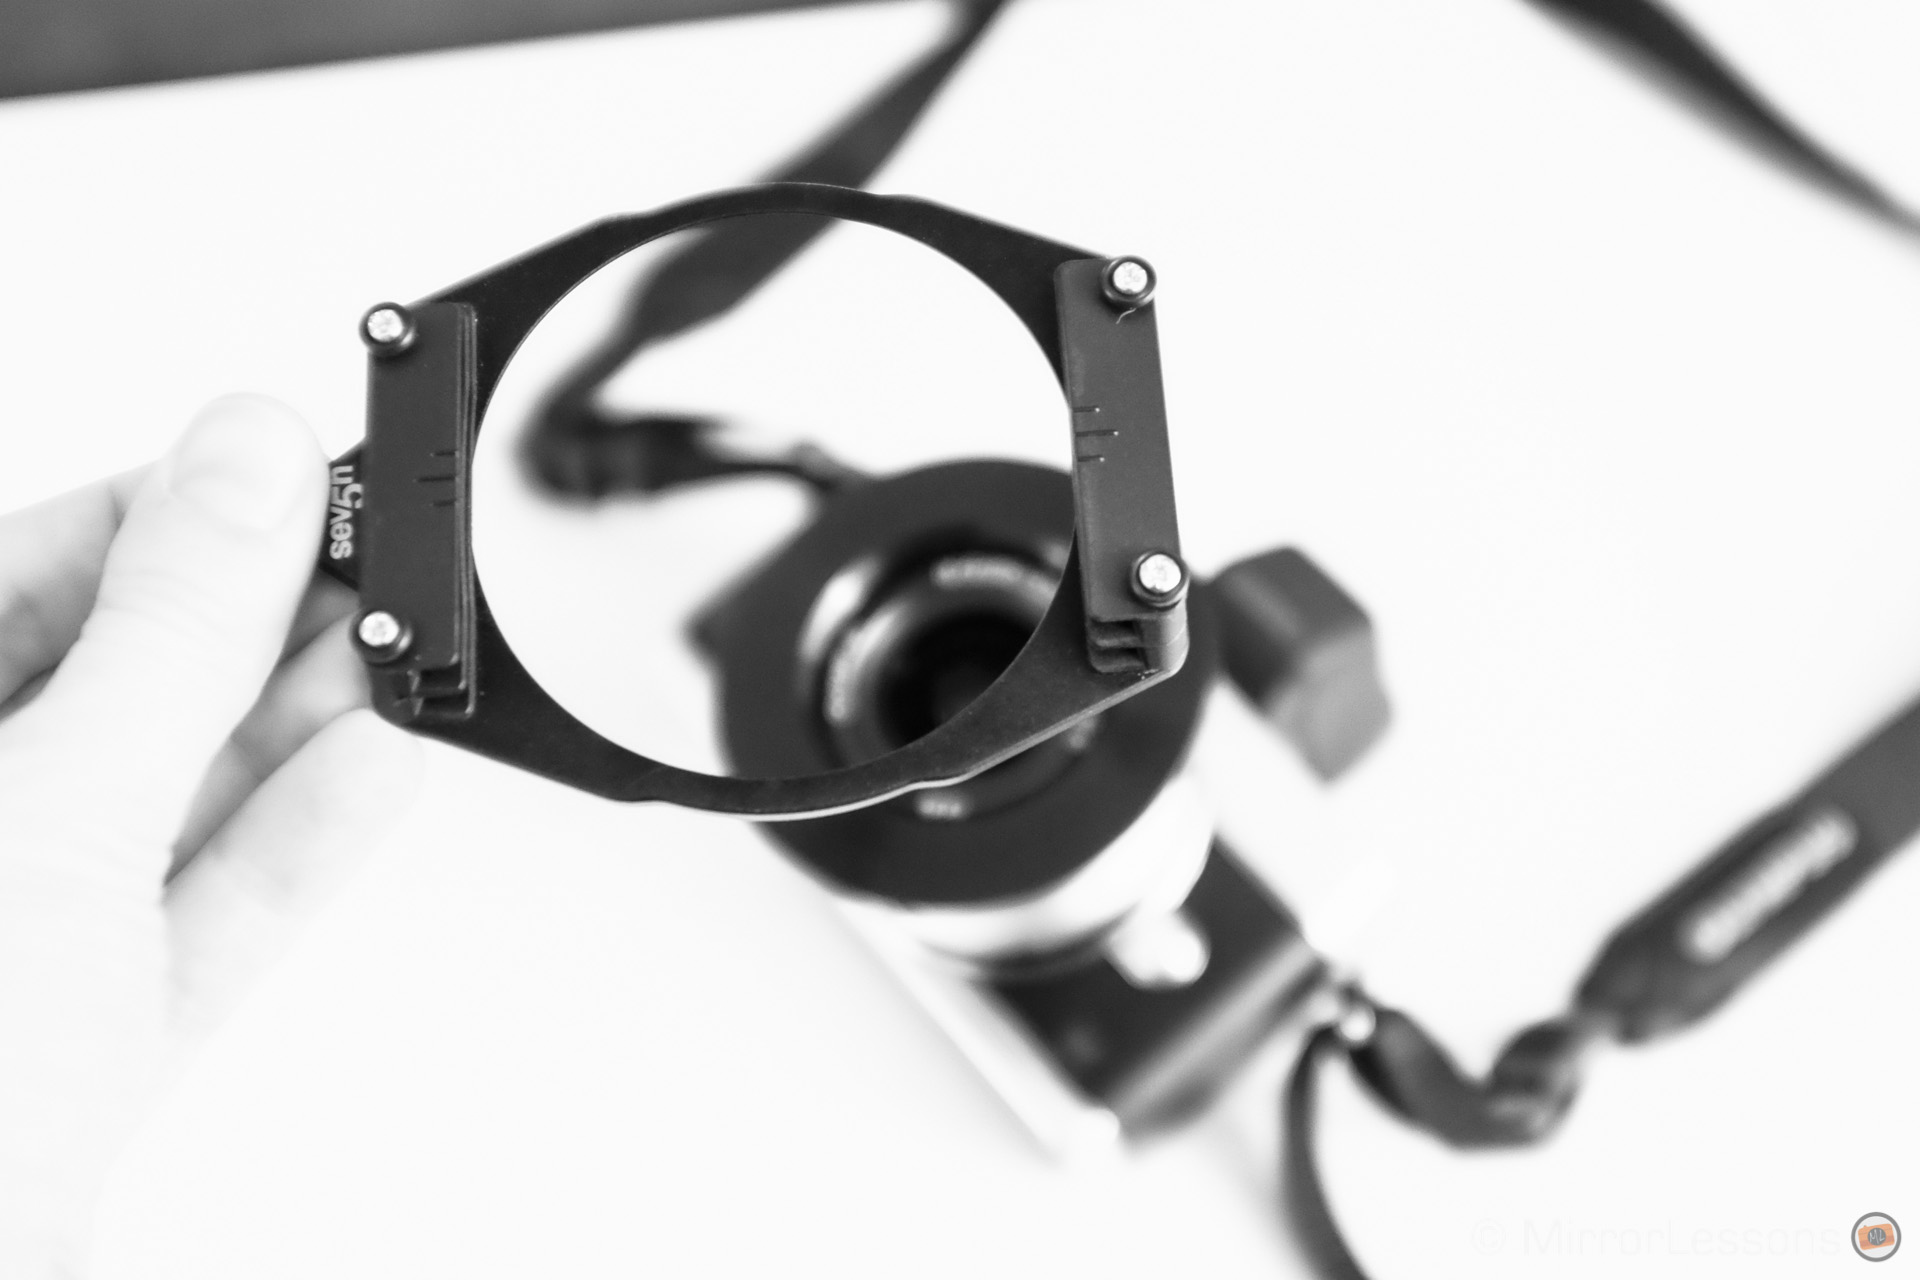
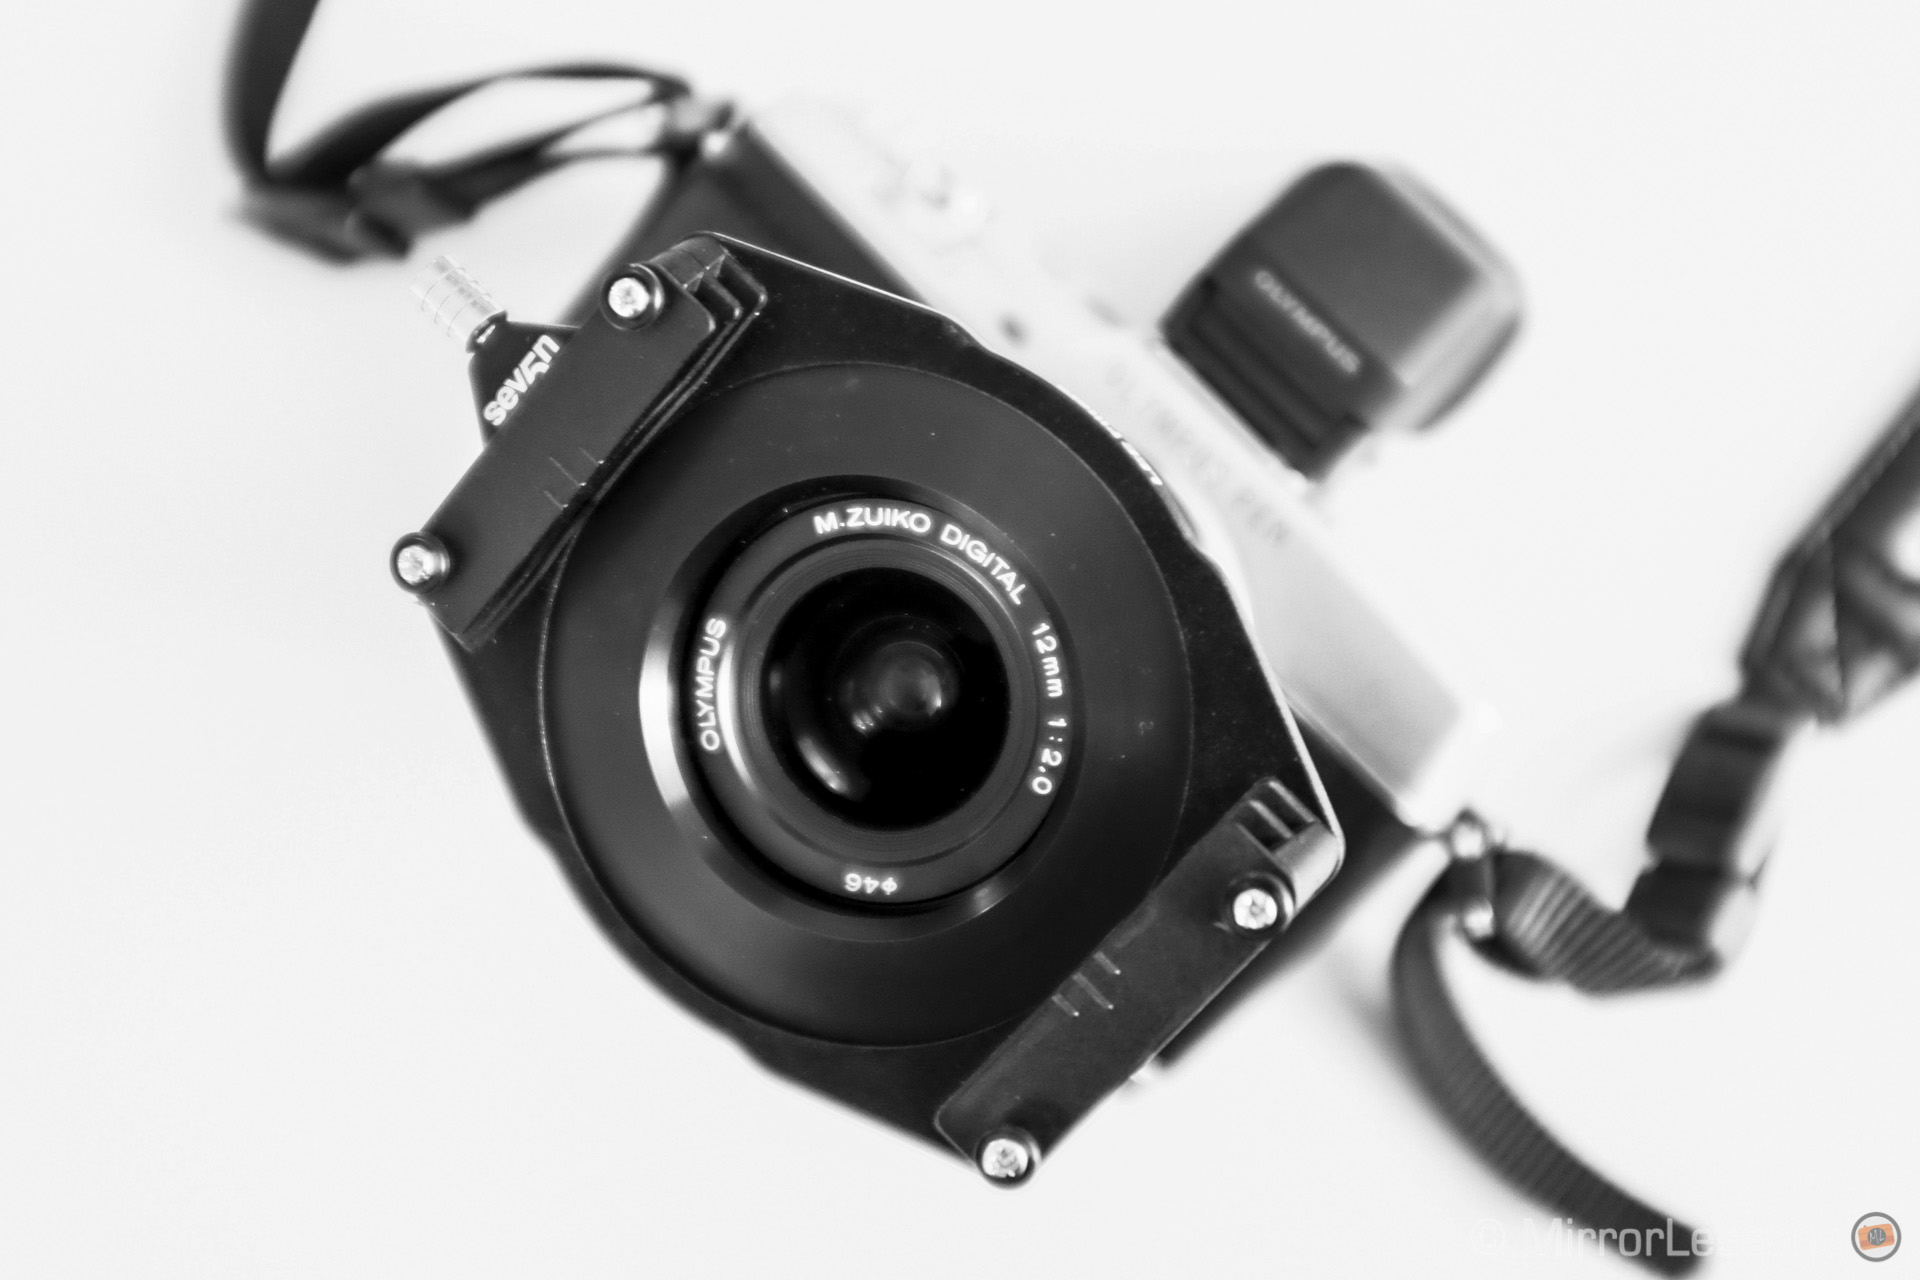
In the kit, you receive the bare essentials of filter photography – a filter holder and a 0.6 ND Hard Grad filter. Since every lens has a different thread size, the screw-on adapter ring for the lens must be purchased separately. To figure out which adapter ring you need, flip the lens cap over and look for a thread size in millimetres written on the back. I asked for the 46mm adapter ring for the Olympus Pen E-P5 and M.Zuiko 12mm combo, and the special adapter ring for the X100s.
Assembling the kit onto your camera is a very straightforward process, though, being a visual learner, I found that a quick glance at a video tutorial was quite useful. Simply screw the adapter ring onto your lens, attach the filter holder to the adapter by pulling back the spring-loaded clamp, and gently slide your filter into one of the two available slots.


The 0.6 ND Hard Grad filter you receive with the kit has been designed to reduce exposure by two stops and provide a hard transition from light to dark. With it, you can control the exposure between the sky and the ground in your image. It is for this reason that ND Grads are often used for sunrises and sunsets.
Ideally, a photographer would have a number of ND Grad filters (between 1 to 3 stops) in his or her bag, and would choose the appropriate one according to the difference in exposure between the sky and the ground.
For shots where the ground is in shadow and the sky is especially bright, a 3-stop (0.9 ND) filter would be appropriate, whereas a less intense difference would probably require only a 1-stop (0.3 ND) filter. The 2-stop (0.6 ND) found in the kit is the perfect middle ground with which beginners can experiment.
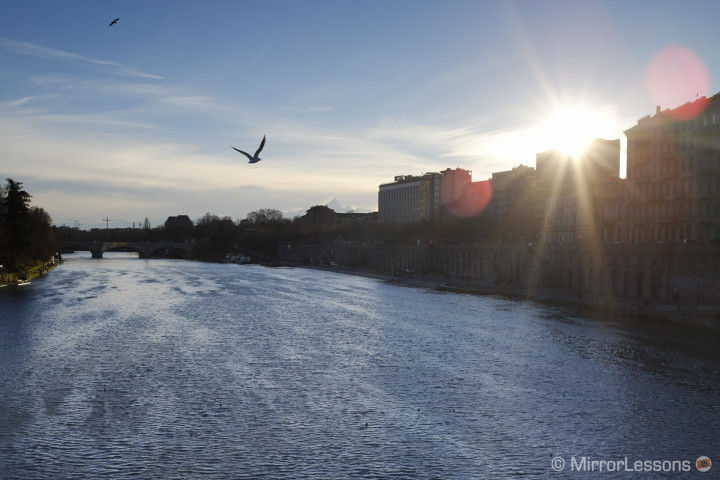
Though the use of filters is quite simple once you get used to them, one of the biggest challenges for beginners is the placement of the ND Grad along the horizon. Since the graduation between light and dark happens quite suddenly, it is important to make sure that the transition occurs in the most natural spot possible. If you place the filter too high, you could end up with a dark blue sky that suddenly transitions to light blue near the horizon. Likewise, if you place it too low, you could cast much of the ground below the horizon into unnatural shadow.
The photo I took below is a good example of how misplacement of the filter can result in an unnatural looking sky.

Another important point you must keep in mind is the area of the photograph you should be metering for.
Since the sky is usually the overexposed part of the image, you will almost always want to meter for the foreground (the area in shadow). For the most accurate results, start by correctly exposing the foreground without the filter. Once you’re happy with the exposure, you can then slot the filter into place and take the shot.
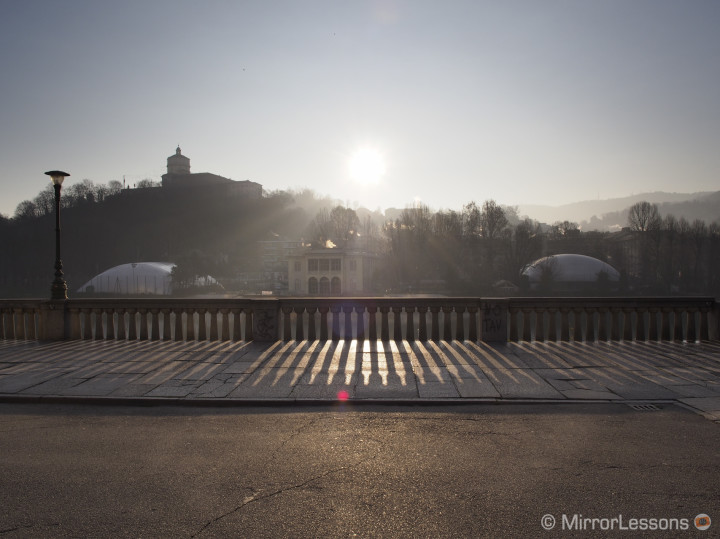
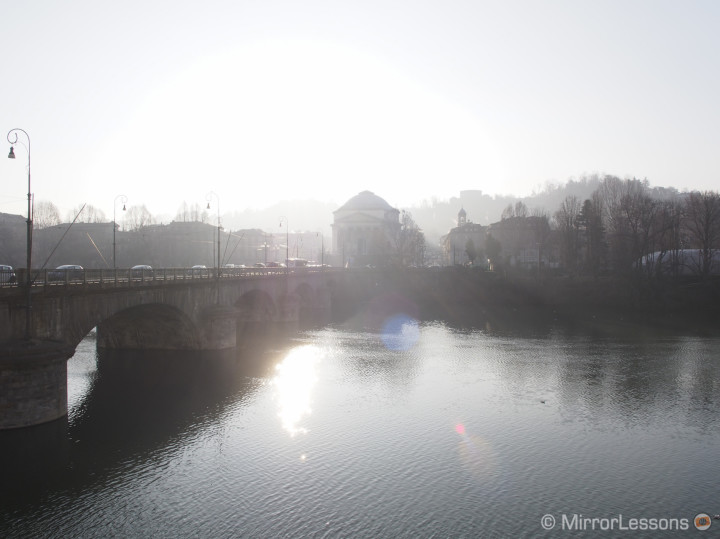
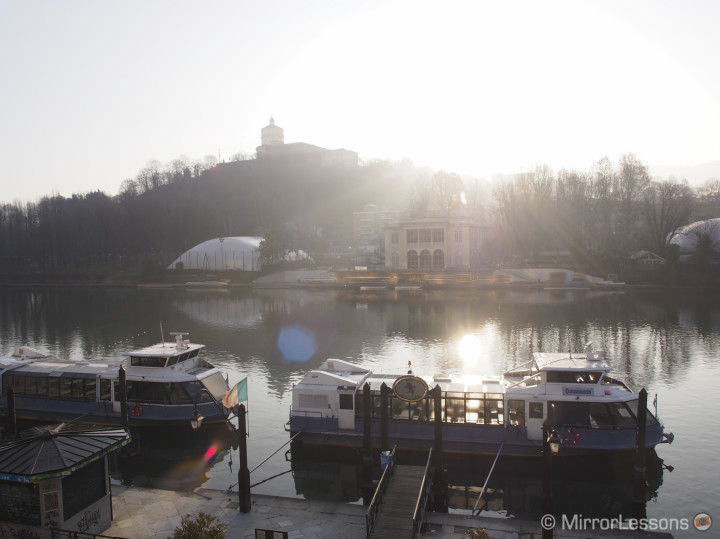
Keep in mind that if you are taking the shot into direct sunlight, a 2-stop ND filter like the one provided with this kit won’t perform miracles. However, it will help you recover some details in the sky and along the horizon as you can see in the examples below.

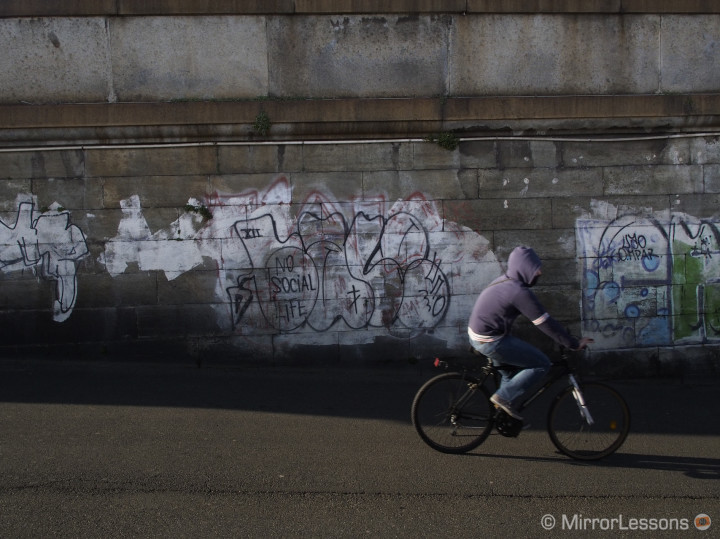
A neat aspect of the LEE filter system is that you can rotate the filter holder 360 degrees.
This means that you can apply the graduation to any part of your image, not just the sky. In the pair of images below, I came across a brightly-lit sidewalk and a dark wall. By using the 0.6 ND Grad upside-down, I was able to darken the sidewalk and completely change the mood of the photograph. Similarly, you can rotate the holder to match the filter up with slanted or diagonal horizon lines.

Regarding the overall feel and usability of the kit, I’ve found it to be lightweight, well-made and perfectly portable. I have no doubt that the whole kit plus a number of extra filters could easily fit into the side pocket of your camera bag. Having said this, the filters themselves are quite fragile, so it is important that they are well-protected. Since they are also easily dirtied, always be sure to carry around a micro-fibre cloth to keep them as fingerprint and dust-free as possible.
Finally, a tidbit of advice: if while using the kit, you suddenly decide you want to take an image without the filter, you may be tempted out of laziness to leave it in the holder and shift it upwards so that only the clear section covers the lens. I would advise against this for two reasons: first, the filter could easily dislodge itself from the holder, and second, you could end up with the bottom edge of the filter in your image in the form of a translucent line, thus ruining your shot.
In short, when you aren’t using the filter, take the time to remove it from the holder and return it to its protective cloth casing. You’ll thank me later! 😉


So far, I have thoroughly enjoyed my experience with the LEE Filters Seven5 Starter Kit. For everyday photography, the 0.6 ND Grad is useful to have on hand, and whets the appetite of the photographer just starting out on his or her filter photography adventure. Amongst the other interesting filters you can use with the filter holder are the well-loved Big Stopper, a 10 stop neutral density filter for long exposures, and the polariser, which removes reflections from non-metallic surfaces. I am very curious to try both when the opportunity arises.
In the coming months as the weather improves, I’m hoping to take the kit out on a few proper landscape photography trips to the rolling vineyards of the Italian Langhe. The big city is good for some kinds of photography, but to get the most out of the LEE filters, it is no doubt best to take advantage of what nature has to offer. Stay tuned!