Update: also check out our Mirrorless on the Job – Episode 2 about using the X100s for work.
I finally received my Fujifilm X100s last week, two days before leaving for Venice where Heather and I joined her parents for a quick Easter holiday.
After following all the fanfare surrounding the x100s on the Internet and reading a number of very good reviews, I was very curious to try the camera out for myself to see if all this enthusiasm really bore fruit. To try it out in Venice was an added bonus, as it is probably my favourite Italian city. I have decided to write this review in the form of a journal of our trip there, describing how I became increasingly confident with the camera and why I am enjoying it more and more each day.
I am aware that 5 days aren’t enough to write a complete and in-depth review, but since I’m planning to use it frequently, I will post more thought about it in the weeks to come. Ready? Time to chase down some gondolas!
Table of Contents
- 1 The Venice Journal, Day 1: Hands-on, Ergonomics & Design
- 2 The Venice Journal, Day 2: Autofocus, manual focus, more high ISO and more rain!
- 3 The Venice Journal, Day 3: the hybrid viewfinder, battery life and night shots
- 4 The Venice Journal, Day 4: Colors, Dynamic range and lens performance
- 5 The Venice Journal, Day 5: Video function and other features
- 6 Conclusion: Processing the pictures and final thoughts
Fuji X100s Main Specs
- Sensor: 16.3 million pixels – 23.6mm x 15.8mm (APS-C) X-Trans CMOS II with primary color filter
- Lens: fixed 23mm f/2, equivalent to 35mm on a 35mm format
- ISO Sensitivity: 200 – 6400, extendable to 100, 12800 and 25600 (JPG only)
- Continuous shooting: approx. 6 fps (max. 31 frames)
- Autofocus: intelligent Hybrid AF (TTL contrast AF / TTL phase detection AF)
- Hybrid Viewfinder (optical and electronic)
- Movie recording: 1920 x 1080 pixels (60fps/30fps) with stereo sound
- Motion Panorama, Multiple Exposure modes
- Dimensions: 126.5 (W) x 74.4 (H) x 53.9 (D) mm / 5.0. (W) x 2.9 (H) x 2.1 (D) in.
Weight: Approx. 445 g / 15.7 oz. (including battery and memory card)
N.B.: all the pictures below are raw files processed with Adobe Lightroom 4.4 and exported as JPGs.
The Venice Journal, Day 1: Hands-on, Ergonomics & Design
Leaving the mainland for the city on the water

The first sight of Venice is the one that takes my breath away. When you exit the train station and face the Canal Grande, it’s like entering another world. The streets, cars, and tarmac are all replaced with canals, water, boats and gondolas.
When we arrived, a cloudy sky was waiting for us and rain was in the air. We brought our luggage to the small apartment a family friend kindly let us use near the Rialto bridge, and we started to walk along the small “calles” (Venetian streets) with San Marco Square in mind as our first destination.


The first thing that came to mind while using the Fujifilm X100s is how well the camera is built.
It feels very solid – all the buttons have been constructed with extreme care and have been placed in a very clever way. Changing the shutter speed and the aperture with the traditional dial and ring is something only a photographer can truly appreciate, so yes, I definitely love the x100s’ retro style. (Retro-style cameras are more and more common these days, as I discussed in this article.)
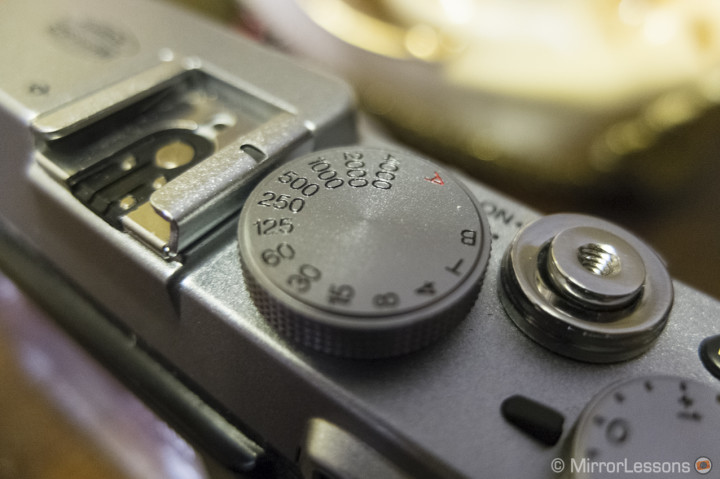
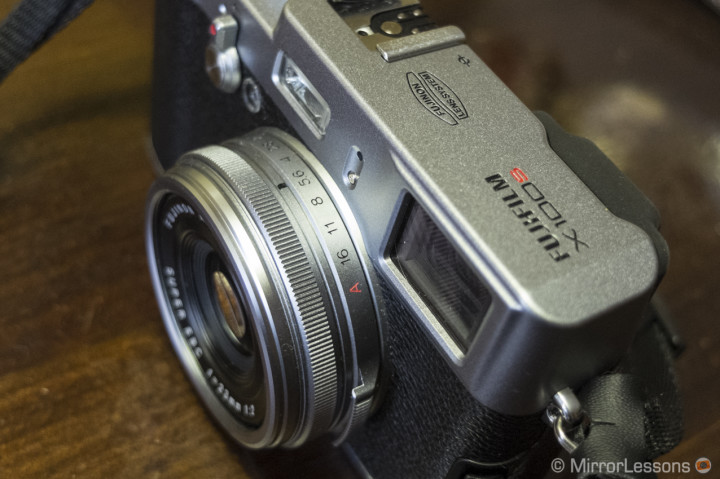
I enjoy using the DRIVE button to quickly switch between single shot, burst and bracketing. The Q button, with which you can change all the main settings of the camera, is also a useful addition.
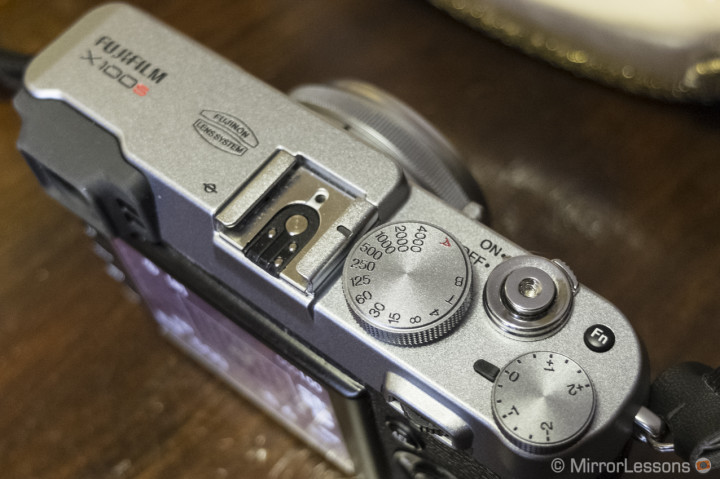
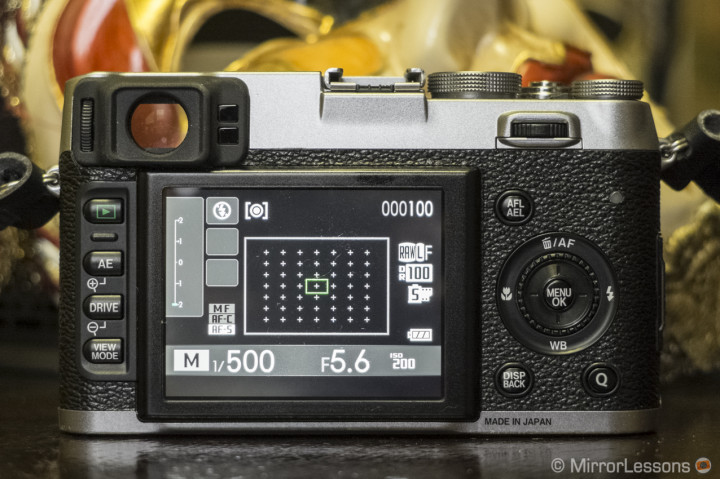
The only thing I really miss is a second Function button as I like assigning the ISO settings to an external button. There is only one and I set it to the ND (Neutral Density) filter function, which is a great feature that I would like to see in other cameras. It gives you the ability to shoot in daylight with a fast aperture, and if the 1/4000s maximum speed isn’t enough to compensate, you can have an extra stop down with the ND filter. The menu dial is also pleasant to use, and the menu system is very simple and intuitive.
Arriving in San Marco’s Square, I focused on tracking down some interesting scenarios, as the light was too poor to capture the beauty of the Venetian architecture. Venice truly is a labyrinth of small streets, miniature bridges and tiny canals. It is nearly impossible to walk the same path twice, and everywhere you turn, you discover a new corner to photograph.


We had arrived in Venice at around 11am, but to my dismay, by 6pm, the battery was dead after taking less than 200 shots.
I had fully charged it the night before and had taken only a couple of pictures for fun during the train journey to Venice, so in the end, it lasted less than 12 hours. I was a little bit surprised when I saw the red battery sign blinking, but then I also realized that the auto-power off was not set. So I changed it to 5 minutes (after which the camera will turn off automatically) hoping to increase the battery life. But a nasty surprise awaited me on day 3… (more on that later).
Thankfully, I had time to charge the battery a little bit before going out to dinner. I took a couple of pictures at the restaurant to test the high ISO, but by then we were pretty tired and decided to head back. Uploading the pictures into my MacBook Pro, I could already see the amazing quality of the RAW files as well as the exceptionally high ISO performance…
You can download some RAW files samples here.


The Venice Journal, Day 2: Autofocus, manual focus, more high ISO and more rain!
Water below us … and above us!

The weather forecast had predicted rain for the entire day, so we went out prepared! The Fujifilm X100s isn’t weather sealed, so I wanted to be careful. Even though the build seems solid, you can never know for sure! The X100s is the perfect camera for street photography because it is light, small, discreet and you can shoot with it while holding an umbrella without much difficulty.
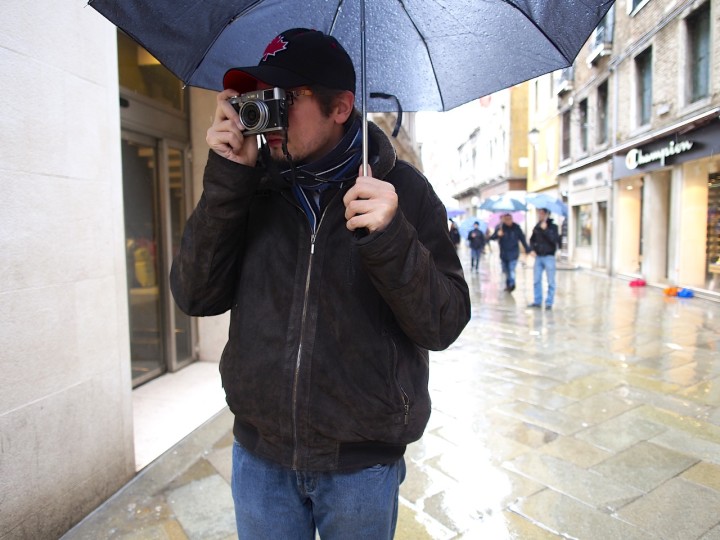
On this day, we decided to go to Murano, a small island on the Venetian lagoon famous for its glass production and glass makers. Murano’s glass is exported all over the world and you can visit many glass factories and see small statues being forged in one minute. It is fascinating, but unfortunately, they don’t allow you take pictures.
I started to explore the different focusing options on the camera. The autofocus performance is probably the most anticipated feature of the new X100s. Very poor in the previous model, it has been dramatically improved in the x100s, just as the overall performance of the camera has been improved.
This said, it isn’t the quickest autofocus I’ve seen despite what Fuji claims. It is fast, yes, and the phase detection pixels introduced in the x100s makes focusing less laborious than before, but I don’t feel confident enough to point and shoot without waiting for the “green rectangle” confirmation because the camera has got it wrong more than once.

If I wait for confirmation that the subject is in focus, it takes a little longer – more than 1 second, I would say, even though I didn’t time it.

Less than an hour into our visit to Murano, the rain started to pour. We sheltered ourselves under the archway along the canal, popping into the San Pietro Martire (St. Peter Martyr) church along the way.

The Fuji x100s offers a few interesting options for manual focusing. You are probably asking why one should bother to focus manually with a digital camera that has a more than decent autofocus. Well, there might be a reason with the X100s. In low-light conditions, the autofocus can test your patience. Furthermore, if your subject is very close, you have to rely on the EVF mode for a precise focus. I’ll give you an example.
I saw the small alter in the church where you can light a candle (a traditional way of praying in Catholic churches). I wanted to take an artistic shot, so I asked Heather to light a candle for me. The match was too close for the autofocus, so I switched to manual. I noticed that the lens and the focus ring are both a little bit too tiny for my big hands. If I don’t pay attention, one of my fingers could accidentally slip into the frame!

There are three ways to focus manually with the X100s, all with the possibility to use either the EVF or the live view mode on the LCD screen.
With the standard mode, you simply adjust the focus with the focus ring on the lens. I recommend setting the MF Check to ON in the setup menu, so that when you are touching the focus ring, it automatically magnifies the picture, helping you focus. Alternatively, you can use the magnify feature at any time by pressing the command dial. You can also display focus distance in meters or feet.
The second feature is called digital split image. What happens is that you have a grey rectangle displayed in the middle of your frame. If your subject is out of focus, the portion of your subject in the grey rectangle will be misaligned horizontally. You bring it back in focus by aligning it. Check the quick video below.
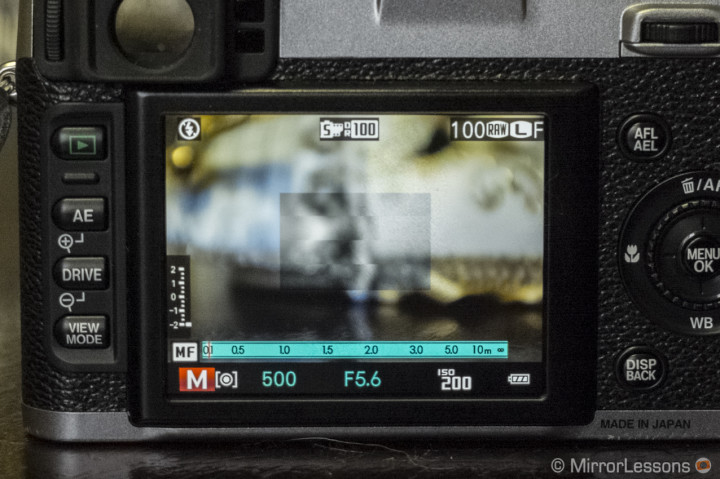
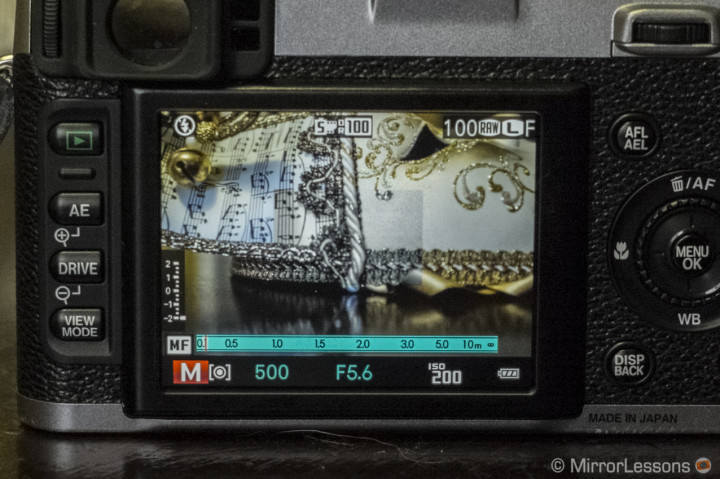
I was very curious to try this second feature but overall, I am not impressed. It works well for a shot that features contrasting colours and/or light between the subject in the foreground and the background, but otherwise, it’s difficult to see the misplacement and correct it. That said, it is a nice new feature that, with some improvements, could become a great tool for manual focusing. It is the digital version of a similar technique used in film SLRs or in the rangefinder system like the Leica M.
The last feature is the focus peak highlight and it is my favorite. It gives you highlighted highly contrasted outline around your subject. It is very simple to use and is in my opinion the quickest way to see if your subject is in focus.
With no less than four ways to focus with this camera, it is probably the most complete selection out there. Bravo Fuji!
Once outside of the church, we had another quick walk, stopped for lunch and headed back to Venice on the ‘vaporetto’ boat.


After Murano, Heather and I decided to do some more “rainy” street photography. It is challenging and can spark your inspiration. Below you can see some of the pictures we took. You can easily see the great performance of the camera at high ISO. The pictures are almost noise free even at 6400 ISO.
Since Venice is composed of a mix of well-lit as well as very dark streets, I set the ISO to Auto.


The autofocus works relatively well in daylight but it starts to decrease in performance as the sun goes down or when you are surrounded by artificial lighting. Sometimes the camera will even “refuse” to focus (that darned red rectangle).
An example is shown below.

I had to change the focus point to the column on the left because the camera wasn’t able to focus on the tower, regardless of whether the AF point was pointed at the white area or the brick surface (and the camera was on a tripod). This sort of thing happened several times. It’s true that the tower wasn’t illuminated, but an OM-D E-M5 or a GH3 wouldn’t have missed it. The camera lets you select the focus point between 49 (evf) and 25 points with the optical viewfinder. You can also change the size of the focus point with the command dial. I recommend leaving it at its largest size to enhance the AF speed.
Overall, I didn’t have many problems with the AF but I think there is still room for improvement. That said, Fuji is headed in the right direction and I’m sure the x100s’ successor will have a perfect autofocus.
The Venice Journal, Day 3: the hybrid viewfinder, battery life and night shots
Here comes the sun!

We woke up with the sound of light rain in our ears, mixed with the engines of boats and gondoliers talking to one other. The weather forecast wasn’t promising again, so we geared ourselves up for a wet Easter Sunday.
We walked past San Marco’s Square on our way to the eastern side of Venice where you enter a less touristic area (Via Garibaldi). From there, you can go back along the Arsenale, the military zone of the city.


The more I used the x100s, the more I found myself enjoying the hybrid viewfinder.
For those who are not familiar with the concept, Fuji introduced a viewfinder on the x100s than can be switched between optical and electronic with the simple toggle of the selector on the front of the camera, next to the lens.
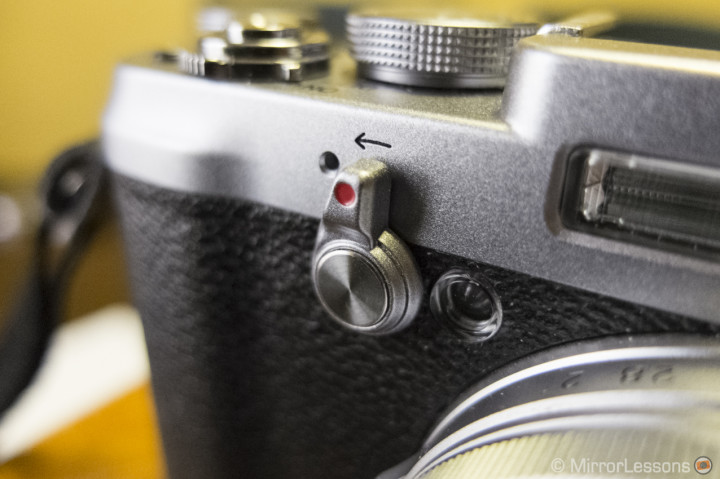
Both have advantages and disadvantages. What I like about the optical viewfinder is the fact that it is brighter and sharper than the EVF and covers a larger area than my actual frame. This is useful because when I point the camera to take a shot, I have a broader view of what is happening in the scene and if I notice something interesting just outside the frame, I can quickly adjust my composition. Also, the optical viewfinder is clearer and brighter than the EVF. Fuji managed to include a lot of information (customizable) in the optical viewfinder. You can view all the main settings, the level indicator, the histogram, etc.
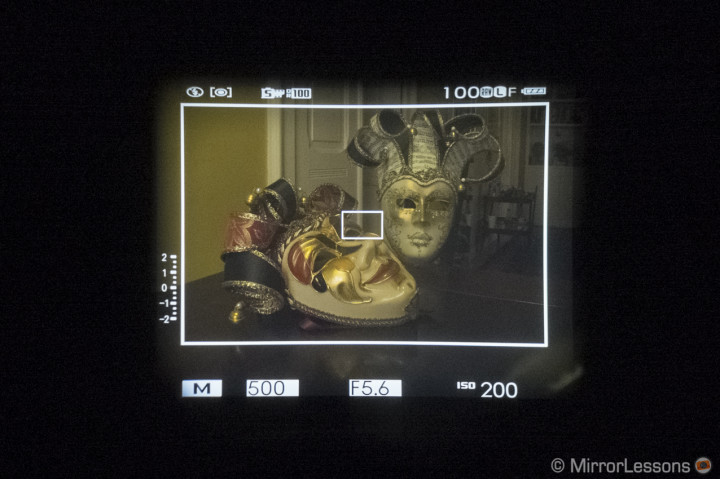
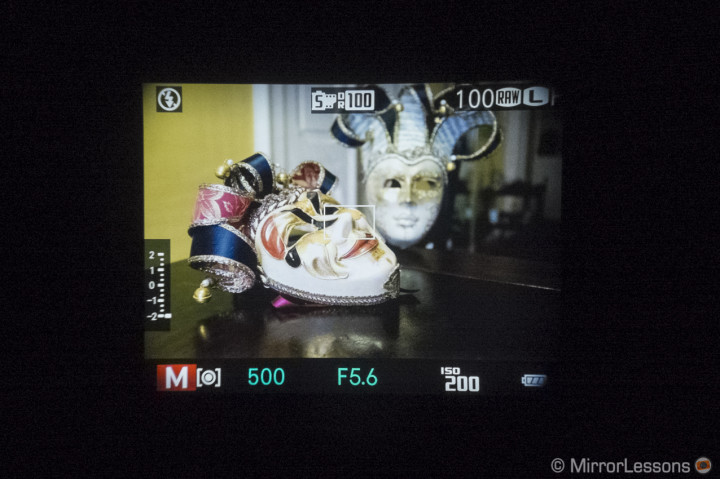
In bright daylight, the information displayed in the optical viewfinder can be slightly hard to read, but in lower light conditions, it is perfectly clear.
Beyond this, there are a few other limitations with the optical viewfinder you need to be aware of. I find some of them challenging and motivating, while others are just limits and will require a switch to the EVF.
The most important is the parallax “effect”. What you are seeing in the optical viewfinder isn’t exactly the same as the shot you are about to take, and this is due to the fact that the viewfinder is at a slight distance from the lens. To explain it briefly, here is an example below.

I wanted the gondolier to be exactly between the two red poles. To obtain this result, I had to press the shutter release, not when I saw him exactly in the middle, but when he was slightly closer to the pole on the left (and as you can see the result isn’t perfect). It is as if the optical viewfinder “anticipates” your shot, but it is actually a simple optical illusion. Once you get used to it, you might find it a pleasant challenge as it gives you a slightly different perspective of your actual scene.
The parallax can be tricky to overcome when focusing on a subject close to you. I recommend activating the Corrected AF frame in the menu. This will give you two little rectangles (instead of one) displaying the focus area in the viewfinder.
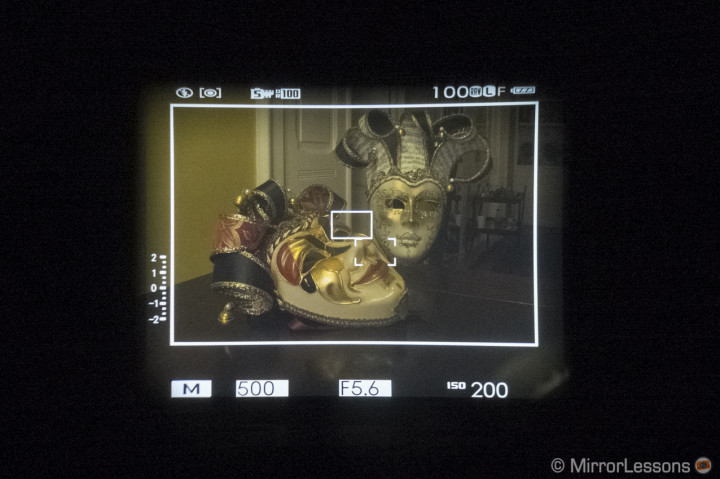
The first in the center will give you the focus point to infinity. Use it if you are focusing far away in the background (like a landscape shot). The second rectangle is positioned slightly below the first one to the right, and will give you the actual focus point if your subject is around 50cm away from the lens. When you half-press the shutter button, a third green rectangle will appear giving you the confirmation that your subject is in focus, as well as the precise location of the focus point between the two first rectangles. Depending on the subject’s distance between infinity and 50cm, you will notice that the green rectangle will appear closer to the first or second rectangle.
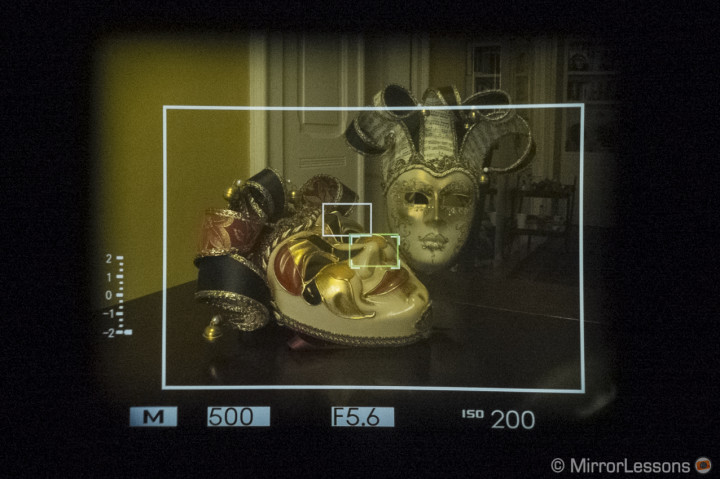
The first time you use the camera, you may find these limits discouraging, but once you get the hang of it, using the camera becomes thoroughly enjoyable. The only real limits with the optical viewfinder occur when your subject is very close to the lens (less than 50cm) or in very low-light conditions. In that case, you will need to switch to the EVF in order for the camera to focus properly.

As with many other cameras today, the Fuji x100s has an eye sensor that lets you switch quickly between the LCD and the viewfinder by bringing the camera to or removing it from your eye. A little tip you need remember: if you playback your pictures, and subsequently choose to take a photo by bringing the camera to your eye, it will switch to playback mode in the viewfinder if you don’t half-press the shutter button.
In the early afternoon, the sun finally peeped through the clouds, and the true colours of Venice gushed forward like water from a broken dam. I could finally explore what the X100s was capable of in terms of colour rendition. Heather and I seized the moment, taking as many photos as possible, knowing that the glorious weather would not last forever…


Then, the unthinkable happened. When I return to San Marco Square, the red battery symbol began blinking vindictively on my screen. Seconds later, the camera switched off. The battery was dead!
It was 4pm, and I had only started shooting at around 10.30am, with less than 200 shots recorded onto the SD card. My first big frustration with the X100s. I had heard about the poor battery life of the previous model, and I had hoped that Fuji would have improved it. Strangely, Fuji states that you can take approximately 330 shots with a single charge. What’s more, the optical viewfinder should technically spare some battery life.
Sadly, I was forced to go back to our apartment and charge my battery. I managed to get out again at around 5.30pm, hoping to take some nice sunset shots. In the end, the day wasn’t ruined but I was now feverishly looking for a camera store to buy a second battery. Monday was supposed to be a sunny day and I wanted to get the most out of it. I also changed the auto power off to 2 minutes to spare as much battery life as possible.

Since it was the first night without rain, I took some night pictures while walking back home after dinner. I definitely love the ISO sensitivity of this camera and working at 3200 or 6400 ISO gives a “filmic” look where the small amount of noise is very organic and pleasant to see.


The Venice Journal, Day 4: Colors, Dynamic range and lens performance
Dawn, colours of Burano and more night pictures

Since Monday was supposed to be the only sunny day according to the weather forecast, we woke up at dawn hoping to take some nice pictures of the sunrise in San Marco Square and along the Canal Grande. Heather and I had done the same thing last year at the Venice Carnival, where I took a series of beautiful portraits of the masks (you can view some of them here).
Early morning is the best part of the day to really enjoy the city and bask in the calm and silence surrounding it. You will hear only a few boats, and encounter only a handful of people going to work. It is so different from the rest of the day when the city is overflowing with tourists.

Unfortunately, we didn’t catch the sunrise we had hoped for due to a wall of clouds on the horizon. We stopped for a cup of coffee, then decided to go to Burano, another island famous for its lace and coloured houses.
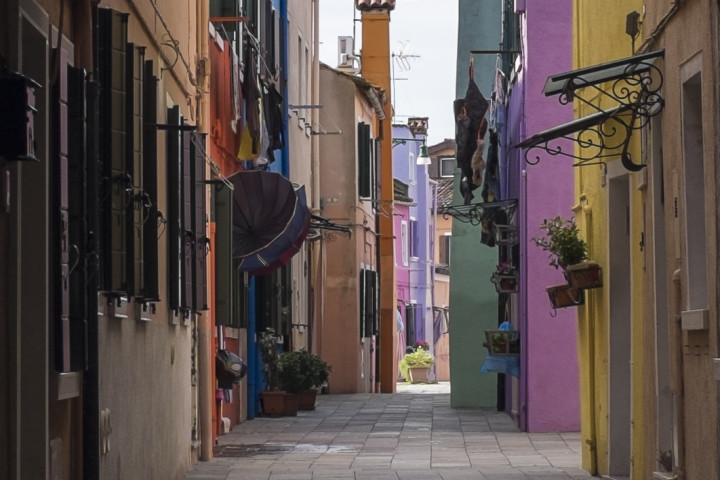
Two aspects that impressed me were the colour reproduction and film modes. My favourite is probably Astia. They looked more “filmic” and less digital than other cameras.
I cannot really justify this claim in a scientific way – it is simply a feeling, and I find it pleasant, natural and unique.
The Film Simulation modes apply to JPGs only. I will take the time out to try them over the next few weeks, but I really like what I saw so far.


The 16mp APS-C X Trans CMOS II sensor has a great dynamic range. The camera also has a function called DR that can be set between 100, 200, 400 or AUTO. What the camera does in this case is increase or decrease the contrast of the photos you take. I left it at 100 as I prefer to work with the wonderful RAW files in post production.
Also the metering is very accurate and always provides you with precise information about the exposure of your photograph.
I also tried the Bracketing function, setting it to +1 EV. When the option is enabled, the camera will take three pictures in a burst with a single press of the shutter button. It is very fast and convenient.

I really like the Fujinon lens on the X100s. It is a 23mm (35mm equivalent on a full-frame camera) with a maximum aperture of f/2 – an ideal lens for street photography. It is very sharp at 2.8, and reasonably sharp at f/2, which makes it nice for low-light photography. The bokeh is very pleasant as well.

The overall sharpness is very impressive, especially from f/4.
There is a little bit of geometrical distortion, but you can correct that easily with Lightroom or Photoshop.
There is also a macro mode that will let you focus as close as 10cm. You can activate it with the command dial. Note that it will work only with the electronic viewfinder.
There is a point I would like to raise about the lens and the camera in general. It is the perfect tool for street photography, but if you are planning to rely on it as a travel camera, you could find the lens very limiting when you want to capture the full scope of a scene or location like San Marco’s Square for example.

The picture above was taken as far away from the tower as possible, but the square is barely in the frame. I could have made a portrait shot but I would have lost either some parts of the Basilica on the left or some parts of the palace on the right. In an even smaller place, you could become quite frustrated with this focal length.
The bottom line is that, if you want to purchase this camera, you have to know why you are buying it and for what kind of photography you intend to use it.
After Burano, we made a brief stop at Torcello Island where you can find some very old archeological sites, then we went back to Venice, where I took other shots in the area around the Train Station.


After dinner, I took a couple of tripod shots to play around with slow shutter speeds.


The Venice Journal, Day 5: Video function and other features
The end of our Easter holiday

The last day in Venice was again rainy and cloudy. We didn’t do much in the morning, but the early afternoon was spent taking some final pictures before our train arrived at 5pm.
As a final challenge, I tried the video mode and some extra features available on the camera.
The video mode is a little bit frustrating. All the settings are automatic, and you can only select the white balance and the film simulation mode. Furthermore, you can only choose 30fps or 60fps, no 25fps PAL for Europe. It is a shame because it actually feels very nice to shoot video with this camera using the electronic viewfinder since the camera is very small and light. I filmed some quick shots and edited them with Premiere CS6, with no colour correction added. You will see that the change of lights in some shots is noticeable, as the camera automatically adjusts the exposure if you pan from a darker to lighter area. Sharpness is ok, but the autofocus won’t work once you start to record. Watch the video below where you will also see the arrival of the high tight in the city.
There are a few things I haven’t tried with the x100s yet. The camera has some interesting features such as Panorama mode and multiple exposure, but I honestly didn’t test them enough to write something about them.
If you shoot solely in JPG, you can increase the ISO to 25600. Finally, the continuous shooting goes up to 6fps. While I don’t see the Fuji x100s as a sport camera, it is really fast.
Conclusion: Processing the pictures and final thoughts
 What I like about the Fuji X100s
- Wonderful design, excellent build quality
- The aperture ring on the lens, the shutter speed dial like old film cameras
- The hybrid viewfinder
- Amazing quality of the RAW files
- Beautiful colour rendition, especially with the Astia Film Simlation mode
- Great dynamic range
- Tiny, lightweight, quiet, it is a perfect tool for street photography
 What I don’t like about the Fuji X100s
- Autofocus still needs some improvements
- Poor battery life. I highly recommend buying a second battery if you plan to be out all day.
- Video mode only automatic, quality could be better given the great X100s sensor;
- The lens isn’t extremely sharp at f/2 (but is still usable) and has some distortion. I had hoped that Fuji would have improved on it.
Despite a few weak points, I really enjoyed using the X100s and it is definitely a camera that I will bring with me for day-to-day photography. It is fast, silent and discreet, and you can even choose to silence the shutter button. No one will notice you when you use it. However, at the same time, it will never become my main camera system. The reason is probably personal, but if I were to visit a place for the first time, I would probably miss a wide angle lens and a medium telephoto lens as I like to diversify my shots and represent a place from different angles and perspectives.
I liked shooting with it in Venice as I had already visited the city. Moreover, thanks to the Fuji X100s’ fixed lens, I was able to concentrate on one single type of photography (street photography), and this proved to be a very good exercise. As I said before, it is a niche camera – you have to know why you are buying it and for what you intend to use it. If street photography isn’t your genre of choice, the x100s probably isn’t the best camera for you. I have to admit that I am not an avid street shooter, and sometimes all I wanted was to be closer to my subject (I did some cropping in a few pictures).
The RAF (Fuji RAW) files are another aspect that really impressed me. The dynamic range is huge and the amount of detail you can recover in both the shadows and highlights is stunning. I rarely work with such good RAW files coming from a camera like this one. You can really see the quality of the X-Trans sensor. High ISO images have little noise and an overall filmic “look” that is quite pleasant to the eye.
You can download some RAW files samples here.
JPGs recorded on camera are fine, but I’ve seen better. I noticed that sometimes the camera tends to darken the shadows are more than necessary.
So, was all that fanfare and enthusiasm justified? Absolutely! And, if after reading this (long!) article, you feel the urge to purchase it and hop on a plane to Venice, then we have the perfect ending to this happy tale!

Thanks David, I’m glad that this review helped you in your decision. The X100s is a wonderful camera, you won’t regret it 😉
Many thanks for this review in addition to the other reports about the X100s. I’ve read many reviews and found those on this site the most informative and useful for me. I’ve been on the fence for several months trying to decide whether to purchase an X100s as a walk around companion to my DSLR rig. I finally made the decision. The order has been submitted. Looking forward to going mirrorless. Cheers!
Thanks, just ordered it ;);)
Hi Kyndel and thanks for your nice comment.
If I remember correctly, the pictures you mentioned were taken in Astia mode but I can’t confirm it 100% as I’m traveling right now and don’t have the original files with me.
If you are interested in X100s colours, I wrote an in-depth article about it here: https://www.mirrorlessons.com/2013/08/13/what-is-the-best-way-to-post-process-fuji-x100s-colours/
Best from Italy 😉
This was one of the most honest reviews I have ever read – pro et contra, and then you can choose for yourself, what matters.
At the same time: You know what you are talking about.
THANKS A LOT.
I have 6 cameras (24MP DSLRS and also the E-M5) , but after this test here I am very, very tempted to buy the Fuji 100S also, I do not think I can resist it – it has a very certain touch, and I love that, thank you for showing it so very clear.
One question:
The astia-colors (film similation) = Is that the pictures (7pictures) AFTER the text here in your review::
“The Film Simulation modes apply to JPGs only. I will take the time out to try them over the next few weeks, but I really like what I saw so far.”
If not ….could You please point out where it is, if there is any – just to nail it for me, so there is no chance I can resist it ;);)
Best from Denmark/Kyndel
I agree, when I see two bars left, it means that approximately 30% of the battery life remains. When there is one bar left, it is better to replace it 🙂
Enjoyed the review. Have the X100S and love it myself.
Agree about poor battery life, but only my DSLR has decent battery life. However what is the most annoying about Fuji and battery life is that when the indicator bars start dropping it really goes fast. From one bar down to red in less than 10 shots sometimes.
Greatly done.. Thanks
Thanks Thedoros, glad you liked it.
Thanks a lot for this. This is the best review for the camera so far. Many bravo!!