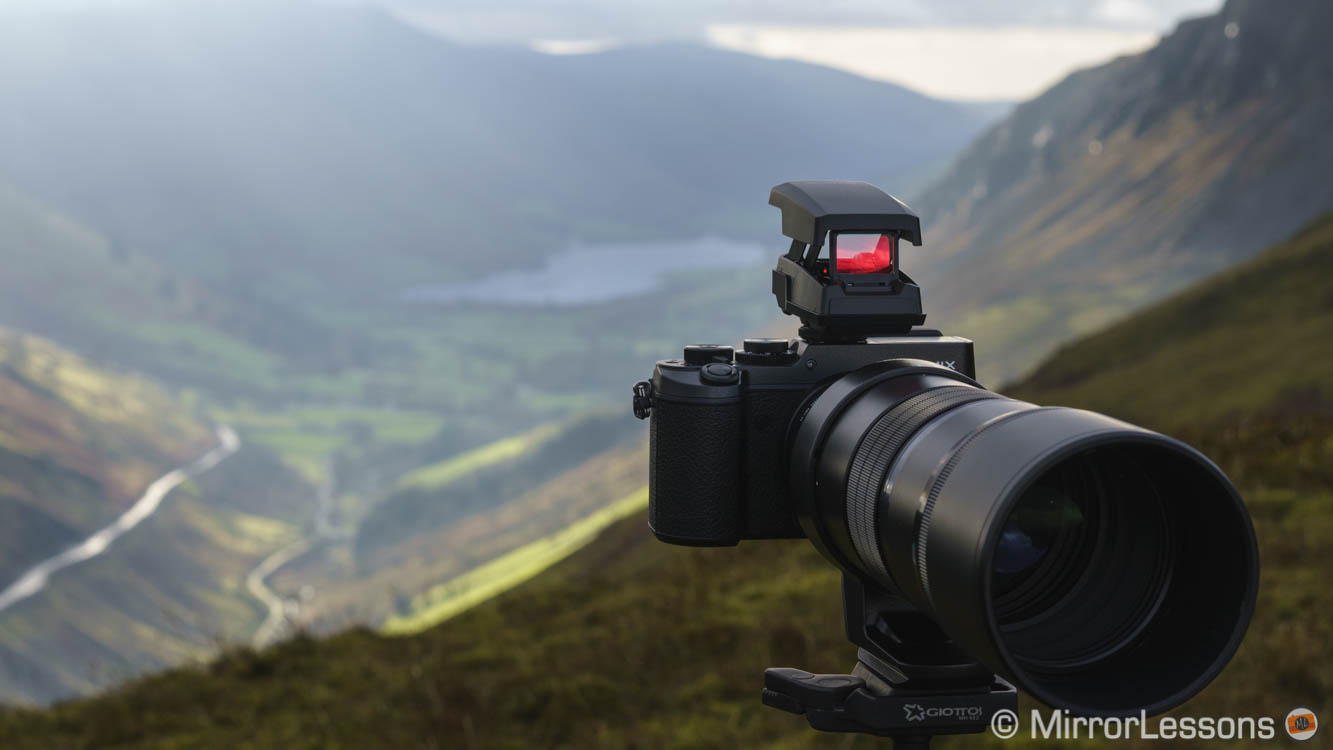
The Olympus Dot Sight EE-1 is a handy accessory to use with long telephoto lenses. By generating a dot style illuminated reticle, it helps you to frame subjects that are far away and moving fast, with birds being the most natural example. Olympus introduced the Dot Sight first in the form of the SP-100, a superzoom bridge camera that has it built-in. Then the company released a separate accessory along with the M.Zuiko 40-150mm Pro lens and MC-14 Teleconverter in 2014. I’d always been interested in trying it out and the chance came with the new 300mm Pro that we recently reviewed.
Update: you can also watch our video review below.


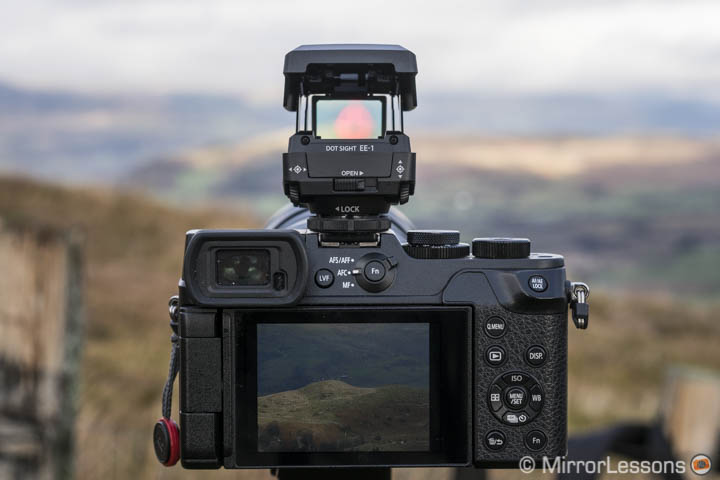
The EE-1 is small, light and made of robust plastic. It is also dust and splash proof, meaning I was able to use it in light rain without any fear of damaging it. It uses a coin-type battery.
The first interesting thing about this product is that it is compatible with any camera featuring a hot-shoe mount.
I used it on the OM-D E-M1 and Panasonic GX8 but you can also mount it on a DSLR. The only thing to take into account is that a large lens with a large hood could get in the way in the case of certain camera and lens combinations. There is a lock mechanism to securely attach it to the camera.
The EE-1 seems like a very simple object to use at first glance but it needs to be configured and that requires some trial and error.
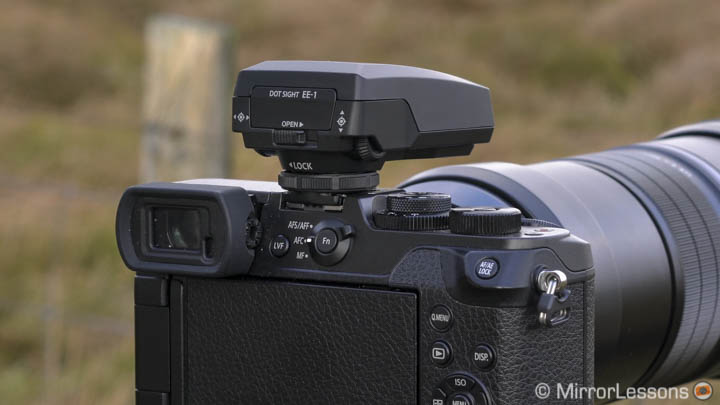
The user manual doesn’t say much. You first activate it by releasing the open switch. You should notice the Red Dot appear on the transparent panel inside. If you don’t see it, make sure that the light is turned on. On the side, there is a dial to turn it On/Off and change the brightness intensity (5 steps available).


Once you see the red dot, you can use the two dials on the rear to move it horizontally and vertically. The idea is to have it at the centre of the panel but that centre point needs to correspond to the centre of your image. The best thing to do is to position the camera on a tripod and find a distant but clear element (reference point) in your frame that you can easily spot with your naked eye. Once configured, you can of course use this set-up handheld. However, setting it up while holding the camera would more uncomfortable because you can’t maintain a precise composition and work with the dials at the same time (especially with a long lens).
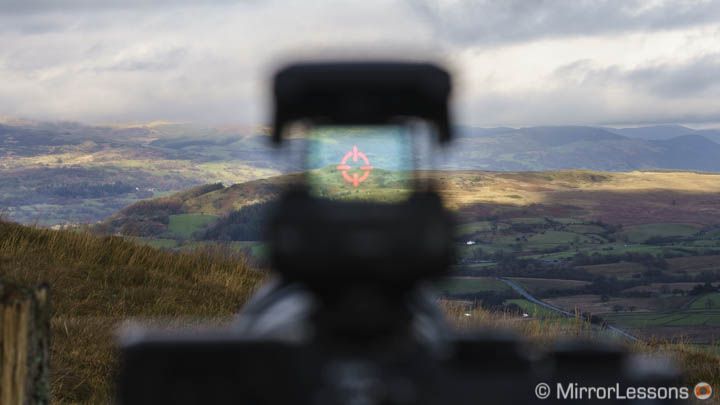
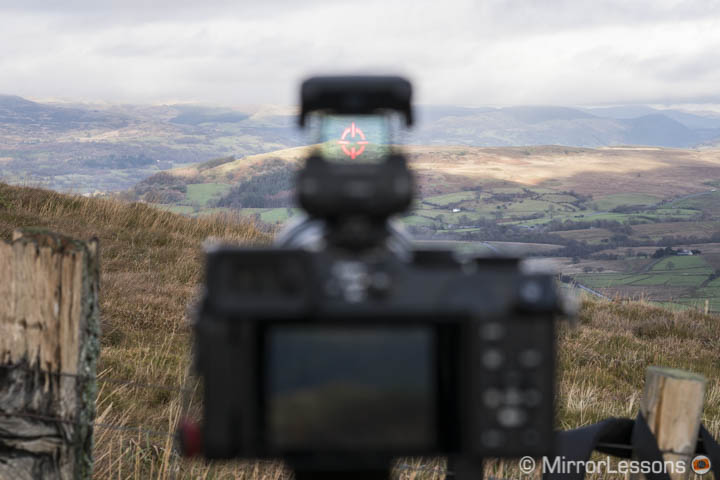
Keep the live view on the LCD screen activated so that you can see your composition better. Adjust your camera’s position until you see that reference point in the middle of the LCD screen. Now look at the EE-1 and move the red dot until it sits on the same reference point as the centre of your composition. It is important that you remain in the same position while performing the whole operation so that your view of the LCD screen and Red Dot Sight doesn’t change much. Now everything you point the Dot Sight at should appear at the centre of your image.
In the example below, I chose the top right side of the green hill as my reference. The more distinct your point of reference is (for example a tree or a farm), the easier it becomes to configure the EE-1.
[twentytwenty]
[/twentytwenty]
Note that the configuration is related to the focal length used. For example if you set up everything for a 100mm lens and then change it for a 300mm lens, it is likely that you will need to reconfigure everything. The EE-1 makes more sense to use with very long focal lengths but if you intend to use different lenses, the best option is to configure it with the longest telephoto you have. If you are using a zoom lens, start at the longest focal length.
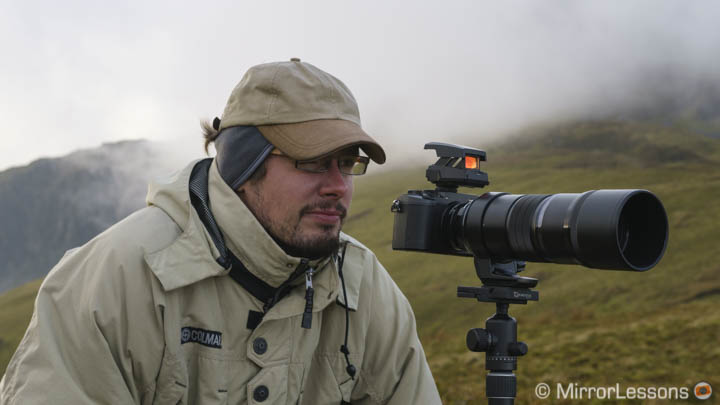
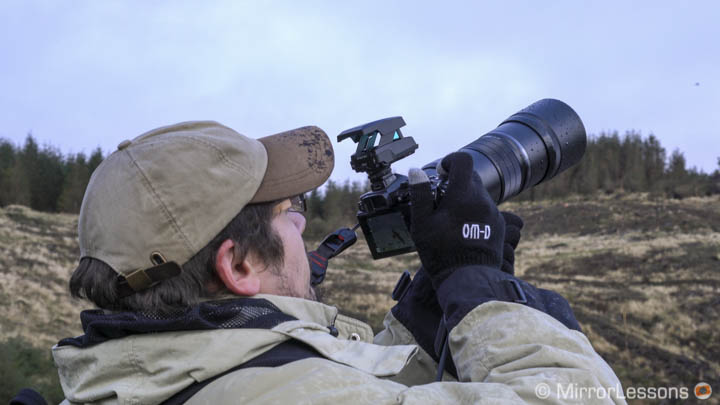
The advantage of using the EE-1 when shooting is that you can keep your camera further away from your eyes and keep track of what is going on around your subject. It is up to you to find the right distance and the position you are most comfortable with. I also find it helpful to use a camera strap such as the Peak Design Slide or Slide Lite to stop my arms from extending too much.
So now that we know how to use it, let’s discover how helpful the EE-1 can be.
Overall I would say that it works well but there are a few aspects to be aware of. First you won’t be able to check your composition with precision. The goal is to keep the red dot on your subject so that it stays at the centre of the frame but it takes a little bit of practice to track fast moving subjects perfectly. If you are less precise, the subject might not end up at the centre of your image or may even be slightly cut off.

An example where I didn’t keep the red dot on the bird.

A perfect example with the bird right in the centre.
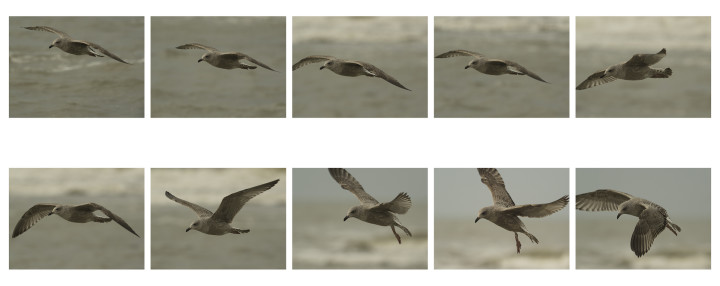
Below is a good example of 10 consecutive shots where I managed to keep the bird almost always at the centre. I was using the MC-14 Teleconverter in addition to the M.Zuiko 300mm lens so I could get a real close up of the bird. This is where the EE-1 becomes really useful. The angle of view is so narrow that it can be difficult to keep your subject in the frame without having a larger view of the scene.

When panning quickly the red reticle can appear slightly decentralized as if it has some sort of delay. This can create some confusion at first but in fact this is simply caused by the quick movement of your camera. The reticle’s precision is not affected so as long as you keep it on your subject it will remain at the centre of the frame.
The autofocus settings of the camera are also very important.
Forget the single AF point because it would require your composition to be more precise and for you to keep an eye on the LCD/EVF constantly to make sure the AF point was on the subject. On the E-M1 I used the 9-Target Group area and even the All-Target group area on some occasions. With the GX8 I set a Custom Area with 9 areas or more depending on the subject and the scene.
Another important thing to remember is to leave the Release Priority to Off (Focus priority). If you choose Release priority over Focus, you will take more shots but you won’t have any clue at all about how the camera is focusing since your eye won’t be on the LCD screen most of the time. In Focus priority mode, on the other hand, sometimes the AF won’t lock at all and the camera will fail to take the picture but at least you’ll know something is wrong.
Another thing I noticed is that the dials on the EE-1 can easily be moved inadvertently when operating, closing/opening or putting it away in a pocket or bag. So whenever you use it again, make sure that the Red Dot’s position hasn’t changed. This is why I also kept the LCD live to check the composition from time to time and make sure that the Dot Sight was still giving me accurate results.

Overall I found the Olympus EE-1 to be an interesting accessory especially for those like me who have little experience with bird photography.
The most difficult thing when using a long telephoto lens is to quickly compose your frame after spotting your flying subject. The first few times I couldn’t track anything because as soon as I looked through the viewfinder, I couldn’t find my subject anymore. All my reference points were lost. One solution is to keep your camera very close to your eye with the lens aimed at the same thing you are looking at. If you see a bird flying, you start following it before moving your eye to the viewfinder. Practice and experience also help.
With the EE-1 you can take pictures while putting some distance between yourself and the camera and keeping an eye on what’s happening around your frame, something an EVF won’t allow you to do. This is also important because you can observe how the birds behave in the air, how they change direction and where they go. Once you know how to use it, it can either help you enhance your tracking abilities (meaning one day you won’t need the EE-1 anymore) or become an inseparable companion for your wildlife photography.
If you look on the internet you can find similar products made by third party manufacturers (some also less expensive) but I have no experience with them. The EE-1 isn’t cheap (more than $100) but can be worth the investment if you are really keen on wildlife photography.