• Skip to primary navigation
  • Skip to main content
  • Skip to primary sidebar
  • About Us
  • Our Websites
  • Contact Us
  • Donations
  • Privacy Policy
  • Facebook
  • Twitter
  • Youtube

MirrorLessons

Mirrorless camera reviews right at your virtual doorstep!

  • Home
  • Camera reviews
  • Lens reviews
  • Accessory reviews
  • Galleries
  • IN-DEPTH
    • Mirrorless on the job
    • Tutorials, Tips & Tricks
    • Essays
    • Musings
  • GUEST POSTS
You are here: Home / Olympus Camera Reviews / E-P5 / How to Create Double Exposures with the Olympus Pen E-P5

How to Create Double Exposures with the Olympus Pen E-P5

20/07/2013 By Heather Leave a Comment

Update: our full review of the Pen E-P5 is now up!

Are you looking for an endless creative outlet that will keep you shooting with enthusiasm from dawn until dusk? If so, look no further than the double/multiple exposure mode. It can be found on a number of mirrorless cameras including but not limited to the Olympus OM-D E-M5, Fuji X100s, Panasonic GH3 as well as the camera I am currently testing, the Olympus Pen E-P5.

If you’re new to photography, you may be asking: what exactly is a double exposure mode?

Essentially, it allows you to take one RAW image – silhouettes of people or statues tend to work best – and overlay it with one or more images – preferably a pattern or design, such as tree branches, a colourful tablecloth, or a rose bush, to name a few.

Not only can double/multiple exposures be produced on-camera, but they can also be easily created in photo editing programs such as Photoshop. (To see a short and straightforward video tutorial on the subject, hop over here.) It was also practiced on film cameras simply by opening the shutter more than once to expose the film multiple times.

Double exposure taken with Pen E-P5
With the exception of some sharpening and contrast performed in Lightroom, this remains an unedited double exposure produced by the E-P5. I used the statue as my subject, and a map of Turin as my filler pattern.

How to use the multiple exposure mode on the E-P5

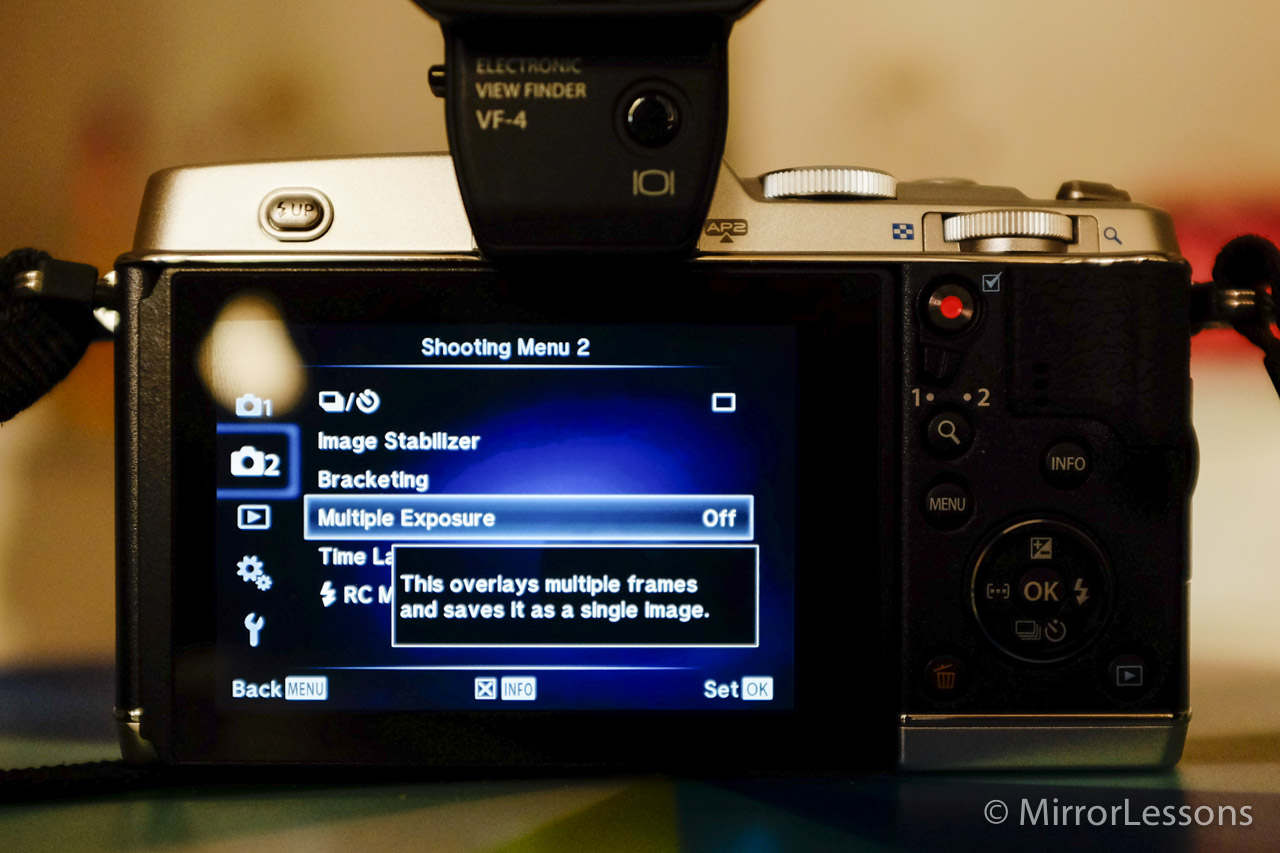
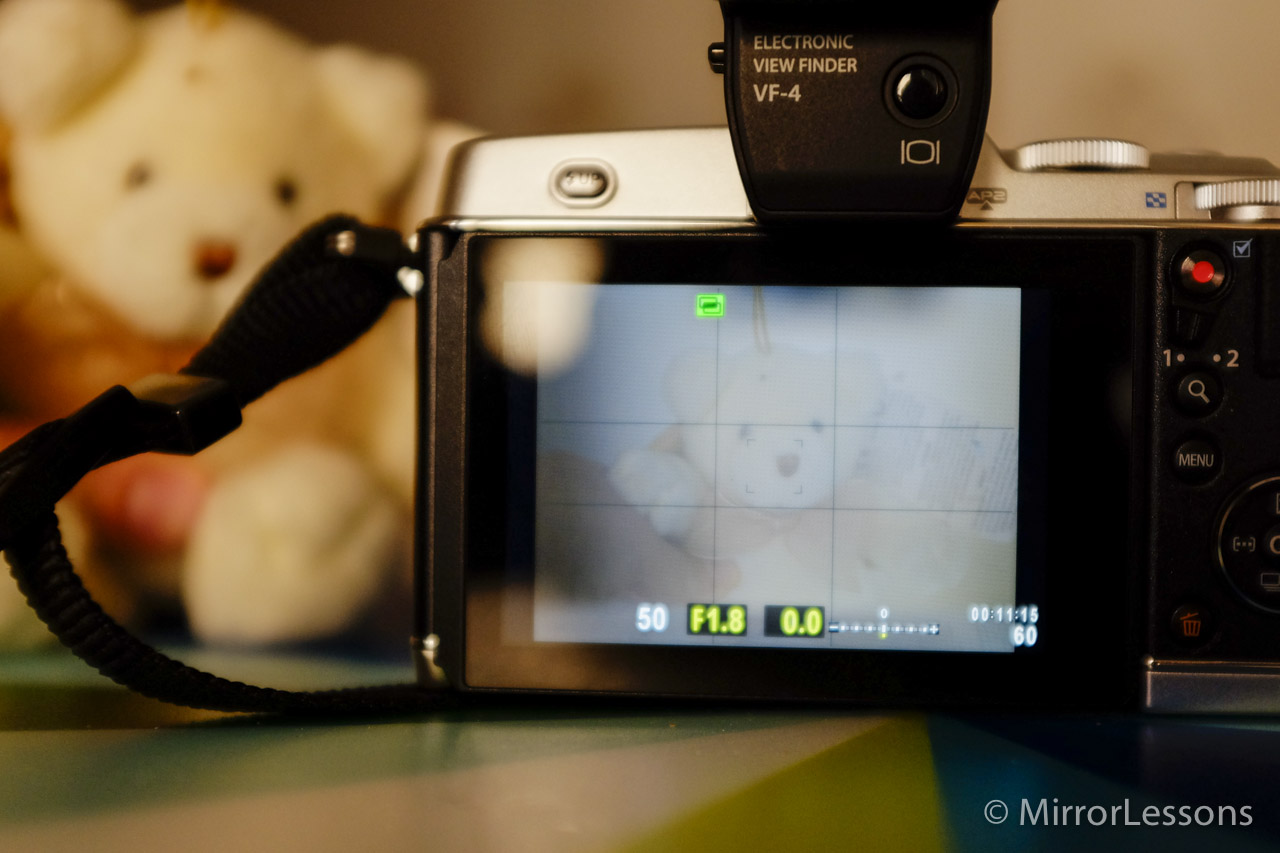
To use this mode, head into Shooting Menu 2 on your E-P5 and scroll down to Multiple Exposures. By default, it will be set to ‘off’ so you must switch it on. Then, go to Frame, switch it to 2f and press OK. At this point, you’ll be able to take your first shot. Immediately after you take the shot, a translucent overlay will appear on the LCD screen which you can use to frame your second shot (the filler pattern).

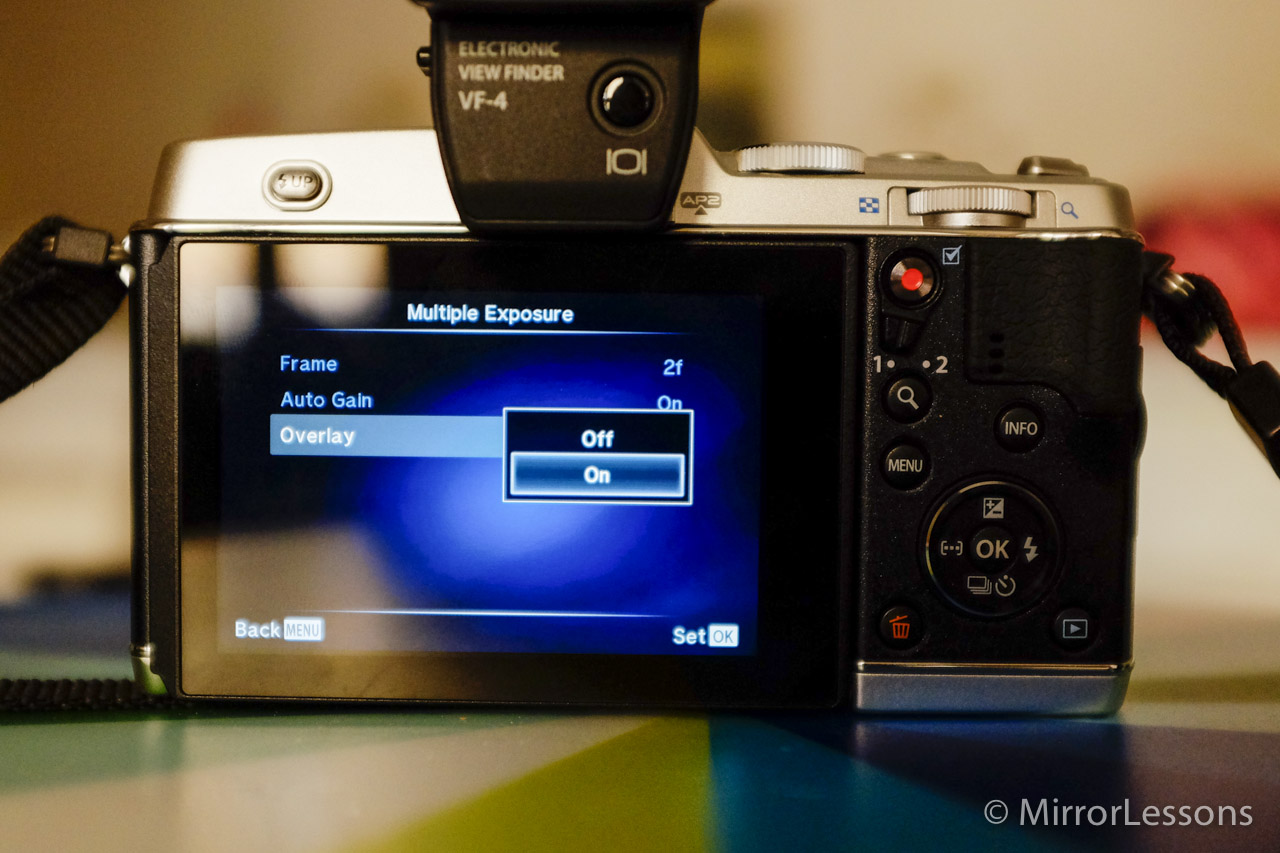
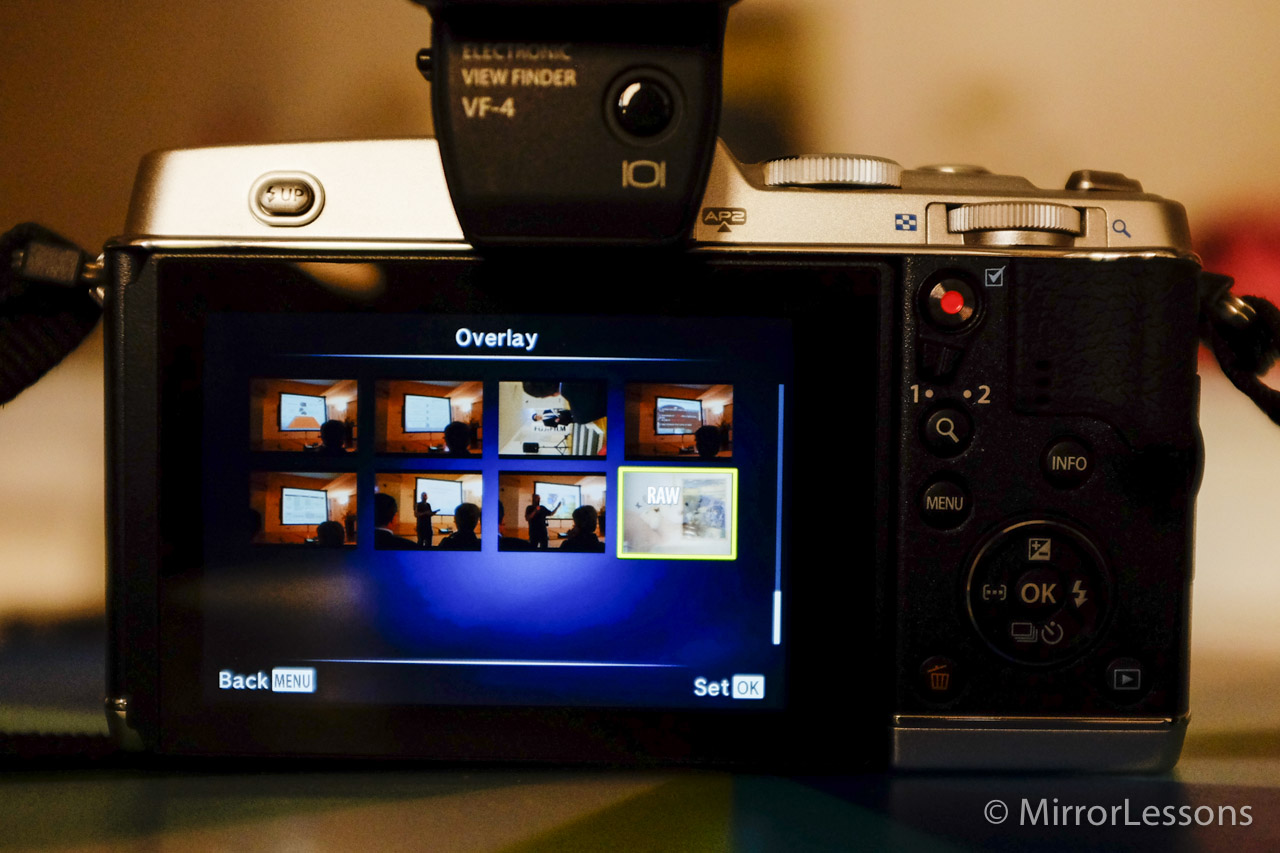
If, on the other hand, you already have a first shot you want to use, go to Overlay, located in the same menu as Frame, and select the image from there.

Below are six step-by-step pictures to help you out, as we all know Olympus’ menus can be rather convoluted!

1. Pick Multiple Exposure from Shooting Menu 2
2. In the Multiple Exposure menu, turn Frame from Off to 2f
3. Take your first image
4. Take your second image and watch them combine into one!
5. If you already have an image you want to use stored on your memory card, go to Overlay in the Multiple Exposure menu.
6. Pick the RAW image you want to use and click away!

To achieve the best results, it is always a good idea to shoot upwards into direct sunlight for both shots so as to blow out the sky, accentuate your subject, and eliminate unnecessary details in the background. Of course, the rules are there to be broken, so go out and experiment. It can become pretty addictive!


Check out the gallery!

In this gallery, I’ve included a handful of shots taken with the E-P5 using the built-in multiple exposure mode. Being that silhouettes work well, I used Mathieu’s profile, as well as a few statues for most of my shots.

Note: Since the background never appears perfectly white, even when you shoot into direct sunlight, I resorted to Photoshop to eliminate unwanted elements in the background, and sometimes to remove it completely. I also used it in the second photo to create a fade-out gradient effect. Otherwise, the photos remain relatively untouched.

In this photo, I found that the background was a distraction, so I eliminated it in Photoshop using the clone tool.
In this case, I used a gradient filters to make Mathieu’s head fade out. The rest of the background was eliminated using the clone tool.
To make it seem that the trees were growing out of Mathieu’s head, I used the Color Range option in Photoshop to select the trees. This allowed me to erase the background without losing any detail around the fine branches.
In this case, I kept the background intact around the tree branches to preserve the form of his head. The background was eliminated with the clone tool.
This photo was converted into B&W and then sharpened in Lightroom. No other editing was done.
This photo has been given added contrast and saturation in Lightroom.
This photo has been given some added sharpness and saturation.
This photo was converted into black and white.

Filed Under: E-P5, In Depth, Micro four thirds tips and tricks, Mirrorless camera tips and tricks Tagged With: double exposure on camera, double exposure photoshop, double exposure tutorial, how to do double exposures, how to do multiple exposures, multiple exposure on camera, multiple exposure photoshop, multiple exposure tutorial, olympus pen ep5, pen ep5, pen ep5 double exposure, pen ep5 multiple exposure

About Heather

Heather Broster was born in Canada, has lived in Japan and Italy but currently calls Wales home. She is a full-time gear tester at MirrorLessons. You can follow her on Google+, Twitter or Facebook!

Primary Sidebar

Reminder

We have moved! Our latest reviews can be found on Mirrorless Comparison and YouTube.

DISCLAIMER & COPYRIGHT NOTICE

Heather Broster is participant in the Amazon Services LLC Associates Program, an affiliate advertising program designed to provide a means for us to earn fees by linking to Amazon.com and affiliated sites.

Heather Broster is a participant in the Amazon EU Associates Programme, an affiliate advertising programme designed to provide a means for sites to earn advertising fees by advertising and linking to Amazon.co.uk.

Heather Broster and Mathieu Gasquet are also participants in the following affiliate programs: B&H Photo Affiliate Program, Ebay Partner Network, Skylum (Impact Radius), Expert Shield, The Inspired Eye, and Mediterranean Photo Tours.

To read more information, visit our full Disclaimer page. Thank you!


© HEATHER BROSTER/MATHIEU GASQUET AND MIRRORLESSONS, 2013-2020

Unauthorized use and/or duplication of this material without express and written permission from this blog’s author and/or owner is strictly prohibited. Excerpts and links may be used, provided that full and clear credit is given to Heather Broster/Mathieu Gasquet and Mirrorless Comparison with appropriate and specific direction to the original content.