Having a professional background in video production always makes me very aware of the video capabilities of the cameras I review. If I see that a camera possesses acceptable video specs, the filmmaker inside me loses no time in taking the lead!
The Sony Cybershot RX100 II (or RX100M2, or RX100 mark II) is a tiny yet powerful compact camera with superb still image quality. It is without a doubt the Queen of all point-and-shoot cameras out there and can hold its own against bigger and more advanced systems. I already wrote up my first impressions and published a gallery and comparison to prove what this camera is capable of, but another feature that caught me off guard was its video function.
Naturally, this camera isn’t meant to be used at a professional level but given Sony’s experience in the field, it is unsurprising that the RX100 II is well-endowed in the video department. It includes a professional video codec (AVCHD 2.0) capable of recording in full HD up to 50p and 28MB/s, which is very good for a point-and-shoot camera. The video capabilities of the RX100M2 are better than the Olympus E-P5 or the Fujifilm X-E1 when it comes to video files. The video is very fluid thanks to the 50p (50 frames per second) option and I didn’t notice any rolling shutter or moiré issues.

The codec is certainly its strongest point. It will consume more space on an SD card and will also require a class 6 or class 10 (recommended) SD card but it is totally worth the upgrade if you don’t already own such a card.
The sensor is smaller than MFT cameras or APS-C cameras, but you will find the same great performance it delivers for still images in terms of dynamic range and low-light sensitivity for video as well. Colour rendition is nice and quite natural.

The lens also performs very well, even when exposed to direct sunlight (minimal flare). You can use its f/1.8 aperture at its widest angle to achieve some shallow and pleasant depth of field. You won’t be able to zoom too far (x3.6 only). If you want to zoom more, you have to keep pressing the zoom toggle and the camera will automatically turn on the digital zoom extender, but the quality of the image will decrease rapidly. One thing that bothers me about the digital zoom is that you cannot turn it off in video mode, so if you don’t want it to affect your image, you have to be careful when zooming in not to reach the border between optical and digital (shown in the top right-hand corner of the LCD screen).
In video mode, ISO only goes up to 3200 but the amount of noise/detail is really impressive; the images remain very clean and usable.

You can start recording video while using the camera at any time, regardless of the mode chosen on the dial. You just have to press the dedicated movie button on the rear of the camera and it will start almost immediately. Once it starts recording, all settings become automatic. If you want to have more control over your settings such as aperture, then you have to choose the appropriate movie mode on the main dial.
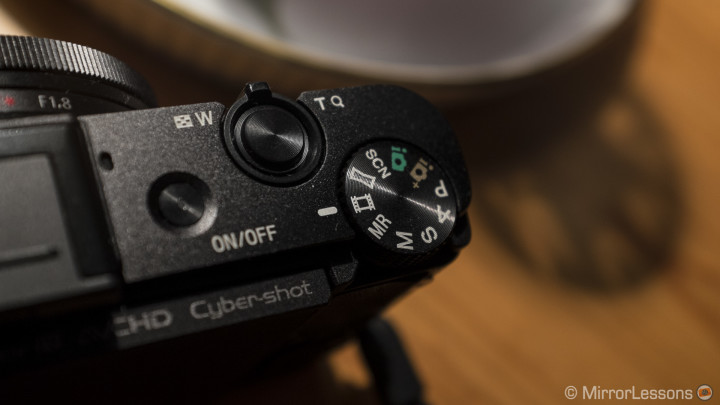
When you choose movie mode on the dial, you can then select P,A,S or M mode. Even with P, ISO remains manual unless you set it to AUTO.
When video is enable, you have AF-C or manual focus only. You can’t work with AF-S (single). So when you want to focus on something that isn’t in the centre of the image, you can’t focus in AF-S and then re-compose and start shooting like you would for still. You either use the tracking option or work in manual. When in MF, you can adjust it by using the control ring on the lens, but I don’t like it: it isn’t smooth enough and isn’t reactive. If you don’t turn it drastically, nothing will change so it becomes difficult to achieve a precise focus adjustment.
Moreover, the flexible-spot option that allows you to select a focus point on the screen is disabled in video mode, so if you want a shallow depth of field when filming some details in the foreground, the only real option is focus tracking. Fortunately, it is quickly accessible. You just press the control wheel’s centre button, choose the area of the image you want the camera to track and then recompose.

It works well for static shots, but the tracking isn’t as effective when used to follow a subject. It is often slow to react and not always accurate.

If you select a semi-automatic mode such as A (aperture priority) or S (shutter priority), the camera will adjust the other settings to get the right exposure. You can also compensate the exposure anytime, even during recording, by using the down arrow on the control wheel. If you rely on the metering of the camera when shooting video in Auto, sometimes the camera will tend to slightly overexpose the image.

The camera also has a built-in stereo microphone that will do the job but as with every built-in microphone, you will hear anything you touch on the camera with your finger during recording, as well as the zoom motor if you zoom in or out.
Below you can watch the final video and judge the quality of the RX100 II for yourself. And of course, feel free to leave a comment to share your impressions about it.

Thank you for the great article and samples. Yes, the video of the RX100 is often overlooked. The resolution is amazing. The fluidity of the pans is better than I’d expect. Even though it may not have 5-axis IBIS, the image stabilization on the handhelds is plenty good enough. And, I’m shocked to see so little jello and rolling shutter – much less than E-P5. It still amazes me some point and shoots have better video codecs than high dollar Oly and Fuji mirrorless cameras. Seriously?
Grazie mille e complimenti per il vostro impegno di nozze per una donna così bella!