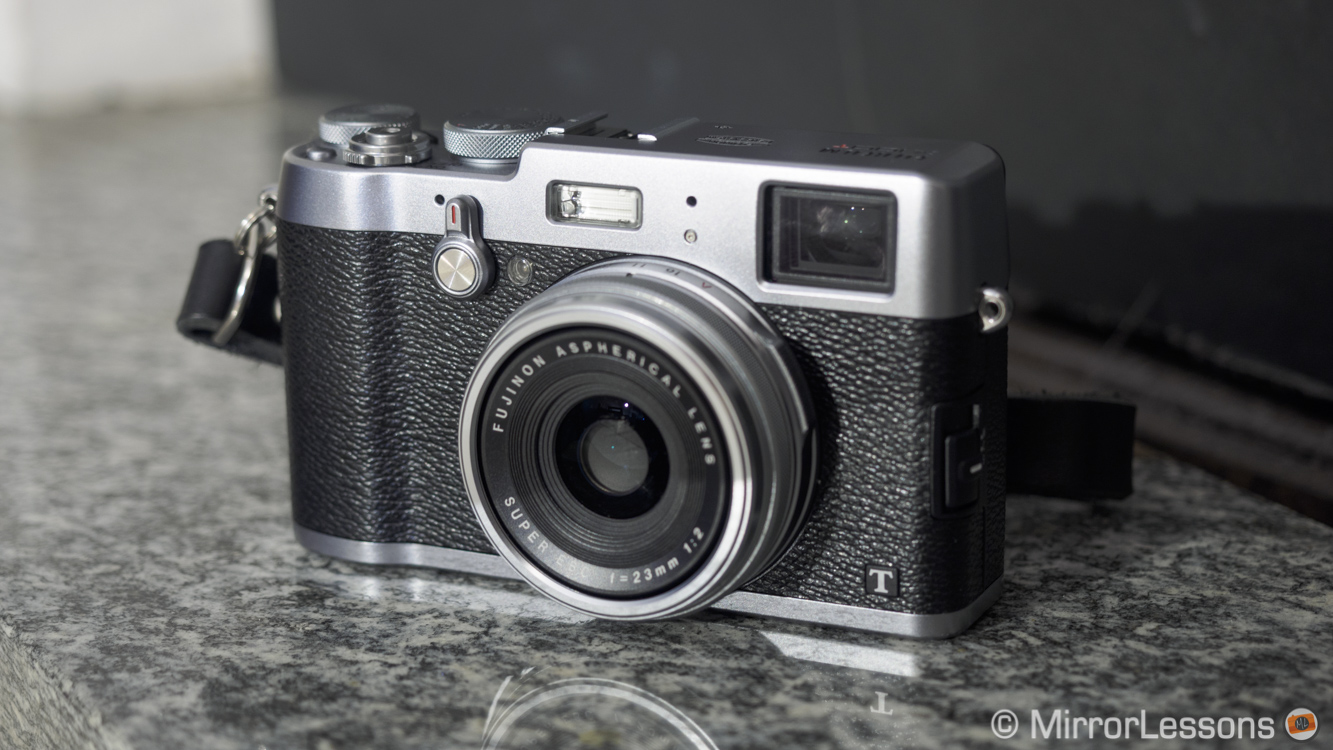
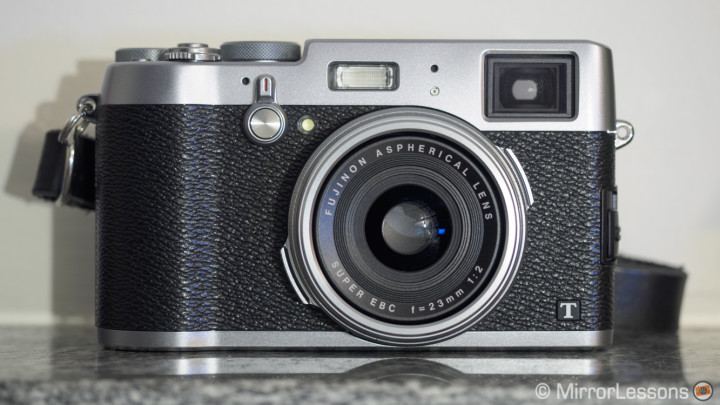
My Fujifilm X100t review could be very simple. Why? Because last year, its predecessor the Fuji X100s became my favourite compact camera. I used it for almost everything: street, travel, reportage and even work as a second body. Then this year I had to sell it to make room for the X-T1. We cannot keep all the cameras we test and I have to prioritise my work for MirrorLessons. So when I grabbed the X100t in late September, it felt as if I were picking up from where I’d left off with the X100s. I already knew everything about it. After all, the main characteristics are the same: same lens, same sensor, same image quality, same size and ergonomics. I loved the X100s, so I love the X100t.

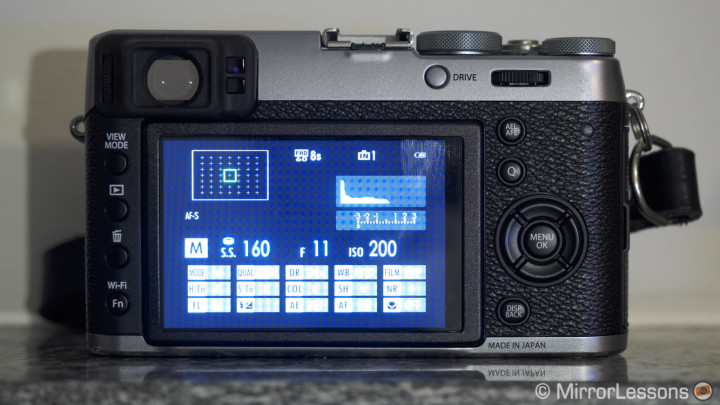
Of course the new camera does incorporate some improvements and new features. Regarding the design and ease of use, the aperture ring now turns in 1/3 steps–a useful addition but one I could have lived without. The surface texture of the dials and focus ring have been slightly redesigned as well. There is an updated button layout on the rear and a larger LCD screen with more resolution (1040k dots versus 460k dots on the X100s). The latter is certainly the most substantial upgrade on the outside of the camera but there is still no tilting screen unfortunately.
On the inside, the improvements worth mentioning are as follows:
- The OVF has a new Digital Rangefinder option (more on this in a bit)
- The EVF has a shorter time lag and a better frame rate for a more fluid live view while maintaining the same resolution (2360k).
- The autofocus is exactly the same as the X-T1 system which adds predictive AF in continuous mode (more on this later).
- Regarding image quality the only difference is the addition of the Classic Chrome picture profile that I already enjoyed during my testing period with the X30. Also the extended ISO sensitivity goes up to 51200 ISO but you will hardly use it. Fujifilm recently released a firmware update that brings Classic Chrome to the X-T1 and X-E2. I suppose they could do the same with the X100s.
So while I will elaborate on all the new additions in my full review, my first impression for now is that the X100t is very similar to the X100s.
I won’t talk about image quality in this post since it hasn’t changed from the X100s. You can check out my X100s review and in-depth articles if you want to know more about it. Most of the shots in this article were taken with the Classic Chrome profile which has became one of my favourites on Fujifilm cameras.
N.B: all the images are RAW files post-processed with Lightroom 5.7.1 unless otherwise specified.
T for Telemeter: the optical viewfinder experience
Legend:
- OVF: Optical ViewFinder
- EVF: Electronic ViewFinder
- ERF: Electronic RangeFinder
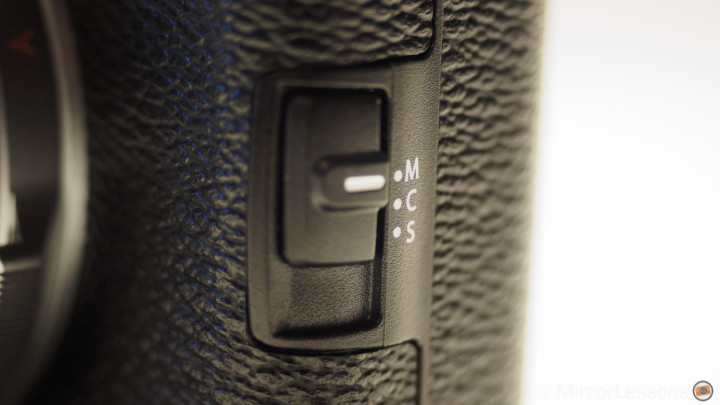
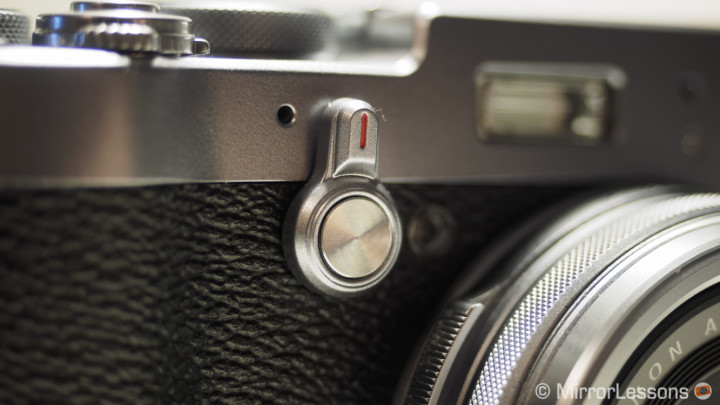
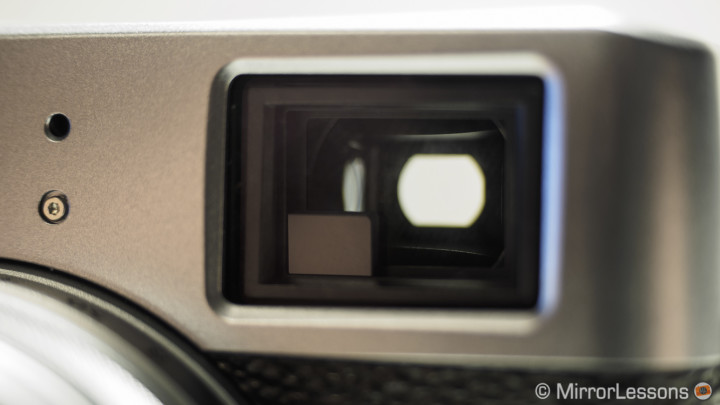
To start testing the X100T, I decided to concentrate mainly on one thing and that is the Optical Viewfinder, which is the aspect of the camera that received the most important update in comparison to the X100s. As you might already know, the X100T features like its predecessor an hybrid viewfinder. By using the selector shown below on the right, you can switch from an optical to an electronic viewfinder.
To me it is somehow like returning to the beginning when I first used the X100s in Venice one year ago. I started using the OVF, then I gradually switched to the EVF. While I appreciate the hybrid viewfinder technology, the EVF allows me to see exactly what I am shooting, where my AF point really is and I have a real preview of my exposure. It is simpler.
With the OVF, I feel as if I am using something with limits. Why would I use it when just next to it you can find a more intuitive option for modern mirroless cameras?
What’s more, with the resolution and time lag of electronic viewfinders constantly improving, I see less and less need for an optical viewfinder. Perhaps if I’d had more experience with rangefinder cameras, I would have a different opinion. But at the same time, the X100 series is the only rangefinder camera that gives you a choice in this matter.

Fujifilm still believes in its hybrid VF concept and includes some interesting new features for the OVF of the X100T. I recently asked several X100/s/t users on the Fuji Italian Facebook Group which viewfinder they were using the most and many answered that they were in favour of the optical version. So I forced myself to use it again and see if I could have a more pleasant experience with it.
The OVF of the X100 series gives you one clear advantage excluding the most obvious ones (brightness, clearer view, no time lag): you can see outside your frame. Being a Reverse Galilean viewfinder type similar to other rangefinder cameras, you can compose your frame while also seeing what’s happening around it. This is useful for example when you notice someone just outside your composition. You can decide to include him in your frame or not before he enters it. The most well-known limit is the parallax issue. The perspective you see in the OVF is not exactly the perspective the lens and sensor see so there is a small difference which becomes more noticeable when focusing closer on a subject or when you have elements at a different distances in your composition.
Example below: the first picture below shows the Mole hiding behind the wall on the right. In the OVF however, I was seeing something closer to the composition of the second picture.
Another classic example is the following: you see someone walking from the left and you want to take the picture when he is exactly in the middle of the frame. With the OVF you will have to take the shot slightly after that person walks through the center of the frame. Once you get used to it, it works. And let’s not forget that many rangefinder photographers worked (and still work) this way and deal with parallax.

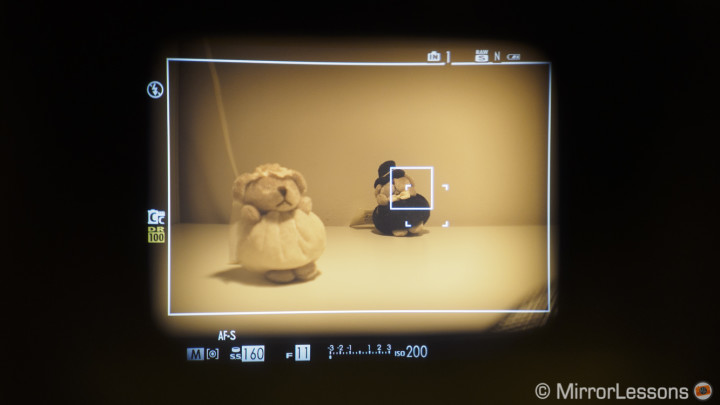
The OVF of the X100s/t also offers some help by displaying a bright white rectangle that corrects the parallax issue. It shows the real frame position when the shutter button is half pressed. The same goes for the AF point (make sure to enable the Corrected AF Frame in the Autofocus menu). The bright frame area covers 92% of the actual image now (90% on the X100S).
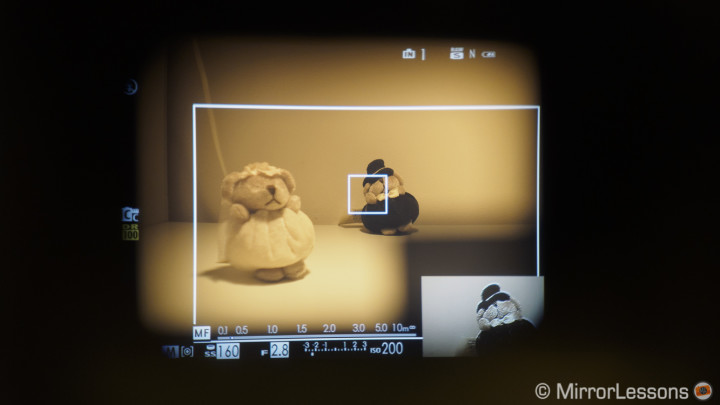
With the X100t, the major improvement concerning the OVF is what the “T” stands for: Telemeter. If you switch the viewfinder selector to the left, the camera activates a small LCD screen in the bottom right corner. This little screen shows an enlarged live view of the focus area. This is why Fuji call the X100T an electronic rangefinder (ERF) camera. With traditional rangefinders such as the Leica M, you achieve focus by aligning two superimposed and semi transparent images that appear at the center of the viewfinder. The X100t concept is similar but adds an electronic screen instead with a different positioning.
The Electronic Rangefinder option looks very interesting. The question is, when is it useful?
ERF and autofocus mode
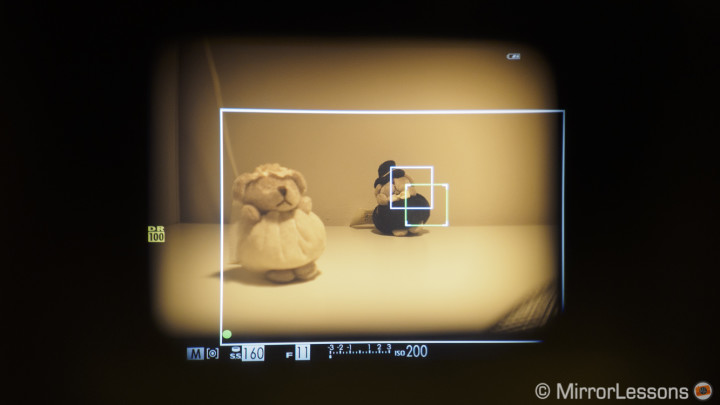
The ERF can be used in autofocus mode to check if the camera is focusing on the element you want when at a close distance. As stated before, the OVF displays a bright rectangle to help you see the parallax-corrected frame as well as two AF areas. The first one with plain lines is the focus point at infinity. The second one with the four corners is the focus point at the shortest distance. If you focus on different elements at various distances you will see that the green square that confirms AF locking will position itself between the two white square AF areas according to the focus distance. The two focus points can be moved together towards any of the 9 central points of the sensor (where the phase detection area is).
When you focus far away, there isn’t any problem but when you focus close, even with the Corrected AF Frame activated in the OVF, the camera will often focus on the background instead of the subject in the foreground. This happens especially if you want to focus precisely on a small element like a Christmas ball on a tree for example. This happens because the Corrected AF Frame is not 100% precise.

The camera could also refuse to lock (red square instead of green square) when you approach the shortest possible focus distance of the lens. It doesn’t matter how good you become at guessing the parallax or real focus point, it is a limit of the OVF itself and you will never be 100% sure unless you playback your picture after taking the shot. On the X100s, I would already have switched to the electronic viewfinder. On the X100t, I have the ERF option that shows me exactly where the camera is focusing, so I can aim at my desired subject with more precision, lock focus, re-compose and take the shot. It works and allows you to take advantage of the brightness and clear view of the optical viewfinder without having to switch over to the EVF.
ERF and Manual focus mode
The ERF becomes an interesting option for manual focus as well. With the X100 or X100s, manual focusing with the optical viewfinder is nearly impossible as you don’t have any reference as to what you are focusing on except the distance indicator displayed in the viewfinder. Now with the ERF, you can use the optical viewfinder while checking your focus point on the small screen in the bottom right-hand corner. You can magnify its view by pressing the rear dial or select one of the manual focus assists such as peaking or digital split image. The latter brings the whole experience the closest to a traditional rangefinder since you have to align the horizontal stripes of the image to have your image in focus. Moreover, when you turn the focus ring, the bright rectangle showing your frame moves in real time in the OVF.

So, a long story short, the X100t makes the usage of the OVF easier. The ERF compensates for some of the limitations of the optical viewfinder. However, I’ve found it distracting and this is perhaps its biggest limitation.
You basically have two distinctive screens in the same finder and the ERF is positioned in one corner. It is hard to focus on it while observing the whole composition. It might just be a question of getting used to it but it is a lot of information to check. With traditional rangefinders, the focusing mechanism is easier because what you need to check is at the center of the finder and thus, at the center of your composition. Here your eye has to focus on either the corner or the center of the viewfinder. So in my first week with the camera I tended to activate the ERF when it was absolutely necessary and then disabled it right away. Also, if you want to use the ERF often I advise that you turn off the “Preview Exposure in M mode” in the Screen Menu. That way, the ERF will always show a bright live view of your exposure. I don’t find the ERF useful to check the exposure anyway as it is small and only shows you a portion of your image. The metering indicator works better.
ERF and mixing auto and manual focus
The best combination I’ve found when using the OVF on the X100t is to keep the camera in Manual focus mode and use either the Instant AF option or the ERF.
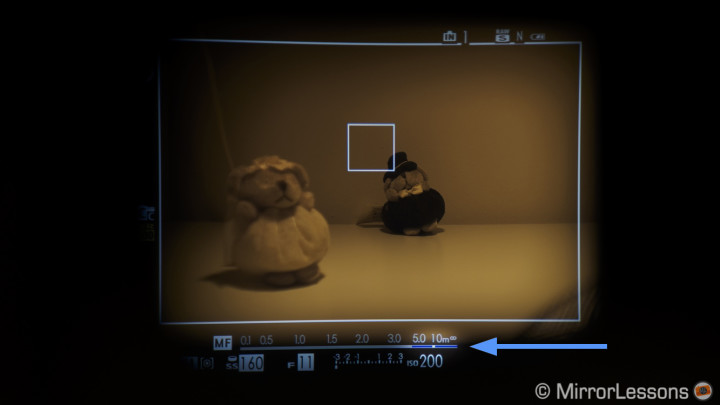
In Manual focus mode in good light, I use the distance scale that is available for both viewfinders. When you select a slower aperture, you will notice that on the distance indicator there is a blue line that enlarges when the aperture is slower. Then if you move the focus ring so that the blue line reaches the infinity mark on the right, you will know that for example at f/11, you have everything in focus from infinity to 5 meters approximately. This combination works especially well for street photography. I would set my aperture to f/11 or f/16, the shutter speed to 1/125s and ISO Auto with 800 as a limit.

Then if I have to focus closer, I have two options: activate the ERF and work with the focus ring or use the AEL/AFL button to quickly activate the autofocus. The ERF will help me make sure that I am focusing correctly with both methods. With the camera in MF mode, I can access both manual and autofocus instead of switching from one to the other with the dedicated switch button on the side. Also, the Instant-AF is more effective now because it works with the phase detection AF points instead of the contrast detection points like on the X100s.
I’ve found this to be a quicker way to operate the camera. You just have to get used to using a different button for the autofocus than the shutter release button. What could also be interesting is to leave the camera to AF-S mode but have manual focus activated as soon as I turn the focus ring. By the way, the latter is the AF+MF feature available on the X-T1/X-E2 and the latest firmware update. Why not bring it to the X100t as well?
Autofocus and other improvements
Now you might have read all the different configurations I came up with regarding the hybrid viewfinder and you might ask: why not use autofocus by default instead? What’s wrong with it?

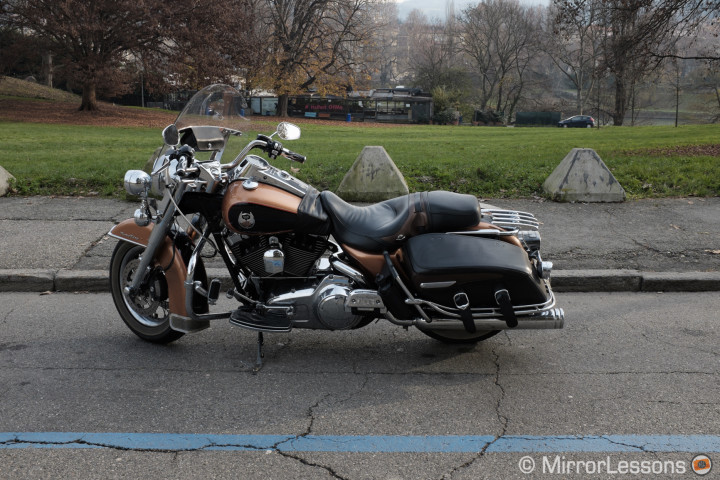
Well, the truth is that like on the X100s before it, the AF on the X100t cannot be trusted at 100%. Sometimes I suddenly see an interesting scene, take my aim and the X100T won’t focus right or will take a long time to focus. I set the AF setting to focus priority so when AF locking fails the camera won’t take the shot. It can be frustrating but at least I know something’s wrong which is better than discovering later that your picture has to be trashed. It doesn’t happen often but the thing is that it is hard to predict when it won’t focus. For example it happened in the scene below which has nothing extraordinary about it: a motorbike on a cloudy day but still in daylight. The photo shown below is the second attempt that was successful. The first one was more interesting because a runner was passing by but I missed it because the camera AF didn’t lock.
Now, there are a couple of settings that can help reduce the chances that something like this will happen. First, disable the eye sensor and use the OVF/EVF view on its own. I noticed that the eye sensor is slow to activate when you lift the camera to your eye and the autofocus will only work once the OVF/EVF is activated. Even worse, if while you lift the camera you half press the shutter button to wake the camera up (especially if it went into standby mode), the OVF/EVF may not activate at all. Another piece of advice is to turn off the “OVF power save” mode and to compensate you can leave the High Performance to off.
There is also a “Pre AF” option that will keep the autofocus active all the time but what the camera does is keep moving the lenses back and forth unless you turn it off completely. I’m afraid that it will drain more battery life. Considering that the X100t probably drains more battery life than the X100s, it might not be the best option. Also, even with the Pre AF on, the camera can still be slow to focus on occasion.

The reason for my frustration is that the X100t’s autofocus can actually behave very well. During the Santa show for the children of the Regina Margherita hospital, it worked like a charm. The X100t has the exact same autofocus system as the X-T1, which is not dissimilar from the X100s (same hybrid contrast and phase detection system, same AF points) but with the addition of the predictive AF function. The camera’s autofocus can follow a subject that is quickly moving towards or away from the camera as long as the selected AF frame remains on him. During the Santa charity event, I managed to track the “Santa bikers” without any particular problem even when using the OVF. This is perhaps the most noticeable improvement I saw on the X100t regarding AF performances. The buffer on the other hand with drive mode set to High (6fps) is not great and will fill up pretty quickly if you shoot RAW (less than 10 frames).
As for other nice features, I discovered that the X100t can be charged via USB but thankfully Fujifilm also includes a proper battery charger (Samsung, Sony: learn!). As such, I can charge two batteries at the same time if I don’t use the camera. The X100t also features an electronic shutter that will give you a completely silent mode and expand the shutter speed to 1/32000s which is useful if you want to shoot at f/2 outside in the middle of the day.
There is a lot of customisation as well. There are seven function buttons and 27 features to choose from. The four selector buttons on the rear can be used to either instantaneously change the AF point or individually assign a different function to each one. I chose the first option. Like the X30, you can also customise the 16 functions of the Quick Menu (Q button).
Conclusion
In this article, I mainly concentrated on a handful of aspects (hybrid viewfinder and autofocus). This is because these are the areas in which I really wanted to see an improvement. What’s more, every other aspect is basically the same as the X100s. I love the image quality, I love the size and form factor, I love the design, and I love the versatility this camera has despite being a fixed prime lens camera.

I will dig into the various autofocus settings to find the optimal setup later on as I want this camera to be as reactive as it can be. For now, I can say that while the autofocus works well in AF-C and works fine in AF-S, sometimes it can surprise you in a negative way. It isn’t perfect, and it isn’t as fast as other mirroless cameras.
The electronic rangefinder integration is a nice addition and has encouraged me to continue using the OVF for now. But I must admit that the electronic viewfinder remains a less complicated choice when you simply want to concentrate on your composition and your scene. You don’t have to think about activating anything according to your focus distance or your focus mode. The X100t also has an enhanced EVF with a shorter time lag, and a better frame rate (55fps) that remains constant in low light. It has an automatic brightness option and a natural live view setting that previews a RAW image instead of the film simulation mode selected. So while I don’t dislike the OVF, I also wonder how far Fujifilm will be able to push it when its EVFs are getting better and better.
The positive thing in all this is that the user can decided to use the combination he or she feels is the best. The users win, no matter what. And this is perhaps the X100t’s best-kept secret.




Yeah perhaps you are right what I wrote there doesn’t really make sense 😀
You mention you’d like to assign instant-af to the shutter button when using mf+af mode. If you think about it this would not work as after focusing, then recomposing, taking a photo would force the camera to refocus. Unless the focus point is aimed where you want it to be, big problem.
so the seperation of focus buttons is necessary.
Thanks for the feedback. Are you referring to a smartphone or tablet display mainly?
Great write up –enjoyable …
.Kindly consider a change in lay-out where-in the write up has a larger font size[at least as large as that in the Comments section ] and it occupies the entire display area ..rather than have the greyscale landscape peeping out at the reader from either side of the actual review matter …just a suggestion ..:)
Hi, honestly I haven’t noticed this difference in comparison with the X100s. I’ll keep this in mind during the next few days while using the X100T 😉
I don’t have the original X100 so I can’t compare but with the X100s the differences are not that huge in my opinion. If you are fine with your X100 than there is no need to upgrade 😉
Thanks Mathieu.always enjoy your Reviews
I was shooting the T for 4 weeks and came to similar conclusions. Beside more responsiveness etc, i have to say, i will keep the x100. Because NR above 1600 When shooting people is getting kind of ugly.
I also found that the x100 is not much slower , even in Low light its not bad.
What is your impression
Using the LCD display is difficult to check whether the picture is sharp when you’re shooting in RAW. Especially when it’s a wide scene whit small parts. You can not enlarge the image size to 100% (you can do it when shooting RAW+Fine, but that is not same file). Sometimes the picture looks like autofocus did not work well and was out of focus, but when you view photos on your computer, it turns out that they are sharp.
I was using the x100s before, and it seems to me that the preview in that camera work better and was much more useful.
Do you have the same problem? Any ideas how to solve it?
A Fuji rep told me that the T stands for Telemeter and the S stands for Speed.
The ‘T’ actually stands for ‘Third’ as the ‘S’ stood for ‘Second’.
No. The ERF is nice but for the rest I see very small differences from the X100s.
The big question, is it worth upgrading from X100S?
Stu probably not. The Oly 17mm and the 23mm of the X100T have the same angle of view. If I had the 17mm already I would stick with it.
Thanks Demian! Have a nice christmas!
Mathieu – Nice in-depth, well considered review (as always), but one comparative question; If you already had an OM-D with Oly 17mm 1.8, (similar size & focal length?), would you still spend the money on the 100T?
Thank you Mathieu for this well readable, balanced & informative review.
I always enjoy visiting Mirror Lessons! Thank you and Heather very much.
Demian
Thanks Ulf!
As always, your articles on photograpy are among the best. Regards Ulf.