• Skip to main content
  • Skip to primary sidebar
  • Archive
    • Camera Reviews
    • Lens Reviews
    • Accessory Reviews
    • In-Depth
    • Galleries
    • Guest Post
  • About Us
  • Our Websites
  • Contact Us
  • Privacy Policy
  • Youtube

MirrorLessons

Mirrorless camera reviews right at your virtual doorstep!

Tripods and supports

SystemGO by Benro: GoPlus Travel tripod review

03/08/2016 By Mathieu

Since starting MirrorLessons more than three years ago, we’ve reviewed almost every kind of accessory … except for tripods. There are a couple of reasons for this, the main one being the time and effort required to expand our professional network and receive samples from the various brands. On a more personal note, I admit that I’ve never been a big tripod aficionado. I only bring one with me when it is strictly necessary because I like to move about with as little gear as possible. The arrival of excellent image stabilisation on some mirrorless cameras didn’t help to change my mind either!

[Read more…] about SystemGO by Benro: GoPlus Travel tripod review

Filed Under: Accessory Reviews, Tripods and supports

Your mirrorless right at your fingertips – The B-Grip Uno Camera Holster Review

29/06/2015 By Mathieu

Alternative carrying solutions seem to have increased with the rise of mirrorless cameras. While having a comfortable bag or strap is often a must, using smaller and lighter gear also means that we can carry it in different ways, enhancing the user experience. Last month Heather tested the Peak Design Capture Pro, a product that allows you to attach your camera to a backpack or messenger shoulder strap as well as directly to your belt. Today, we are looking at another product that falls into the same category but with a different design.

[Read more…] about Your mirrorless right at your fingertips – The B-Grip Uno Camera Holster Review

Filed Under: Accessory Reviews, Tripods and supports

Review of the Peak Design Capture PRO camera clip – A handy camera carrying solution 

01/05/2015 By Heather

Since photography first became accessible to the masses, companies have been looking for innovative ways to make cameras more portable. While traditional camera bags and straps remain the most popular option, a number of new products have sprung up over the years that have changed the way we carry around our cameras, including holsters, belts bags, interchangeable straps and clips.

The most recent solution we’ve been testing on our mirrorless cameras is the Peak Design’s flagship product, the CapturePRO camera clip. Peak Design is one of the main innovators in camera carrying solutions, having developed popular products such as the versatile Anchor Link system, Slide strap and CapturePOV, just to name a few.

The CapturePRO kit comes with the following items: the all-aluminium Capture clip, PROplate, two adapters for Manfrotto RC-2 tripods with four screws, and a hex key to screw the plate onto the camera.

peak design capture pro camera clip review
What you get in the CapturePRO clip kit

According to the Peak Design website, the CapturePRO camera clip can withstand up to 200 pounds of force. Though we all like impressive statistics, this one isn’t particularly relevant as you probably won’t want more than 3 pounds hanging from your belt or strap at one time. It is however a testament to its heavy-duty construction.

capture pro camera clip review
The CapturePRO camera clip with tripod clamp

What you really need to consider are the dimensions of your camera-lens combo. If you attach the clip to your backpack strap, you can comfortably carry around most camera and lens combinations but if you fasten it to your belt or handbag strap, it is best to mount a lens that isn’t too long or bulky so that you are free to move about.

A small thing to note is that if the lens barrel extends below the base of your camera, it is impossible to attach the clip lengthwise. This is demonstrated in the example below featuring the diminutive Fujifilm X-A2 and the fairly bulky 16-55mm f/2.8.

capture pro camera clip review
The CapturePRO won’t fit if the lens extends beyond the base of the camera

There is a bit of a learning curve to understanding how to attach the clip to your belt but once you’ve got the hang of it, it’s very straightforward. (Keep in mind that the maximum dimensions for the belt or strap to which you attach the clip are 3 inches (7.6 cm) wide and 0.5 inches (1.3 cm) thick.)

  1. Loosen the two large black screws on the clip until they almost come off.
  2. Unhook the upper plate by pulling it away from the left-hand screw. This step can be a bit fiddly.
  3. Slide the clip onto your belt or strap with the red spring facing downward.
  4. Reconnect the upper and lower plates and tighten the black screws.
peak-design-capturepro-1
Step 1
Step 2
Step 3
Step 4

Then comes the step of sliding your camera (with PROplate attached) onto the clip:

  1. Attach the PROplate to the camera with the hex key. Make sure it’s screwed on tightly.
  2. Rotate the red spring on the clip so that it can be pushed like a button.
  3. Slide the camera onto the clip with the lens facing downward.
  4. Rotate the red spring so that it can no longer be pushed. This will lock the camera in place.
Step 1
Step 2
Step 3
Step 4

The fact that I was using a rented lens probably didn’t help but for the first day I couldn’t muster the courage to release my grip on the camera, even though it was securely attached to my belt. This anxious stage soon passed however as I gained confidence in the system and my ability to use it. I’ve found it especially good for long hikes, where wrist straps are impractical and neck straps swing back and forth, putting your gear at risk. It also eliminates the hassle of dealing with a tangled mess of bag and neck straps if you use more than one body.

peak design capture pro
With the CapturePRO attached to my backpack

Perhaps the aspect I enjoy the most about the system is that it takes the pressure off my shoulders and back, which after a day of shooting sometimes ache if I use a neck strap. I feel as if the weight of my gear is more evenly distributed across my body. This is true whether I attach it to my belt, handbag strap or backpack.

peak design capture pro
With the CapturePRO attached to my camera bag strap

The CapturePro PROplate is also compatible with Peak Design’s proprietary Anchor Link system, which means you can easily switch between using your camera with the CapturePro and any one of Peak Design’s straps. If one thing can be said about Peak Design, it truly has inter-compatibility down to a fine art.

peak design capture pro
The PROplate attached to the Peak Design Slide via the Anchor Links

One small limitation is that placing the clip against your hipbone can sometimes hurt. It is a shame as the hip would theoretically be the most ideal position for the clip, being out of the way of your leg but not so far back that you can’t reach your camera. I usually end up attaching it just to the left of my hipbone when I’m out on a casual walk or to my backpack strap when I’m hiking.

The PROplate that comes with the kit can also function as a tripod clamp for certain tripod models. It is compatible with all ARCA-type tripod heads on its own and with the adapters, it will fit most Manfrotto tripod heads with the RC-2 denomination. Unfortunately we own neither so this wasn’t a functionality we were able to test.

DMC-LX100, 1/20, f/ 4/1, ISO 800
The adapters for Manfrotto RC-2 tripod heads


thumb-up 
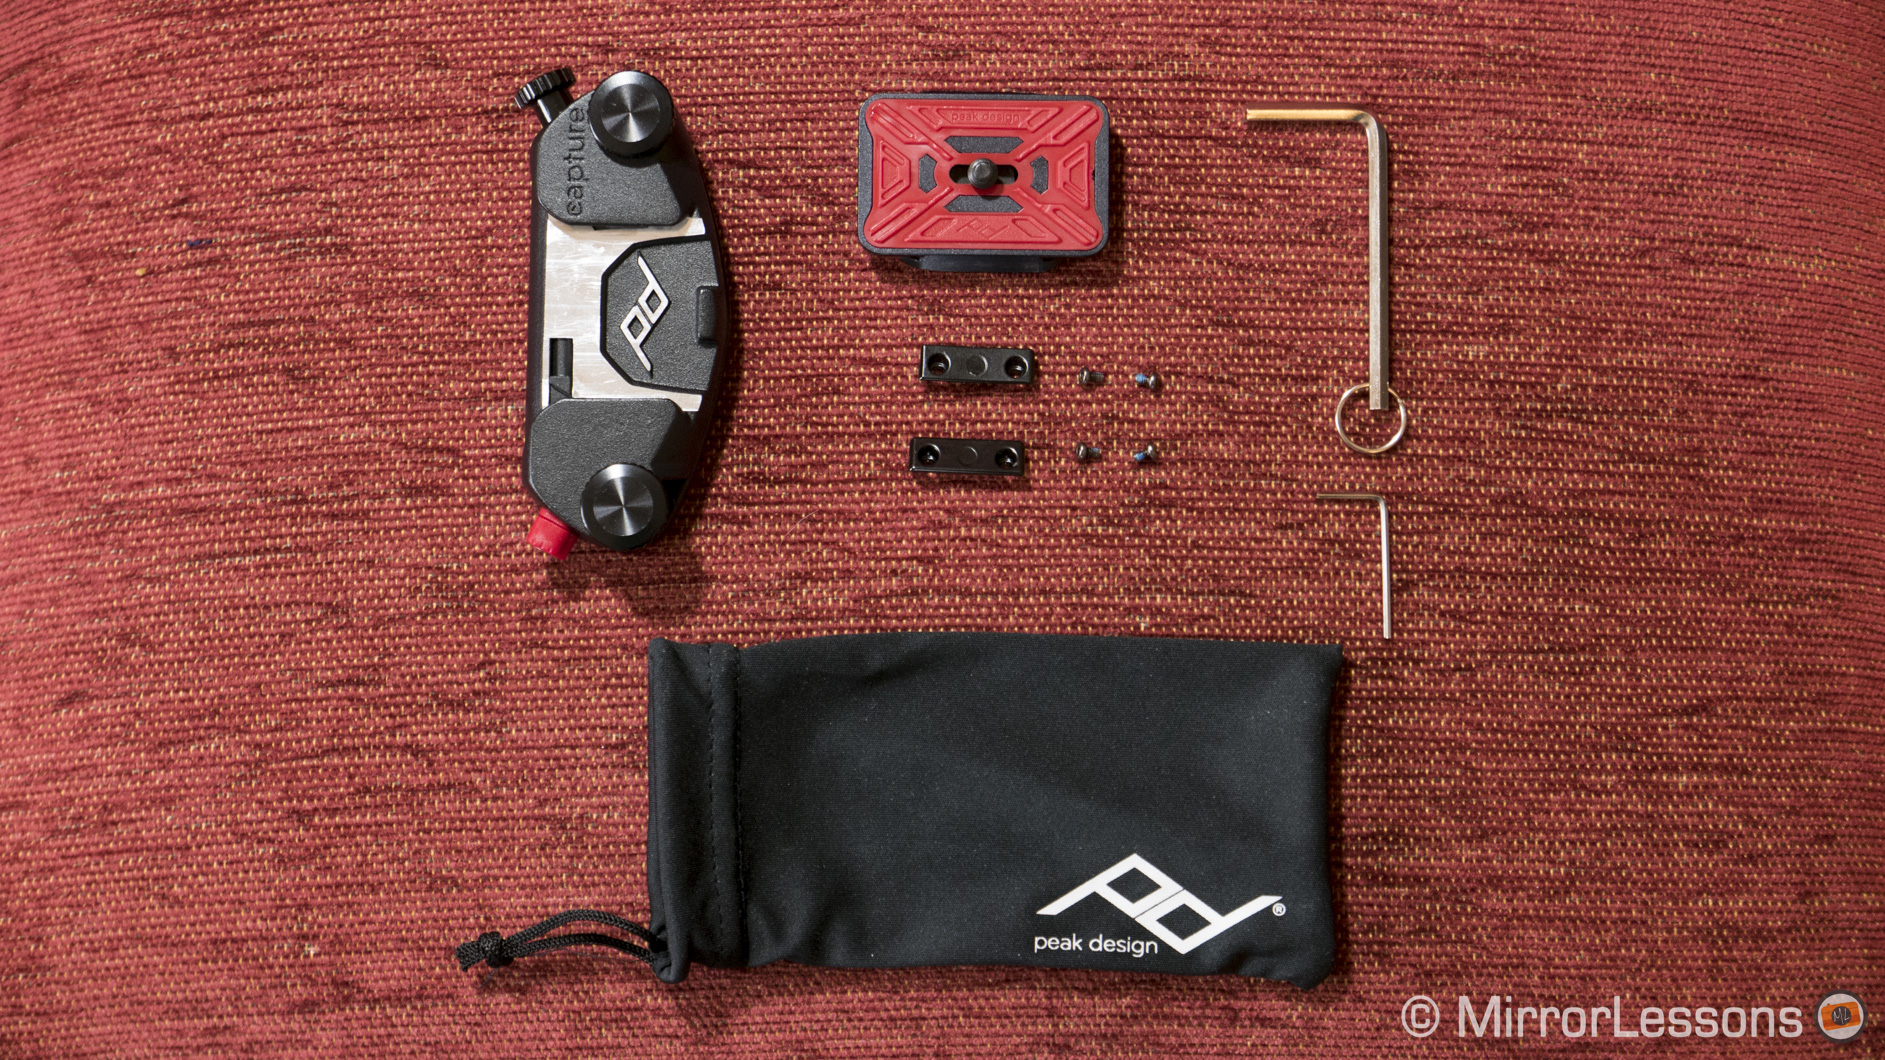
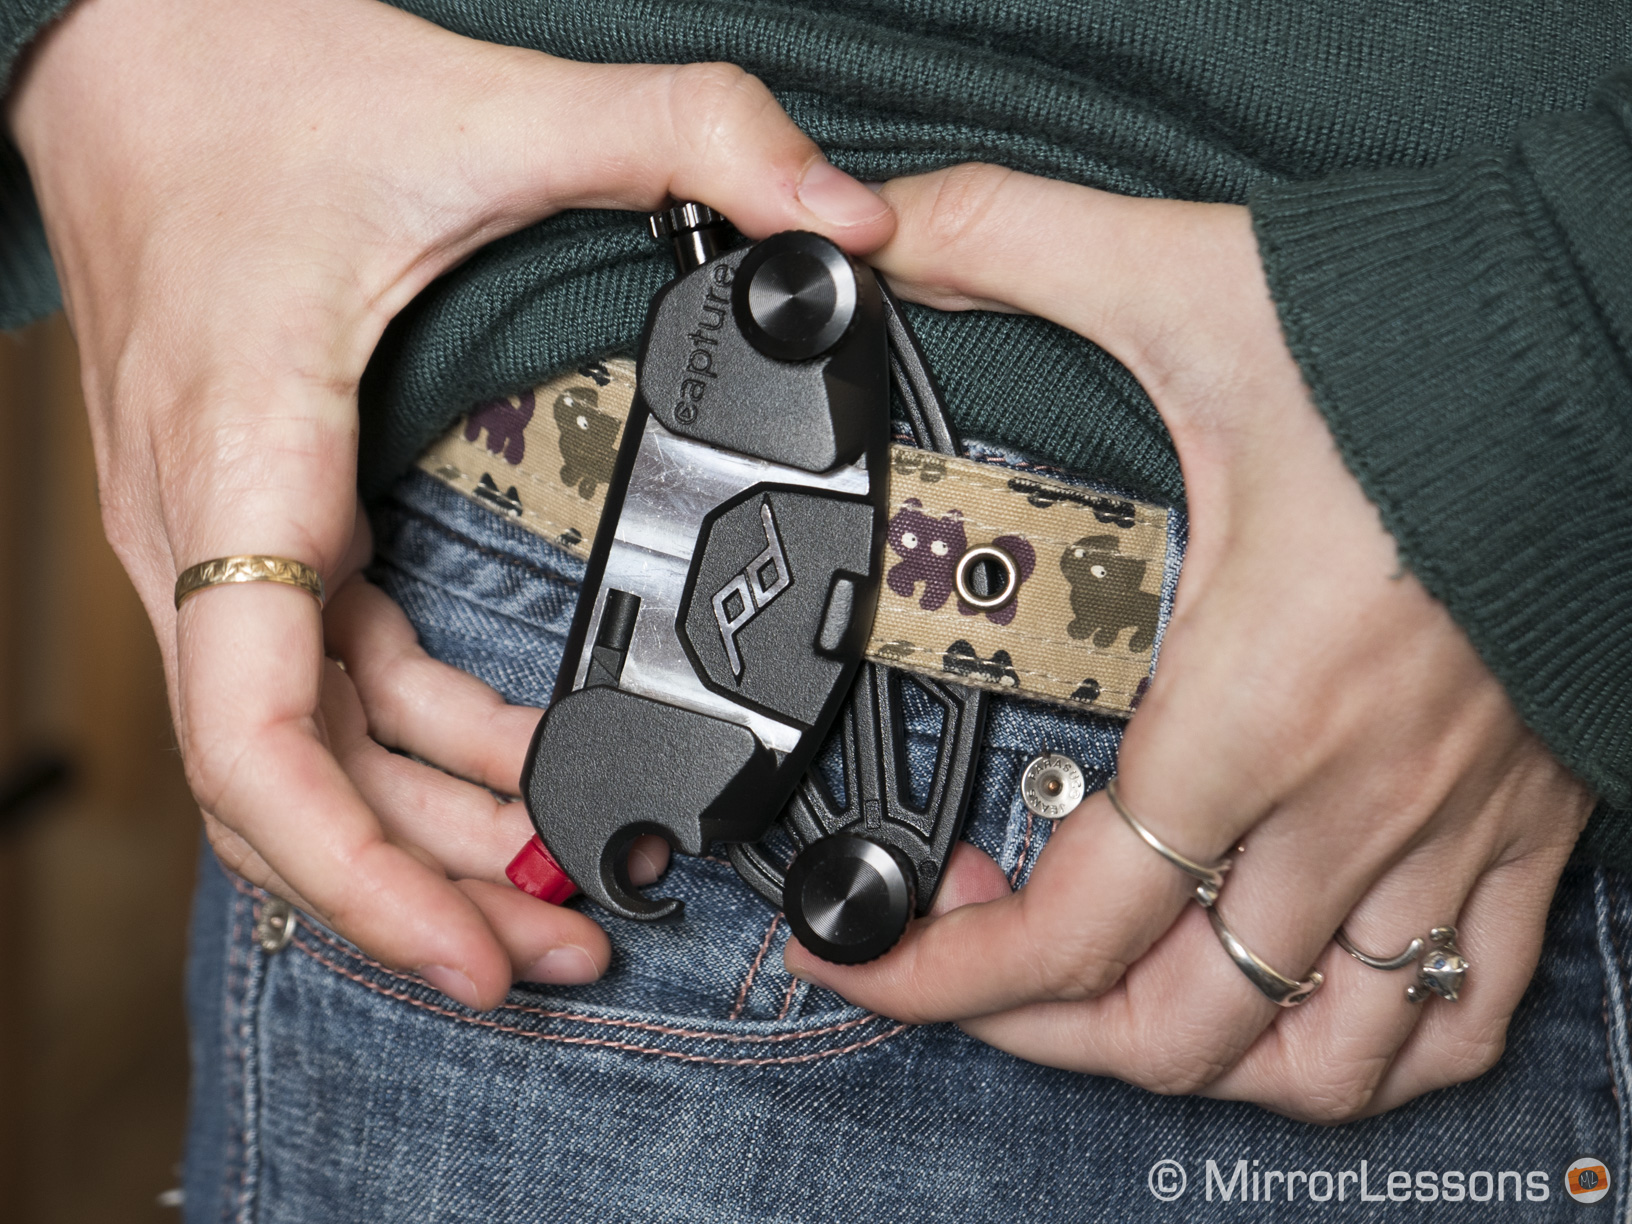
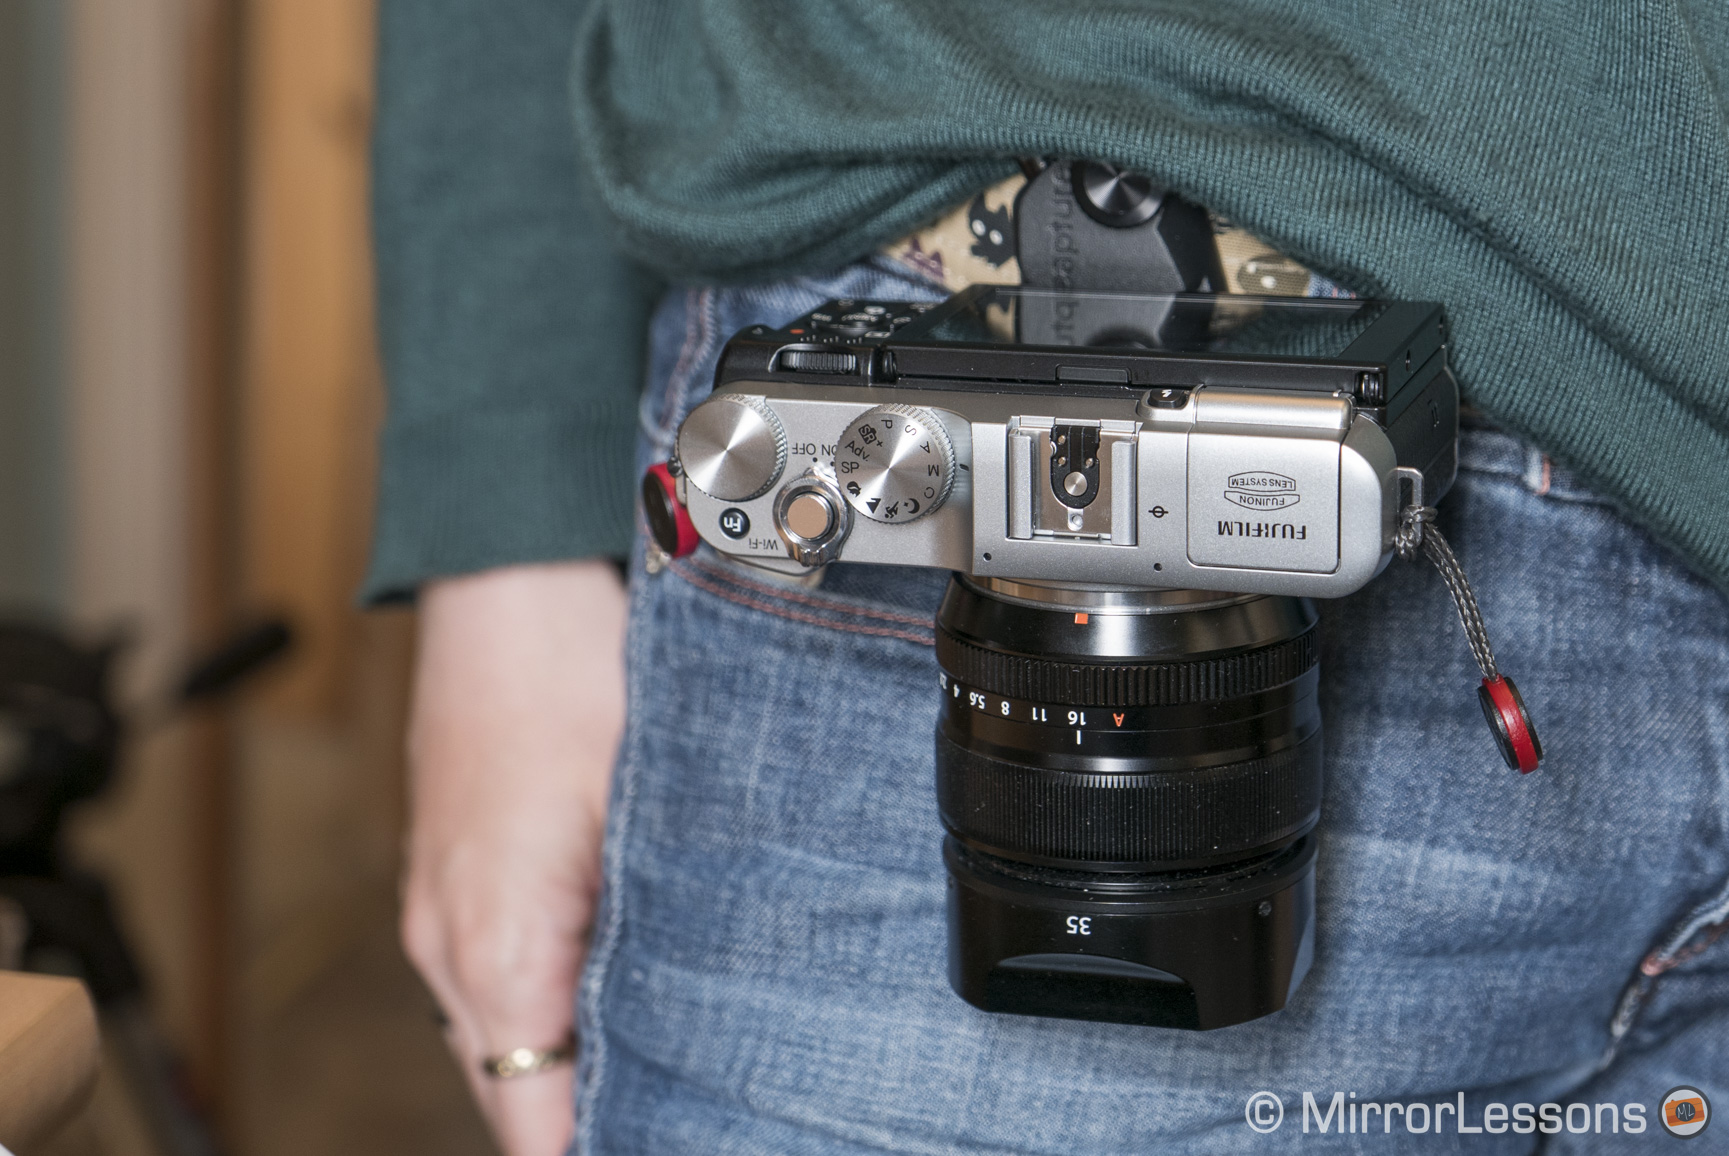
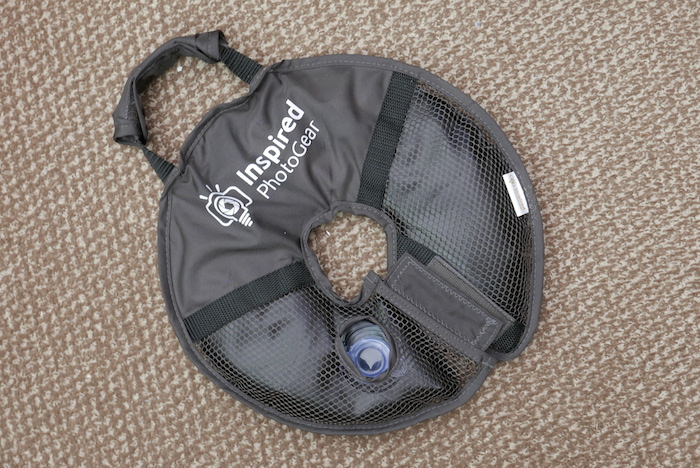
What I like about the CapturePRO:

  • An innovative carrying solution for all mirrorless cameras, big and small
  • Takes all pressure off of your shoulders and back
  • Small, light, durable and portable
  • Easy to use once you’ve got the hang of the system
  • Can be attached to belts, backpack straps, bag straps, and more
  • Can be used as a tripod clamp for certain tripod models
  • Is compatible with Peak Design’s anchor link system

thumb-down What I don’t like about the CapturePRO:

  • Can hurt your hipbone a little if used with a belt
  • Not compatible with all tripods

Want to find out more about the CapturePRO and Peak Design’s other innovative products? Then be sure to check out their official website!

Filed Under: Accessory Reviews, Tripods and supports

Review of the Lollipod – The “take-with-you-everywhere” tripod for small mirrorless cameras

12/03/2015 By Heather

When you hear the name Lollipod, it is difficult to suppress the urge to start singing that catchy 1950s tune by the Chordettes. Now that I’ve got the song permanently stuck in your head, we can take a look at the tripod that is as “lightweight” as the song it brings to mind!

What is the Lollipod?

The Lollipod is a casual carry-around tripod constructed from pure lightweight aluminium and hardened plastic. It has been built to support any camera or smart device that weighs less than 420 grams, including smaller mirrorless cameras such as the LX100, RX100 series, X30 or G7X.

Lollipod review
Using the LX100 on the Lollipod

Based on a photographer’s light stand, it has three short legs and a long pole that extends to a height of 113 cm. Included in the package are a net carrying bag and a stabilisation net that sits under the tripod legs. You can choose between six jolly colours.

Is it portable?

At a mere 320 grams and 32cm in length when retracted, the Lollipod is the lightest, most portable tripod we’ve ever tried. It comes with a handy net bag which you can use to either store the tripod or carry it around via a clip that attaches to belts, zippers and bag handle attachments. I personally found that latching the bag onto my coat pocket zipper was the most convenient solution for when I was out walking.

Lollipod review
The Lollipod attached to the zipper on my jacket

The fact that it is so small and light means that you will be more likely to take it out on walks or pack it in your hand luggage for short vacations. When it is attached to my coat, I barely even notice that I am carrying it.

Is it practical?

The Lollipod is practical for some applications, but less so for others. This is due to the very characteristic that makes it so appealing – its lightweight build.

First of all, even a moderate wind will cause the tripod to sway back and forth, particularly when it is extended to its full height. The same happens when you press down on the shutter release. I thought that a 2-second timer might solve the issue of the micro-movements generated by my hand, but even then it would continue to sway long after I’d pressed the shutter button.

Lollipod review
The Lollipod standing at its full height of 113 cm

For this reason, I only ever extended the tripod to its full height for shots where I would have normally used a monopod. It worked quite well for bracketing for example.

Lollipod review
Using the Lollipod as a pseudo-monopod

The swaying was greatly reduced however when I retracted the tripod to half its full height, and it disappeared completely when I used only the bottom pole. Both long exposures and time lapses are possible when the tripod is set to its minimum height on a calm day.

Lollipod review
If you use the Lollipod at half its full height, it is much more stable

Another point in its favour is that you don’t have to twist the camera onto the mount. Instead, you set the camera on top of the mount, align the tripod head screw with the receptacle, and rotate a dial on the side which locks the camera in place. Attaching a camera to a tripod head has never been easier.

I was also surprised to learn that the Lollipod can be used in both landscape and portrait modes thanks to its very flexible tripod head.

Lollipod review
Using the Lollipod in portrait mode

Is it durable?

I won’t mince words in this section: if you are looking for a tripod that will last you years and stand up against even the harshest weather conditions, the Lollipod is not for you. Rather, it is an inexpensive solution for people who want a little more stability than a hand-held shot would give.

While the aluminium poles and plastic joints seem durable, the knobs that adjust tightness are notably more fragile. For example, the knob that adjusts the position of the head developed a crack down the side when I tried to tighten it the first time I used the tripod. It is still usable but I’ve learned not to strain the knobs too much.

DMC-LX100, 1/20, f/ 28/10, ISO 800
The cracked knob to adjust the tightness of the tripod head

The most durable part of the Lollipod is most certainly the tripod head itself. It is made of hardened plastic and features a flat layer of textured rubber around the screw to protect your camera and keep it in place.

DMC-LX100, 1/50, f/ 17/10, ISO 800
Tripod head with screw and dial on the side

The Lollipod has been designed to support a maximum weight of 420 grams but it is possible to use slightly heavier cameras as long as they have small and flat primes. I had no trouble using it with the X100T, for example, which is 440 grams. In the case of larger premium compacts with zooms like the LX100, the tripod head will slump a little under the frontal weight if you fully extend the zoom, changing your composition.

Is it easy to use?

The Lollipod is very easy to use and adjust. The aluminium poles slide up and down very smoothly and the legs are easy to extend. Since there aren’t any tightening mechanisms on the legs or poles, they rely on friction to stay in place.

Lollipod review
The legs and poles stay in place with friction

The additional stabilising net is also easy to attach. You simply slide the three plastic hooks into the holes on the legs and fill the net with heavy objects like rocks or sand. The net will stop the tripod from blowing over but won’t stop it from shaking.

Lollipod review
The stabilisation net attached to the legs

Note: if you want even more stabilisation for the lollipod, or any tripod for that matter, you may also want to consider the InspiredPhotoGear WaterWeight (pictured below). Fashioned in a doughnut shape so that it slides onto your tripod, it can be filled with either water or sand, and can easily be wrapped up and stored inside your camera bag or carried around with the attached handle. (Keep in mind that you’ll need a small funnel of some sort to fill it up efficiently.)

waterweight tripod
InspiredPhotoGear WaterWeight

Is it priced right?

The Lollipod is one of the most economical options out there for people who want to engage in casual tripod photography. You can find it on InspiredPhotoGear.

Conclusion

Lollipod review
The Lollipod and the LX100 at the beach

As I stated at the beginning of this review, the Lollipod isn’t suited for the rugged lifestyle. It is however a fun, easy-to-use and economical alternative for anyone who owns a small mirrorless camera and is interested in dabbling in the world of tripod photography. Most importantly, it is the kind of tripod you wouldn’t hesitate to bring along even on the shortest of outings. That’s something I can’t say about many of the other tripods I’ve used in the past.

thumb-up 
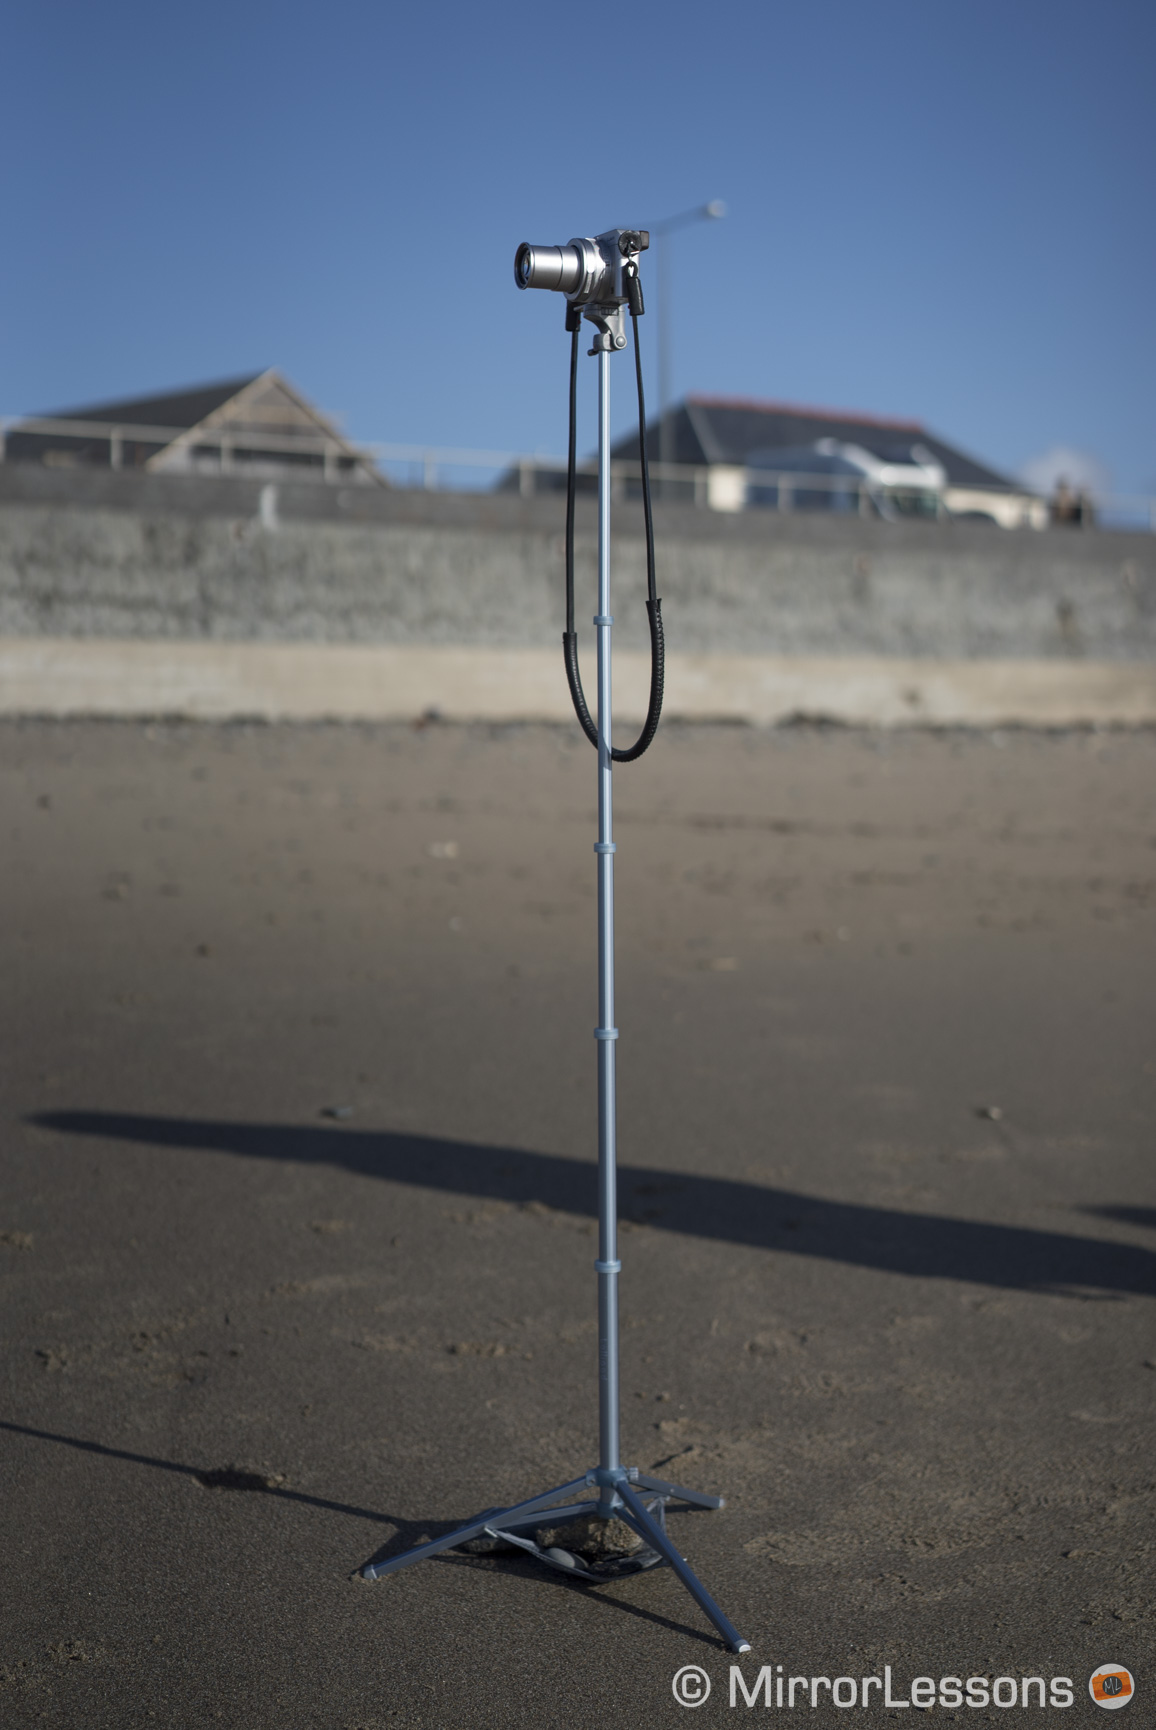
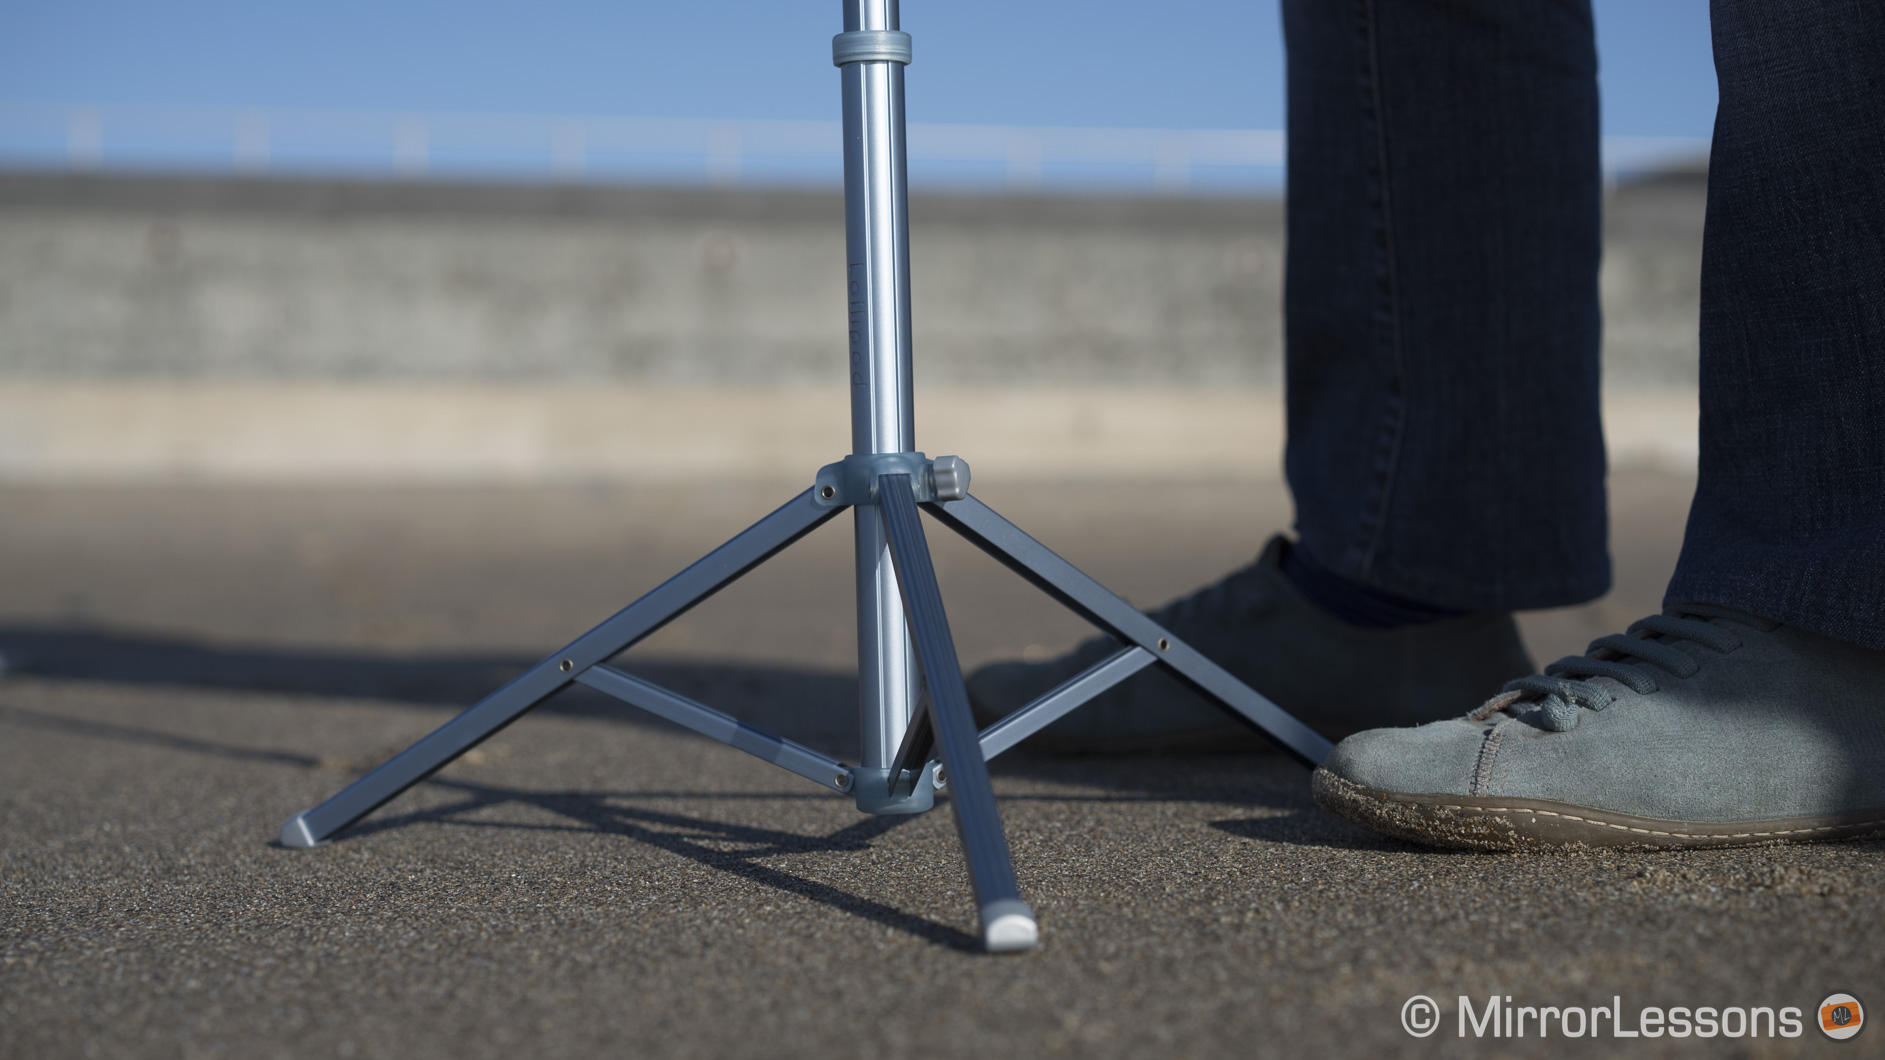
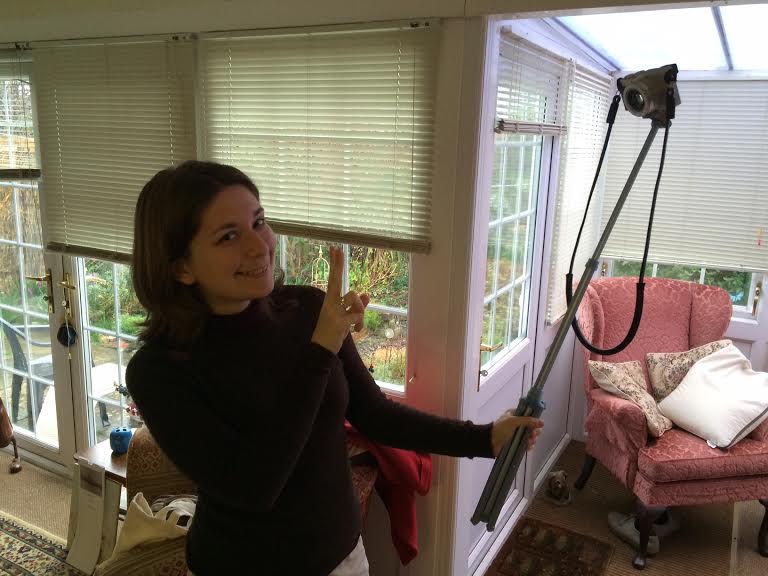
What I like about the Lollipod:

  • lightweight and portable
  • very easy to use and adjust
  • poles and tripod head are well-made
  • very economical

thumb-down What I don’t like about the Lollipod:

  • a bit too light for many kinds of photography
  • sways back and forth at full length
  • some parts are fragile such as the adjustment knobs
Hey, it can also be used as a selfie stick! ;)
Hey, it can also be used as a selfie stick! 😉

Do you own the Lollipod? If so, share your thoughts about it below!

Filed Under: Accessory Reviews, Tripods and supports

LEE Little Stopper, HandlePod and Olympus Pen E-P5: Light gear for long exposures

24/03/2014 By Heather

Though I’ve always had a fondness for long exposure photography, my interest in seriously experimenting with it myself first emerged when I came across FlixelPix’s excellent article about using the LEE Seven5 System with the Fujifilm X100s. In his article, he speaks about his initial outings with the Big Stopper, a 10-stop ND filter for daytime long exposures, and shares what he calls “test shots,” though I’m sure you’ll agree they are deserving of a better title than that! 🙂

Up until recently, the Big Stopper had been the only long exposure option from LEE for compact system cameras. However, complaints that 10-stops was too much for sunrises and sunsets led the company to produce a second filter, the 6-stop LEE Little Stopper, which is the filter I spontaneously ended up ordering at the UK Photography Show a couple of weeks ago.

[Read more…] about LEE Little Stopper, HandlePod and Olympus Pen E-P5: Light gear for long exposures

Filed Under: Accessory Reviews, Filter Reviews, Tripods and supports

  • Page 1
  • Page 2
  • Go to Next Page »

Primary Sidebar

Reminder

We have moved! Our latest reviews can be found on Mirrorless Comparison and YouTube.

DISCLAIMER & COPYRIGHT NOTICE

Heather Broster is participant in the Amazon Services LLC Associates Program, an affiliate advertising program designed to provide a means for us to earn fees by linking to Amazon.com and affiliated sites.

Heather Broster is a participant in the Amazon EU Associates Programme, an affiliate advertising programme designed to provide a means for sites to earn advertising fees by advertising and linking to Amazon.co.uk.

Heather Broster and Mathieu Gasquet are also participants in the following affiliate programs: B&H Photo Affiliate Program, Ebay Partner Network, Skylum (Impact Radius), Expert Shield, The Inspired Eye, and Mediterranean Photo Tours.

To read more information, visit our full Disclaimer page. Thank you!


© HEATHER BROSTER/MATHIEU GASQUET AND MIRRORLESSONS, 2013-2024

Unauthorized use and/or duplication of this material without express and written permission from this blog’s author and/or owner is strictly prohibited. Excerpts and links may be used, provided that full and clear credit is given to Heather Broster/Mathieu Gasquet and Mirrorless Comparison with appropriate and specific direction to the original content.