• Skip to main content
  • Skip to primary sidebar
  • Archive
    • Camera Reviews
    • Lens Reviews
    • Accessory Reviews
    • In-Depth
    • Galleries
    • Guest Post
  • About Us
  • Our Websites
  • Contact Us
  • Privacy Policy
  • Youtube

MirrorLessons

Mirrorless camera reviews right at your virtual doorstep!

Guest Post

10 Days Around Iceland with a Mirrorless Kit – Guest Post by Chris Corradino

12/08/2015 By Heather

It was the trip of a lifetime, 10 days around the beautiful country of Iceland. Despite the promise of spectacular landscapes and wildlife, I did the unthinkable and opted to leave my full frame Canon camera home. I still took pictures of course, turning out over 7000 captures.

[Read more…] about 10 Days Around Iceland with a Mirrorless Kit – Guest Post by Chris Corradino
Filed Under: Guest Post

How I Light Paint Epic Milky Way Photos with the A7r – Guest post by Gavin Hardcastle

28/07/2015 By Heather

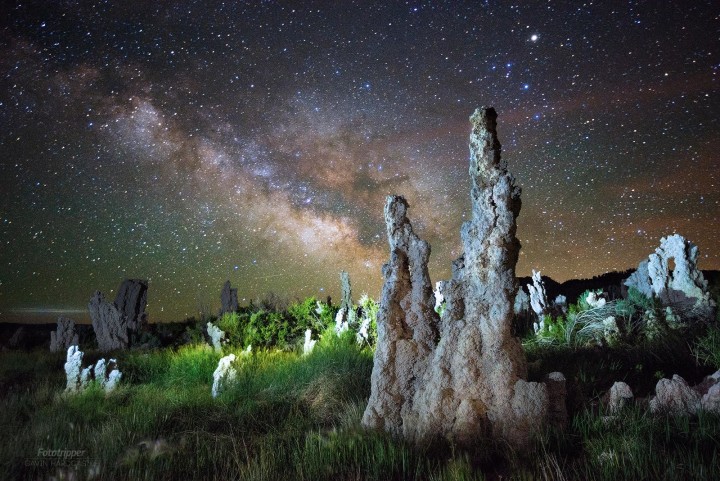
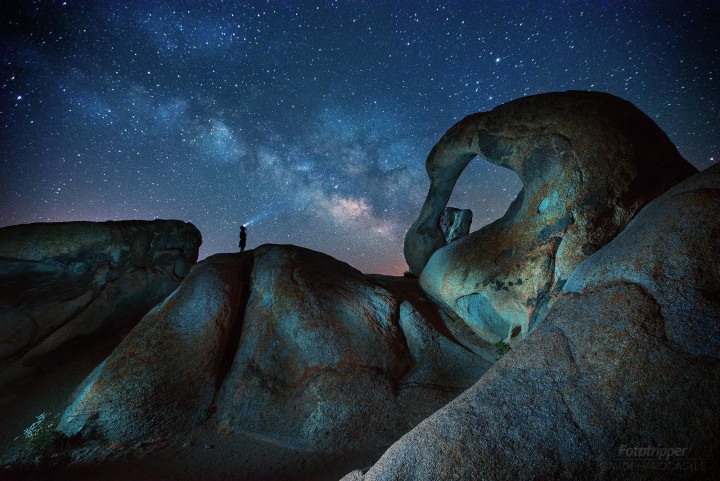
If you’ve ever tried light painting in your astrophotography, you’ve probably discovered how ugly and unnatural artificial light can often look. One of the questions I get asked most often is how I manage to get such clean and atmospheric light painting in Milky Way images.

Aside from using an awesome camera (in my case the Sony A7R), there is a certain method that I use to capture every part of my composition in a way that gives me maximum image quality and lots of control over light.

One Exposure vs. Multiple Exposures

how to take milky way photos

If I want the absolute maximum image quality in my Milky Way light painting images, I’ll need to shoot multiple exposures each with different light painting techniques and then combine those in Photoshop. It’s possible to get a really beautiful Milky Way image in just one exposure but I’ll have to accept the noise and general lack of image quality.

I’ve found that a lot of astrophotography photo contests insist on having the shot made with just one exposure so it’s a good idea to aim for this as a standard.

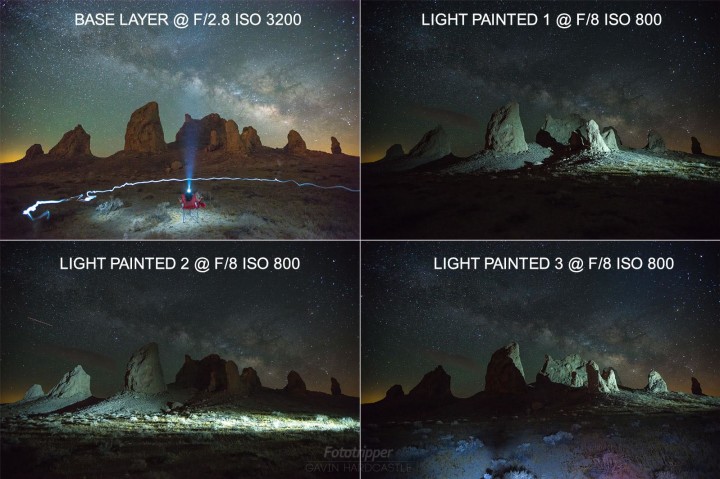
I’ll always shoot one exposure to create what I call my ‘Base Layer’. This is the one shot that I’m going to light paint as if I only had once chance to get it right.

I’ll then shoot additional exposures that are purely for my light painted foreground and nothing else. I combine those in Photoshop to get the perfect balance.

Shoot Your ‘Base Layer’ With ‘Bounced Light’

sony a7r astrophotography

My ‘base layer’ will either be my finished shot if I plan on entering a strict photo contest or it’ll be my base layer onto which I can add additional light painted exposures to get maximum image quality.

When shooting I use my widest aperture (like f/2.8), focus on a star and take a 30″ exposure when it’s fully dark and the stars are really clear.

For the ‘base layer’ image I will rarely use direct light when light painting. Most often I’ll bounce my 300 lumen headlamp off another surface such as a wall, floor, tree, rock etc. The reason I bounce the light is because it becomes much softer and weaker and will balance better with the light I can see in the Milky Way. Bounced light that I can barely see with the naked eye will be extremely bright to the cameras sensor when set to ISO 3200.

I find that if I point my headlamp directly up into the air above my head and then angle it down ever so slightly, the scene before me will be gently illuminated by that soft light at a low angle.

I’ll also hold the headlamp behind my back and slowly pan it from side to side. If my foreground objects are fairly close and not too large (like a medium sized tree) this creates a lovely soft light from a very low angle.

During a 30″ exposure, that soft light can look very pleasing in the final image.

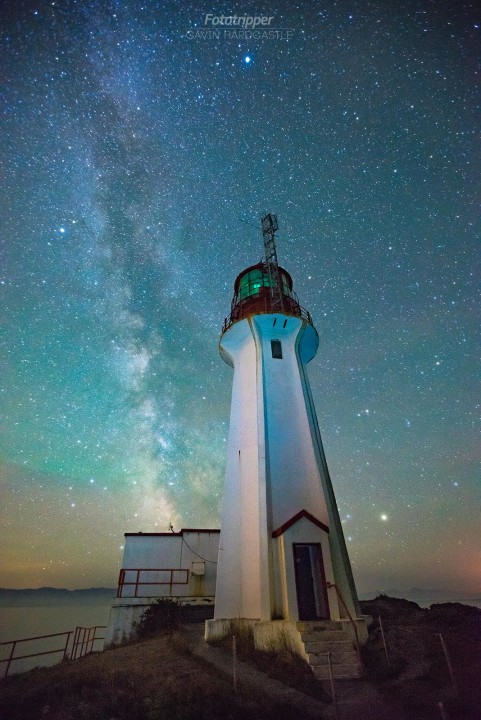
how to take milky way photos
This is an example of soft, bounced light for my ‘base layer’. I held the 300 lumen headlamp above my head pointing almost vertical. Processed with the ‘Lighthouse – Neutral’ preset from Gavin’s Milky Way Lightroom Presets.


Shoot Your Additional ‘Light Painted’ Exposures

If I’ve decided that I really can’t get the perfect shot with just one exposure I’ll have to shoot additional ‘light painted’ exposures. This is where the magic happens. I’ve shot my ‘base layer’ and it looks great but the foreground is really noisy and there’s only so much of that I can clean up with noise reduction. So here’s how I get around that.

Without moving the camera in any way, I change my ISO to 800 and my aperture to f/8. I don’t change any other setting.

how to photograph milky way

I now shoot another 30″ exposure while shining my light directly at one small part of my composition. I don’t try to light paint the whole scene, I just focus my beam on one area. This will result in an image that is mostly completely black but with a nicely illuminated area where I directed my beam.

I then repeat this process several times until I’ve lit all of the important surfaces in my composition and have an exposure for each.

Post Processing Milky Way Images

For the base layer, I’ll always use one of ‘Gavin’s Milky Way Lightroom Presets‘ to get the right colour hue, noise reduction, sharpening and basic enhancements that make that base layer pop.

To combine the additional exposures where I light painted each area of the composition, I’ll process those with the exact same Lightroom preset but this time I’ll remove the noise reduction. I then open all of my processed images in Photoshop and layer all of the ‘light painted shots on top of the ‘base layer’.

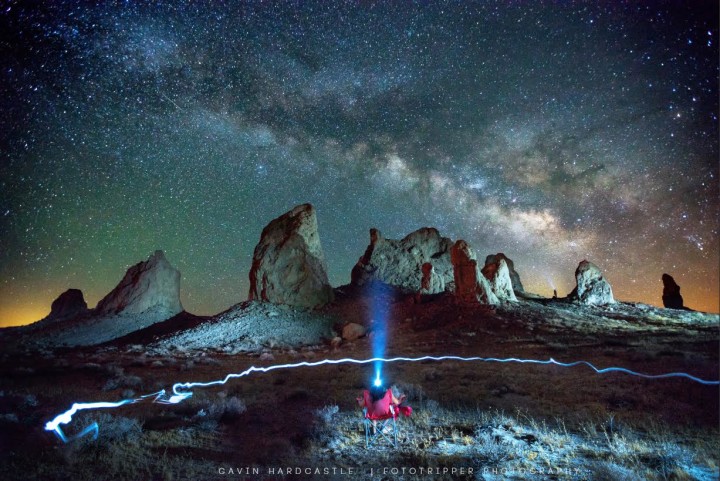
Once all of the images are placed on top of the ‘base layer’ I’ll then change the layer Blend Mode to ‘Lighten’ and BAM! I can now see all of my images combined.

sony a7r milky way

To get the perfect blend of ‘base layer’ and ‘light painted’ layers I’ll use Photoshops ‘Brightness / Contrast’ tool to darken the ‘light painted’ layers so that they blend more naturally with the base layer. I don’t change the opacity of the ‘light painted’ layers because that will just reveal the noisy dark areas of the ‘base layer’ underneath – and I hate noise.

With just a few quick tweaks the image is ready to be exported as a TIFF or JPEG and shared with the world.

Give it a Try

It takes a little bit of practice to get it right but once you’ve done it a couple of times you’ll get better very quickly.

Additional Shooting Tips

  • Use a Tripod
  • Shoot in Tungsten/Incandescent White Balance
  • Focus on a star using ‘Live View’
  • Use a blue light headlamp that has around 300 lumens or more
  • Turn off ‘Long Exposure Noise Reduction’
  • Don’t move your camera or tripod between shots

If I’ve missed anything please feel free to post your questions and I’ll be happy to answer.


Gavin Hardcastle is a fine art photographer, writer and instructor from BC, Canada. Become a better photographer today with his free photography guides and photography tutorials. You can learn from Gavin directly at his global photography workshops in some of the worlds most spectacular locations. Upgrade your post processing skills with his online video tutorials for Photoshop and Lightroom.

Filed Under: Guest Post

The Champions Go for a Drive – Guest Post by Hugh Hastings

03/06/2015 By Heather

All images are property of Hugh Hastings and used with permission.

The time is half-past-high noon in posh south west London and have I am standing in a fenced-off part of high value real estate being pelted by sticks of celery from some of the 100,000 people gathered here.

It’s the day after the end of the English football season and the new champions, Chelsea FC, are about to go on their open top bus victory parade through the closed-off streets of Fulham. My job is to walk in front of the convoy of three buses on their mile-long journey and capture images of the team celebrating. I am the only photographer accredited by Chelsea to this position and for company I have just twenty-two security guards walking alongside me in strict v-shaped formation.

[Read more…] about The Champions Go for a Drive – Guest Post by Hugh Hastings

Filed Under: Guest Post, Mirrorless on the Job - Guest

The Reinterment of King Richard III at Leicester Cathedral – Captured with the Panasonic LX100

30/03/2015 By Heather

The following is a guest post written by amateur enthusiast Peter Glyn who had the opportunity to attend the reinterment of King Richard III on Thursday, March 26th 2015. Though he usually uses a Lumix FZ48, a compact super zoom camera, he had the chance to take the Panasonic Lumix LX100 to this special event. Unfortunately, he was not allowed to take pictures inside the cathedral but he took a number of images of the proceedings before and after the ceremony in Leicester. To find out more about Peter’s experience, be sure to check out his dedicated article about the event!

[Read more…] about The Reinterment of King Richard III at Leicester Cathedral – Captured with the Panasonic LX100

Filed Under: Guest Post

Shooting Boudoir with the Fujifilm X-T1 – Guest Post by Jay Farrell

17/03/2015 By Heather

My name is Jay Farrell, a Nashville, Tennessee-based journalistic wedding, portrait, and fine art/boudoir photographer, and it’s almost been a year since I decided to switch to mirrorless exclusively. It all began after buying my first Fujifilm X-T1 with a battery grip and the 18-55 kit lens in May 2014. After shooting my first wedding with it, I added a second X-T1 with the battery grip that I found used at my local camera store with only 300 frames on it. Soon after I bought the two Zeiss Touits, the 32mm 1.8 and 12mm 2.8, and not long after, the 56mm f/1.2. Recently I picked up a 23mm 1.4, which will be a major player for wedding photography and boudoir sessions, especially in confined areas.

[Read more…] about Shooting Boudoir with the Fujifilm X-T1 – Guest Post by Jay Farrell

Filed Under: Guest Post, Mirrorless on the Job - Guest

  • « Go to Previous Page
  • Page 1
  • Interim pages omitted …
  • Page 3
  • Page 4
  • Page 5
  • Page 6
  • Page 7
  • Page 8
  • Go to Next Page »

Primary Sidebar

Reminder

We have moved! Our latest reviews can be found on Mirrorless Comparison and YouTube.

DISCLAIMER & COPYRIGHT NOTICE

Heather Broster is participant in the Amazon Services LLC Associates Program, an affiliate advertising program designed to provide a means for us to earn fees by linking to Amazon.com and affiliated sites.

Heather Broster is a participant in the Amazon EU Associates Programme, an affiliate advertising programme designed to provide a means for sites to earn advertising fees by advertising and linking to Amazon.co.uk.

Heather Broster and Mathieu Gasquet are also participants in the following affiliate programs: B&H Photo Affiliate Program, Ebay Partner Network, Skylum (Impact Radius), Expert Shield, The Inspired Eye, and Mediterranean Photo Tours.

To read more information, visit our full Disclaimer page. Thank you!


© HEATHER BROSTER/MATHIEU GASQUET AND MIRRORLESSONS, 2013-2024

Unauthorized use and/or duplication of this material without express and written permission from this blog’s author and/or owner is strictly prohibited. Excerpts and links may be used, provided that full and clear credit is given to Heather Broster/Mathieu Gasquet and Mirrorless Comparison with appropriate and specific direction to the original content.