• Skip to main content
  • Skip to primary sidebar
  • Archive
    • Camera Reviews
    • Lens Reviews
    • Accessory Reviews
    • In-Depth
    • Galleries
    • Guest Post
  • About Us
  • Our Websites
  • Contact Us
  • Privacy Policy
  • Youtube

MirrorLessons

Mirrorless camera reviews right at your virtual doorstep!

Heather

Review of the Lollipod – The “take-with-you-everywhere” tripod for small mirrorless cameras

12/03/2015 By Heather

When you hear the name Lollipod, it is difficult to suppress the urge to start singing that catchy 1950s tune by the Chordettes. Now that I’ve got the song permanently stuck in your head, we can take a look at the tripod that is as “lightweight” as the song it brings to mind!

What is the Lollipod?

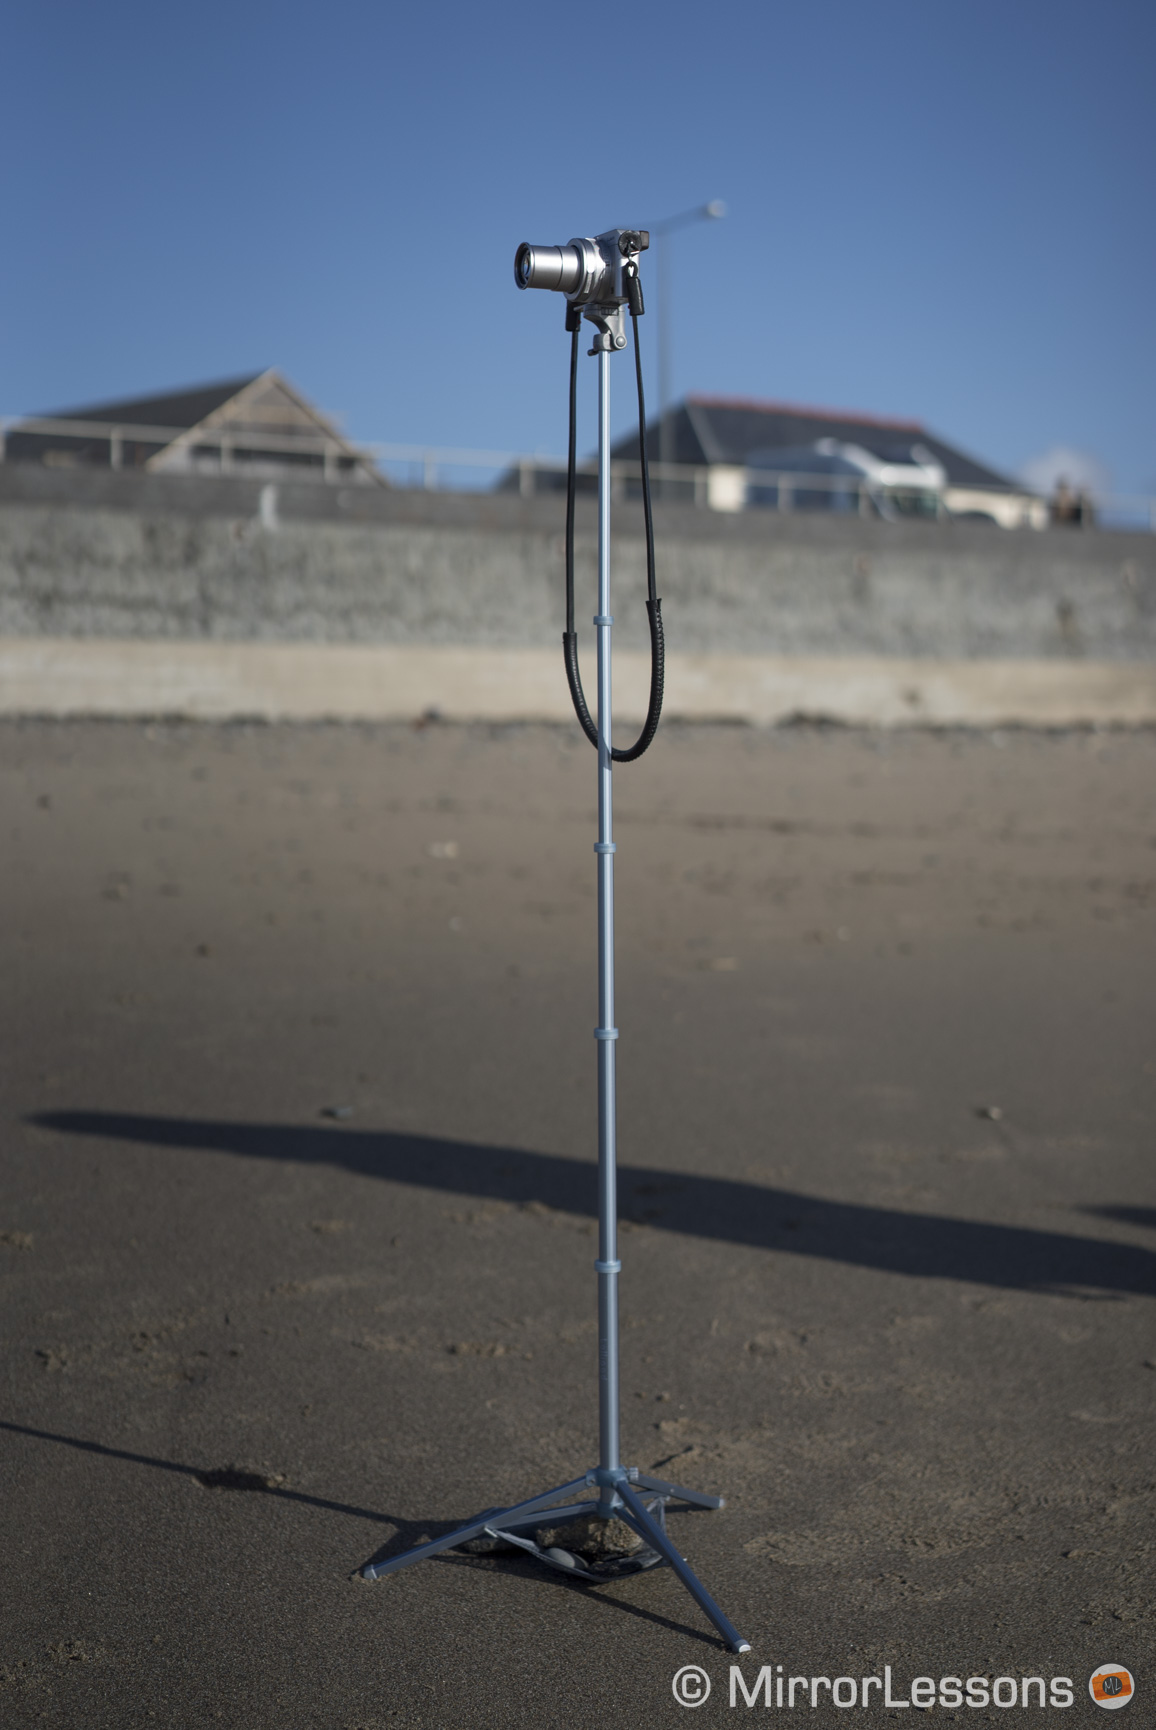
The Lollipod is a casual carry-around tripod constructed from pure lightweight aluminium and hardened plastic. It has been built to support any camera or smart device that weighs less than 420 grams, including smaller mirrorless cameras such as the LX100, RX100 series, X30 or G7X.

Lollipod review
Using the LX100 on the Lollipod

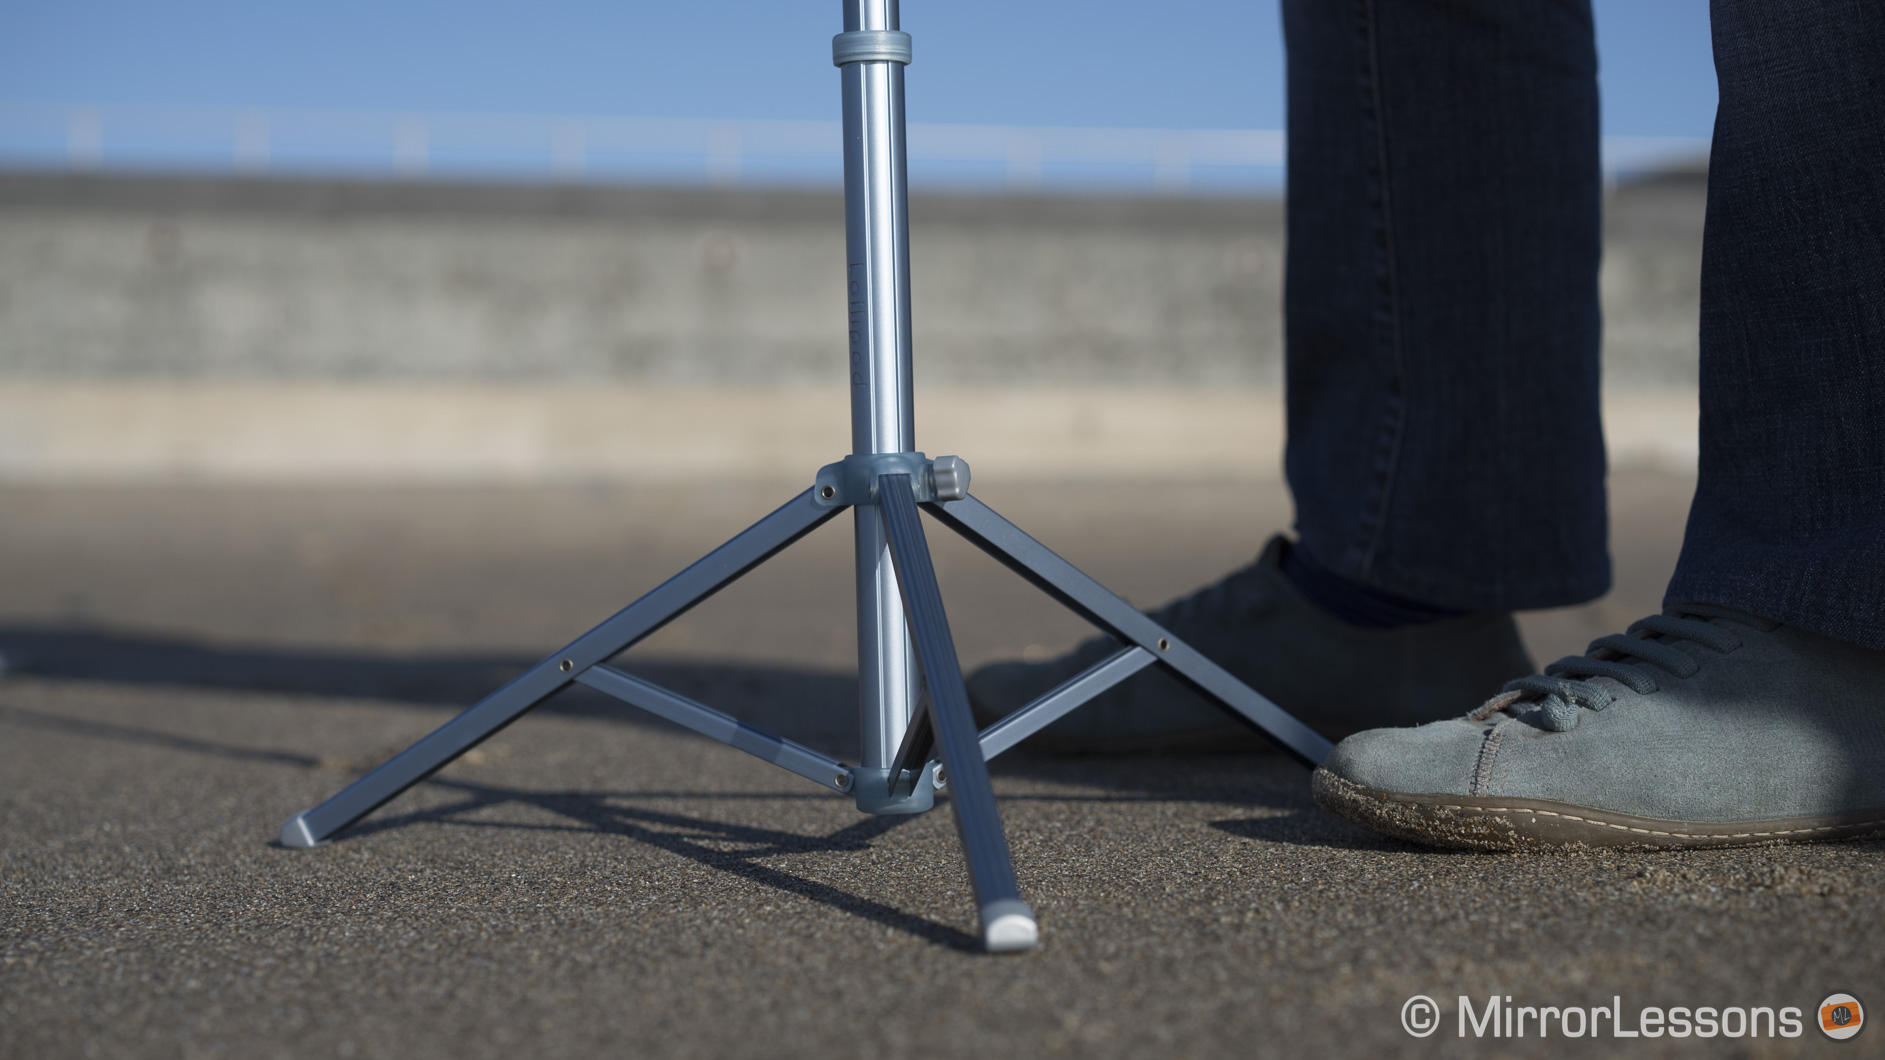
Based on a photographer’s light stand, it has three short legs and a long pole that extends to a height of 113 cm. Included in the package are a net carrying bag and a stabilisation net that sits under the tripod legs. You can choose between six jolly colours.

Is it portable?

At a mere 320 grams and 32cm in length when retracted, the Lollipod is the lightest, most portable tripod we’ve ever tried. It comes with a handy net bag which you can use to either store the tripod or carry it around via a clip that attaches to belts, zippers and bag handle attachments. I personally found that latching the bag onto my coat pocket zipper was the most convenient solution for when I was out walking.

Lollipod review
The Lollipod attached to the zipper on my jacket

The fact that it is so small and light means that you will be more likely to take it out on walks or pack it in your hand luggage for short vacations. When it is attached to my coat, I barely even notice that I am carrying it.

Is it practical?

The Lollipod is practical for some applications, but less so for others. This is due to the very characteristic that makes it so appealing – its lightweight build.

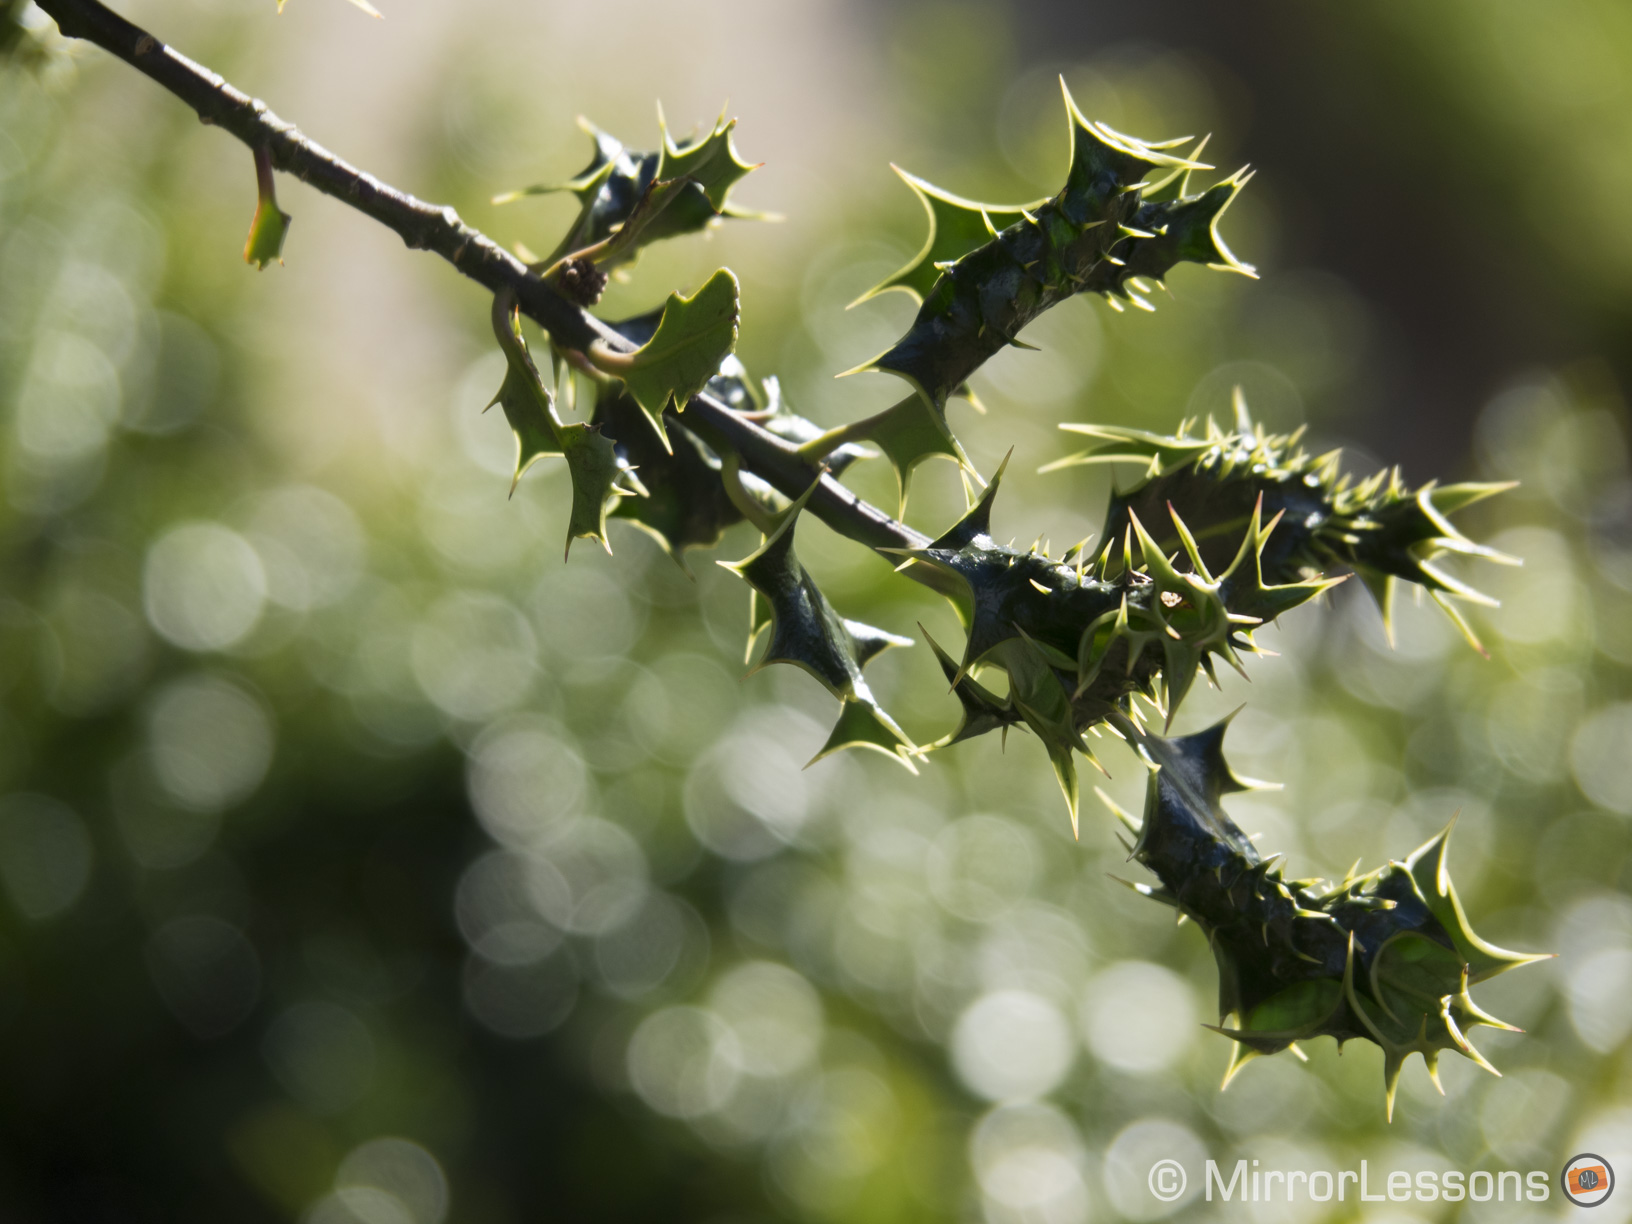
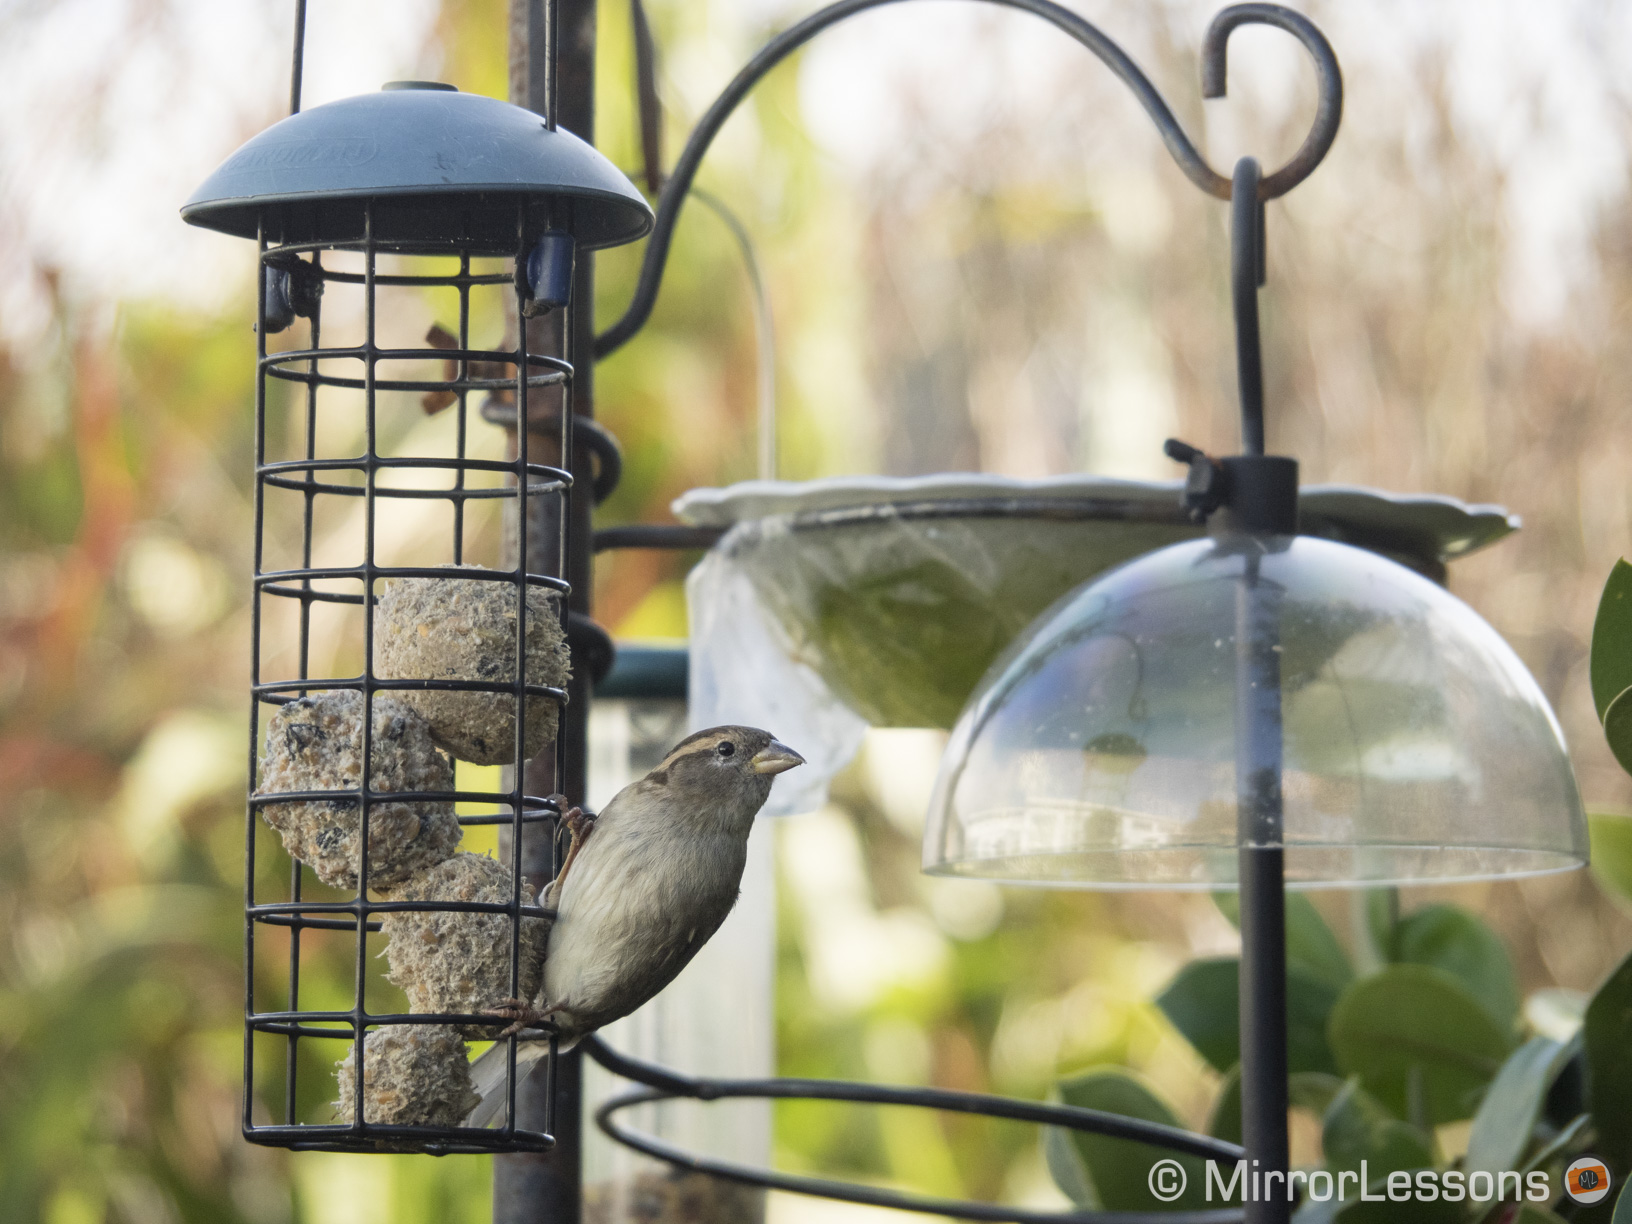
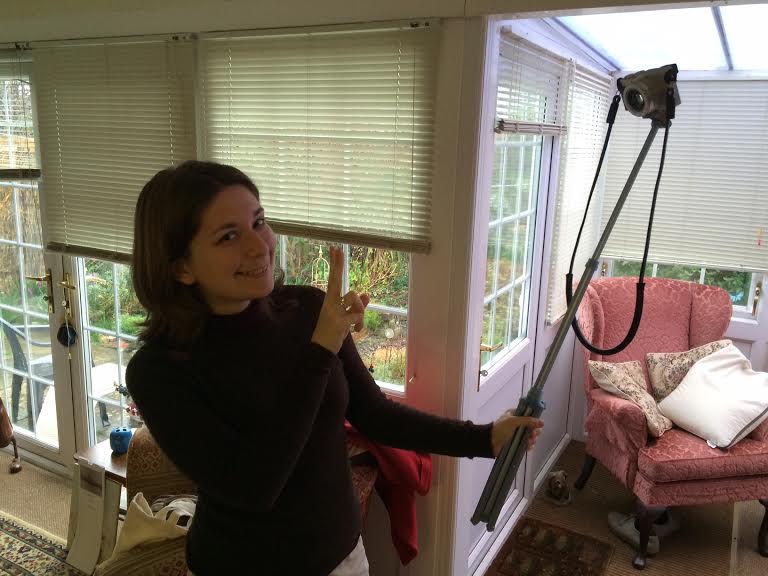
First of all, even a moderate wind will cause the tripod to sway back and forth, particularly when it is extended to its full height. The same happens when you press down on the shutter release. I thought that a 2-second timer might solve the issue of the micro-movements generated by my hand, but even then it would continue to sway long after I’d pressed the shutter button.

Lollipod review
The Lollipod standing at its full height of 113 cm

For this reason, I only ever extended the tripod to its full height for shots where I would have normally used a monopod. It worked quite well for bracketing for example.

Lollipod review
Using the Lollipod as a pseudo-monopod

The swaying was greatly reduced however when I retracted the tripod to half its full height, and it disappeared completely when I used only the bottom pole. Both long exposures and time lapses are possible when the tripod is set to its minimum height on a calm day.

Lollipod review
If you use the Lollipod at half its full height, it is much more stable

Another point in its favour is that you don’t have to twist the camera onto the mount. Instead, you set the camera on top of the mount, align the tripod head screw with the receptacle, and rotate a dial on the side which locks the camera in place. Attaching a camera to a tripod head has never been easier.

I was also surprised to learn that the Lollipod can be used in both landscape and portrait modes thanks to its very flexible tripod head.

Lollipod review
Using the Lollipod in portrait mode

Is it durable?

I won’t mince words in this section: if you are looking for a tripod that will last you years and stand up against even the harshest weather conditions, the Lollipod is not for you. Rather, it is an inexpensive solution for people who want a little more stability than a hand-held shot would give.

While the aluminium poles and plastic joints seem durable, the knobs that adjust tightness are notably more fragile. For example, the knob that adjusts the position of the head developed a crack down the side when I tried to tighten it the first time I used the tripod. It is still usable but I’ve learned not to strain the knobs too much.

DMC-LX100, 1/20, f/ 28/10, ISO 800
The cracked knob to adjust the tightness of the tripod head

The most durable part of the Lollipod is most certainly the tripod head itself. It is made of hardened plastic and features a flat layer of textured rubber around the screw to protect your camera and keep it in place.

DMC-LX100, 1/50, f/ 17/10, ISO 800
Tripod head with screw and dial on the side

The Lollipod has been designed to support a maximum weight of 420 grams but it is possible to use slightly heavier cameras as long as they have small and flat primes. I had no trouble using it with the X100T, for example, which is 440 grams. In the case of larger premium compacts with zooms like the LX100, the tripod head will slump a little under the frontal weight if you fully extend the zoom, changing your composition.

Is it easy to use?

The Lollipod is very easy to use and adjust. The aluminium poles slide up and down very smoothly and the legs are easy to extend. Since there aren’t any tightening mechanisms on the legs or poles, they rely on friction to stay in place.

Lollipod review
The legs and poles stay in place with friction

The additional stabilising net is also easy to attach. You simply slide the three plastic hooks into the holes on the legs and fill the net with heavy objects like rocks or sand. The net will stop the tripod from blowing over but won’t stop it from shaking.

Lollipod review
The stabilisation net attached to the legs

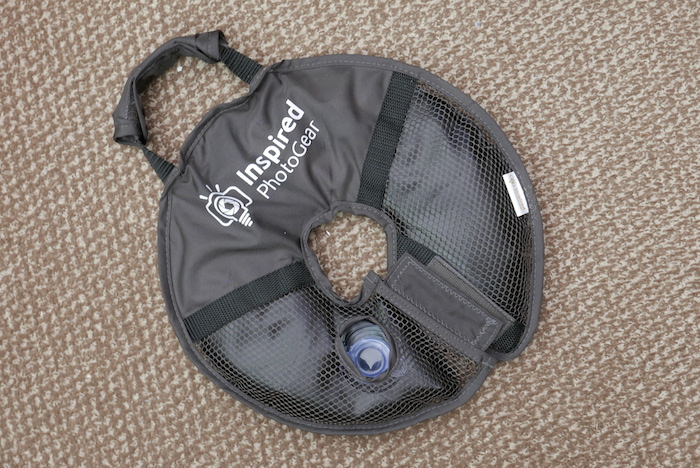
Note: if you want even more stabilisation for the lollipod, or any tripod for that matter, you may also want to consider the InspiredPhotoGear WaterWeight (pictured below). Fashioned in a doughnut shape so that it slides onto your tripod, it can be filled with either water or sand, and can easily be wrapped up and stored inside your camera bag or carried around with the attached handle. (Keep in mind that you’ll need a small funnel of some sort to fill it up efficiently.)

waterweight tripod
InspiredPhotoGear WaterWeight

Is it priced right?

The Lollipod is one of the most economical options out there for people who want to engage in casual tripod photography. You can find it on InspiredPhotoGear.

Conclusion

Lollipod review
The Lollipod and the LX100 at the beach

As I stated at the beginning of this review, the Lollipod isn’t suited for the rugged lifestyle. It is however a fun, easy-to-use and economical alternative for anyone who owns a small mirrorless camera and is interested in dabbling in the world of tripod photography. Most importantly, it is the kind of tripod you wouldn’t hesitate to bring along even on the shortest of outings. That’s something I can’t say about many of the other tripods I’ve used in the past.

thumb-up What I like about the Lollipod:

  • lightweight and portable
  • very easy to use and adjust
  • poles and tripod head are well-made
  • very economical

thumb-down What I don’t like about the Lollipod:

  • a bit too light for many kinds of photography
  • sways back and forth at full length
  • some parts are fragile such as the adjustment knobs
Hey, it can also be used as a selfie stick! ;)
Hey, it can also be used as a selfie stick! 😉

Do you own the Lollipod? If so, share your thoughts about it below!

Filed Under: Accessory Reviews, Tripods and supports

Compactness and versatility all in one zoom – Olympus M.Zuiko 14-150mm f4-5.6 II Review

09/03/2015 By Heather

While there is no question that the recent announcement of the OM-D E-M5 Mark II stole the show, there was also another announcement that has grabbed the interest of beginner and amateur photographers looking for an affordable all-purpose zoom: the 14-150mm f/4-5.6mm Mark II. We recently received it for testing on our OM-D E-M1.

Olympus M.Zuiko 14-150mm f 4-5.6 II Review
E-M1, 1/500, f/ 9, ISO 200
Olympus M.Zuiko 14-150mm f 4-5.6 II Review
E-M1, 1/200, f/ 5.6, ISO 200
Olympus M.Zuiko 14-150mm f 4-5.6 II Review
E-M1, 1/200, f/ 5, ISO 200

Want to find out more about this multi-purpose zoom? Then be sure to read on!

Build Quality and Ergonomics

The differences between the original 14-150mm f/4-5.6mm and its successor are actually quite subtle, and most of them lie in the build and ergonomics of the lens. Not only does it feature a new solid body but unlike the previous version, it is also weather sealed. With the weather being so wet here in Wales, it was a comfort to know that both our E-M1 and the new zoom could stand up to the rain.

Olympus M.Zuiko 14-150mm f/4-5.6 II Review

What I really love about this zoom is how well it respects the ethos of the Micro Four Thirds system. Despite the enormous focal range it covers, the body of the lens itself is no bigger than a small drinking glass when the zoom is sheathed and hardly adds any weight to the camera. When you fully extend the zoom, it doubles in length. It also comes with an additional petal-shaped lens hood.

DMC-LX100, 1/125, f/ 28/10, ISO 800
Zoom extended to full length

Since this isn’t a professional zoom, it does not have any function buttons on the body. What you do have is an improved textured zoom ring, which is very easy and smooth to turn, and a well-designed ribbed manual focus ring at the end of the barrel. There isn’t an aperture ring.

DMC-LX100, 1/125, f/ 4/1, ISO 800
The lens and its hood

Sharpness

Olympus M.Zuiko 14-150mm f 4-5.6 II Review
Peacock at Powys Castle – E-M1, 1/200, f/ 7.1, ISO 200

As I mentioned above, we aren’t dealing with a professional zoom so it would be foolish to expect the kind of sharpness you’d see from the 40-150mm f/2.8 PRO. That said, I was far from disappointed by the performance of the lens. Zooming in on the photos I took of the birds in our back-garden and the peacock at Powys Castle, the detail in the feathers is impressive for a kit lens even at 150mm. However it is slightly softer at the fastest aperture with the optimal sharpness being around f/8. Below you can see a small gallery of some of the shots that best demonstrate the lens’ sharpness.

bird photography olympus
E-M1, 1/1000, f/ 5.6, ISO 200
E-M1, 1/400, f/ 5.5, ISO 1600
E-M1, 1/200, f/ 7.1, ISO 200
E-M1, 1/640, f/ 5.6, ISO 200

Vignetting

Given that the 14-150mm covers such a wide focal range, it is normal that there is some vignetting at the fastest apertures and longest focal lengths. If you set the aperture to f/5.6 at 150mm, for example, vignetting can be quite noticeable in some situations. It gradually becomes less pronounced up until f/13, at which point it completely disappears.

Olympus M.Zuiko 14-150mm f4-5.6 II Review
Vignetting at 150mm at f/9 – E-M1, 1/125, f/ 9, ISO 200

It is less noticeable at 14mm and tends to disappear at around f/8. A quick fix is to bring those photos into Lightroom or a similar program and correct the vignetting in the Lens Corrections section.

Olympus M.Zuiko 14-150mm f4-5.6 II Review
Vignetting at 14mm and f/4 – E-M1, 1/2500, f/4, ISO 200

Chromatic Aberration and Flare

I did not observe any chromatic aberration with this lens, even in shots featuring tree branches taken straight into the sun.

Olympus M.Zuiko 14-150mm f4-5.6 II Review
Example of a photo taken into the sun – E-M1, 1/500, f/ 8, ISO 200

Flare however does exist, though it is much less intrusive than on other Micro Four Thirds lenses. This is because Olympus has improved the coating of the optics. If you take a photo straight into the sun, you may also see a small rainbow flare along with a purple glow.

Olympus M.Zuiko 14-150mm f4-5.6 II Review
E-M1, 1/200, f/ 22, ISO 200

Distortion

Distortion becomes an issue only at the widest focal length (14mm) but it is fairly pronounced especially if you are photographing a flat horizon line such as the sea. Like vignetting, it can easily be resolved in Lightroom. Below you can see two shots of the same scene, one where I’ve left the distortion and the other I’ve corrected.

Distortion present – E-M1, 1/100, f/ 6.3, ISO 400
Corrected – E-M1, 1/100, f/ 6.3, ISO 400

Out-of-Focus Area

Olympus M.Zuiko 14-150mm f4-5.6 II Review
E-M1, 1/400, f/ 5.6, ISO 200

The 14-150mm isn’t known for its bokeh but I actually find it quite attractive with the nicest results being produced at 150mm. The rendering is both smooth and creamy and the out-of-focus points of light (bokeh balls) are perfectly round, though there is a slight “onion ring” effect due to the three aspherical lens elements. Of course, since we are dealing with a f/4-5.6 zoom, you have to get as close to your subject as possible to produce a pleasant out of focus area. The closest focus distance is 50cm.

E-M1, 1/500, f/ 5.5, ISO 200
E-M1, 1/800, f/ 5.6, ISO 640
E-M1, 1/100, f/ 5.6, ISO 200

Conclusion

Olympus M.Zuiko 14-150mm f4-5.6 II Review
Wide-angle shot – E-M1, 1/800, f/ 8, ISO 200
Olympus M.Zuiko 14-150mm f4-5.6 II Review
Medium focal length – E-M1, 1/2500, f/ 7.1, ISO 200
Olympus M.Zuiko 14-150mm f4-5.6 II Review
Telephoto shot – E-M1, 1/160, f/ 5.6, ISO 200

I end off this review with a small discussion about the lens’ strongest point, its versatility. Since the 14-150mm covers all bases, including landscape, portrait and telephoto, it is likely that a casual photographer would never feel the need to change lenses.

Wide angle – E-M1, 1/200, f/ 56/10, ISO 200
Telephoto – E-M1, 1/160, f/ 56/10, ISO 200
Wide angle – E-M1, 1/640, f/ 56/10, ISO 200
Telephoto – E-M1, 1/640, f/ 56/10, ISO 200

The only exception would be specific kinds of photography that, for example, require a fast aperture, close focussing/macro capabilities or extreme sharpness. The lens isn’t nearly as compact as some of Olympus’ other offerings but it doesn’t matter as it covers nearly every focal length you’ll ever need.

Olympus M.Zuiko 14-150mm f4-5.6 II Review
E-M1, 1/1250, f/ 5.4, ISO 200
Olympus M.Zuiko 14-150mm f4-5.6 II Review
E-M1, 1/320, f/ 5.6, ISO 1600
Olympus M.Zuiko 14-150mm f4-5.6 II Review
E-M1, 1/800, f/ 5.6, ISO 200

Some of you might be wondering whether it would make more sense to choose the Mark II or go with the original version of the 14-150mm. The truth is that the two lenses are very similar. The Mark II has weather sealing, a sturdier body and less flare but the optics and zoom range are exactly the same. Keep in mind that the first version will indubitably be cheaper.

If I had to recommend a “first lens” to a beginner who had just invested in an Olympus camera, I would not hesitate to suggest the M.Zuiko 14-150mm f/4-5.6 II. There is no better lens to help you develop your photography skills and discover the genre that appeals to you above all others.

thumb-up What I like about the M.Zuiko 14-150mm:

  • very compact and well-built
  • weather-sealed body
  • very sharp images for a kit lens
  • very little flare and no observable chromatic aberration
  • an extremely versatile focal range for landscape, portraits and telephoto
  • a less expensive option for beginners and amateur photographers

thumb-down What I don’t like about the M.Zuiko 14-150mm:

  • some distortion at 14mm noticable especially when there is a flat horizon line in the image
  • some vignetting at the fastest apertures and longest focal lengths
  • fastest apertures are f/4-5.6 so low-light shooting is challenge, as is achieving a shallow DoF
  • close focussing capabilities could be better

Do you own the M.Zuiko 14-150mm f/4-5.6 II? If so, share your thoughts about it below!

Filed Under: Lens Reviews, M.Zuiko 14-150 II, M.Zuiko Lens Reviews, Reviews

Monthly Flickr Photography Challenge – March 2015 – Man vs. Nature

09/03/2015 By Heather

Have you ever pursued a specific project or challenge to improve your photography? If not, let me tell you that not only is it an excellent way of developing a specific skill, but it also encourages you to learn about a genre in which you may have had very little interest.

Since we as artists all enjoy exercising our creative abilities and sharing our imagery with a wider audience, Mathieu and I at Mirrorlessons in association with Tyson Robichaud Photography Blog have decided to embark on a monthly Flickr photography challenge, and we invite all of you to join us for the ride!

[Read more…] about Monthly Flickr Photography Challenge – March 2015 – Man vs. Nature

Filed Under: Monthly Challenges

Elegant, enduring and eco-friendly – Nucis Leather Strap Review

06/03/2015 By Heather

Our friend Matthew Maddock of PhotoMADD recently introduced us to a new brand of leather camera strap that has quickly become one of our favourites for our smaller rangefinder-style mirrorless cameras. The manufacturer is called Nucis. It is the brainchild of Fernando Carvalho da Silva, a Portuguese photographer wanted to create a series of camera straps and cases that were not only appealing but comfortable and practical as well.

For testing purposes, Mathieu and I received the Good Vibes neck strap, tan Vintage Wrist Strap and Cork Neck Strap.

The first thing you’ll notice about Nucis straps is just how thin and lightweight they are compared to other leather straps. The chance of these straps adding bulk to your set-up is next to none, which is quite important if you plan to use them on a small mirrorless camera. They both come with leather discs that you can attach to your camera’s lugs for protection.

best leather camera strap
The Nucis “Good Vibes” neck strap

The Good Vibes neck strap’s appeal lies in the colour contrast between the upper and lower parts of the strap. The upper side is fashioned in discreet black leather whilst the lower side features a soft suede layer in bright cherry red. To add some extra flare, the ends have been hand-stitched with red thread that matches the underbody of the strap.

best leather camera strap
The red stitching on the ends

Unlike many other straps, the metal ring fasteners are quite easy to open and slide onto the lugs of your camera. It comes in two different lengths – standard (100cm) and long (120cm). My guess is that the long version would be better for a man as the standard version fits me quite well.

X-T1, 1/8, f/ 8/1, ISO 1600
The Nucis “Vintage Leather Strap”

We also enjoyed using the Vintage Wrist Strap. Fashioned completely in smooth durable leather, it adds a stylish and classic look to your camera. Both the strap end and the leather O-ring have been neatly hand-stitched for practical and decorative purposes. I was especially happy with the latter as it easily slides up and down the strap when you want to adjust its size yet has excellent resistance once in place. As with the Good Vibes strap, the metal ring fastener is very easy to open.

best leather camera strap
The leather O-ring

You may have noticed that I mentioned the word “eco-friendly” in the title of this article. This refers to a unique product produced by Nucis, the Cork strap. By producing a leather strap that incorporates cork fabric on one side, the company helps to sustain one of the most important ecosystems in the south of Europe, the Montado cork industry.

Nucis Cork Strap
Nucis Cork Strap

If being eco-friendly weren’t enough, it is also one of the most beautifully-made straps I’ve ever used and looks truly distinctive paired with a vintage-style mirrorless camera. You might naturally think that cork would be prone to breaking or crumbling but this is not the case; it is actually extremely soft, smooth and resistant. The strap is 20mm wide and comes in two lengths (100mm and 120mm) like the Good Vibes strap.

nucis cork strap
Nucis Cork Strap

Have you tried a leather camera strap from Nucis? If so, tell us about your experience with it!

Filed Under: Accessory Reviews, Straps

Backyard Bird Photography with the OM-D E-M1, 14-150mm f/4-5.6 Mark II & Olympus Share app

05/03/2015 By Heather

My parents have a beautiful back garden in Wales which is lovingly nurtured by my “green thumb” mum. The centrepiece is a three-pronged feeder, where dozens of species of birds including robins, sparrows, blue tits, goldfinches, wrens and siskins gather for their daily feast of seeds and balls of fat. It is nothing short of a small paradise when the sun is out and the temperature is right.

[Read more…] about Backyard Bird Photography with the OM-D E-M1, 14-150mm f/4-5.6 Mark II & Olympus Share app

Filed Under: In Depth, Micro four thirds tips and tricks, Mirrorless camera tips and tricks, Mirrorless Tips

  • « Go to Previous Page
  • Page 1
  • Interim pages omitted …
  • Page 34
  • Page 35
  • Page 36
  • Page 37
  • Page 38
  • Interim pages omitted …
  • Page 87
  • Go to Next Page »

Primary Sidebar

Reminder

We have moved! Our latest reviews can be found on Mirrorless Comparison and YouTube.

DISCLAIMER & COPYRIGHT NOTICE

Heather Broster is participant in the Amazon Services LLC Associates Program, an affiliate advertising program designed to provide a means for us to earn fees by linking to Amazon.com and affiliated sites.

Heather Broster is a participant in the Amazon EU Associates Programme, an affiliate advertising programme designed to provide a means for sites to earn advertising fees by advertising and linking to Amazon.co.uk.

Heather Broster and Mathieu Gasquet are also participants in the following affiliate programs: B&H Photo Affiliate Program, Ebay Partner Network, Skylum (Impact Radius), Expert Shield, The Inspired Eye, and Mediterranean Photo Tours.

To read more information, visit our full Disclaimer page. Thank you!


© HEATHER BROSTER/MATHIEU GASQUET AND MIRRORLESSONS, 2013-2024

Unauthorized use and/or duplication of this material without express and written permission from this blog’s author and/or owner is strictly prohibited. Excerpts and links may be used, provided that full and clear credit is given to Heather Broster/Mathieu Gasquet and Mirrorless Comparison with appropriate and specific direction to the original content.